Canon REALiS 4K501ST Pro AV 5000-Lumen LCoS Projector User Manual
Page 45
45
Installation Procedure
Bas
ic G
uide
In
st
allation
Pr
ocedu
re
1
Separate the Joint fitting from the Ceiling-mount bracket temporarily
(Preparation on page
)
2
Make a hole in the ceiling (Step 1 on page
3
Secure the Ceiling-mount bracket to the ceiling (Step 2 on page
4
Attach the Base bracket to the projector (Step 3 on page
)
5
Attach the anti-fall wire (Step 4 on page
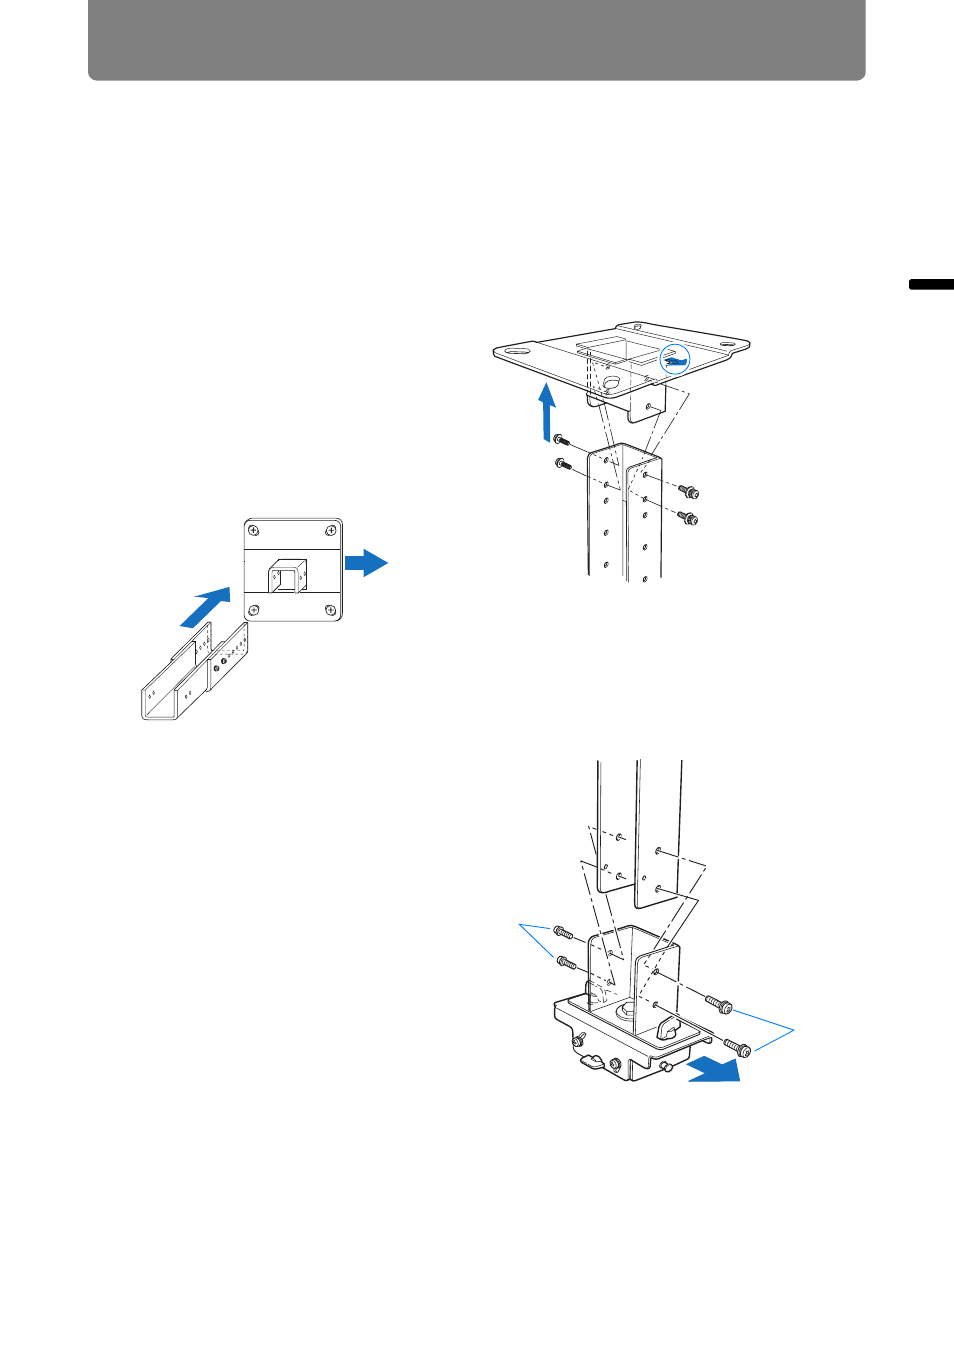
6
Attach the top of the extension
pipe to the Ceiling-mount
bracket
Secure to the extension pipe using
the four supplied M5 screws.
•
The open end of the pipe should
face the open end of the Ceiling-
mount bracket as shown.
7
Attach the Joint fitting to the
bottom of the extension pipe
Use the four M5 screws (A)
removed initially to secure it.
Direction to the
screen
Direction to the
screen
A
A
Direction to the screen