Basic recording procedure, Recording – Olympus VN-541PC Digital Voice Recorder (BLACK) User Manual
Page 12
2
Recording
12
EN
Recording
Basic recording procedure
1
Changing the recording scene
(
☞
• Each new voice recording file is saved
in the selected folder.
2
Point the built-in microphone
in the direction of the sound to
record.
3
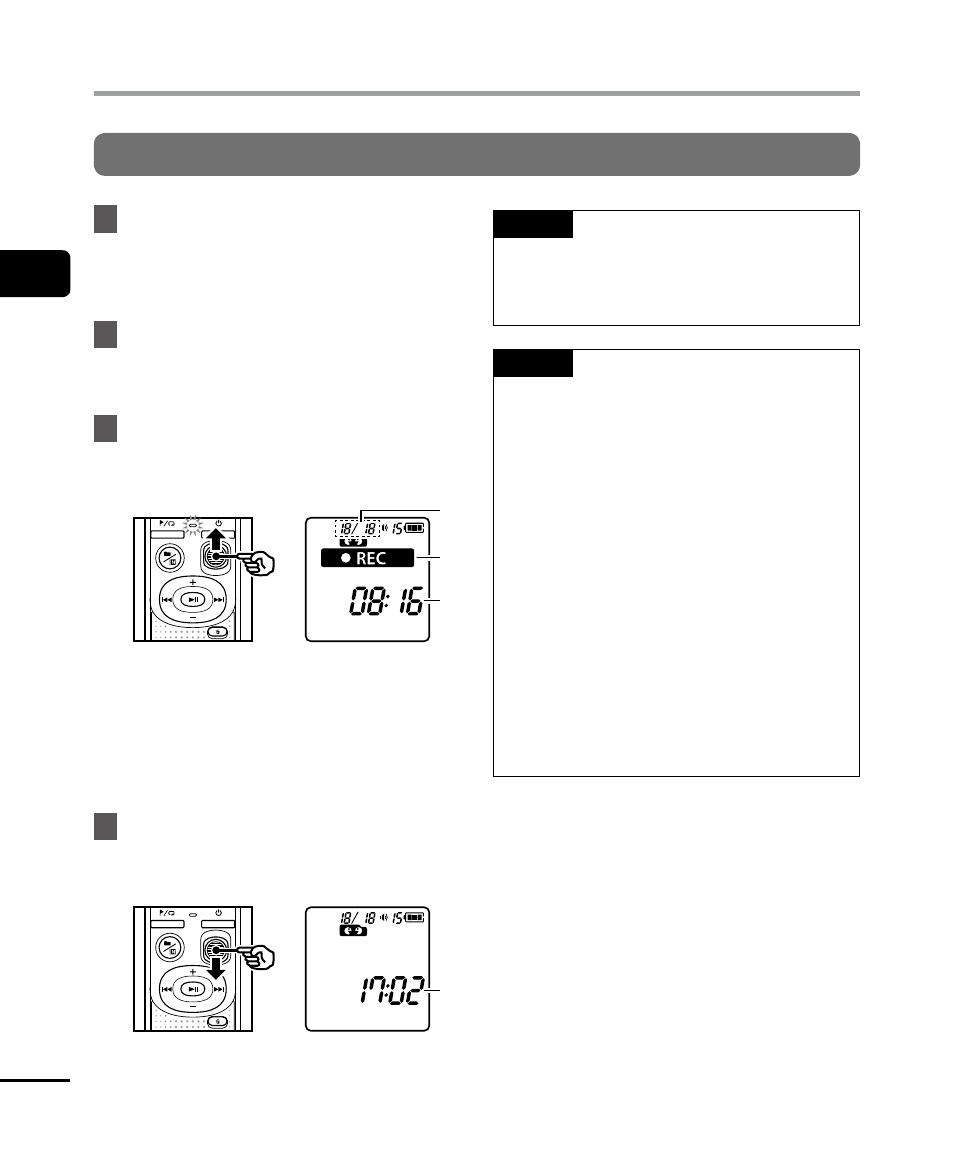
Slide the
REC
switch to start
recording in the direction of the
arrow.
c
b
a
a
File number/Total number of
recorded files in folder
b
Voice recorder status indicator
(during recording)
c
Elapsed recording time
• The LED indicator light lights.
4
Slide the
REC
switch to stop
recording in the direction of the
arrow.
d
d
File length
TIP
• Even when the power is turned off, you
can immediately start recording by
sliding the REC switch up.
NOTE
• To prevent the beginning of the
recording being cut off, start recording
after the LED indicator light has lit or
recording indicator has appeared in
the display.
• When the remaining possible recording
time is 60 seconds, the LED indicator
light starts flashing. It flashes more
rapidly as the remaining time decreases
(at the 30- and 10-second points).
• If the number of files inside the
recorder reached 199 or the memory
becomes full, you will not be able to
record any further, and [FULL] will
be displayed. You will need to delete
unnecessary files to record more
(
☞