Features, Rear panel – Alto Professional Alto TS412 2500W 12" 2-Way Active Loudspeaker with Bluetooth User Manual
Page 8
8
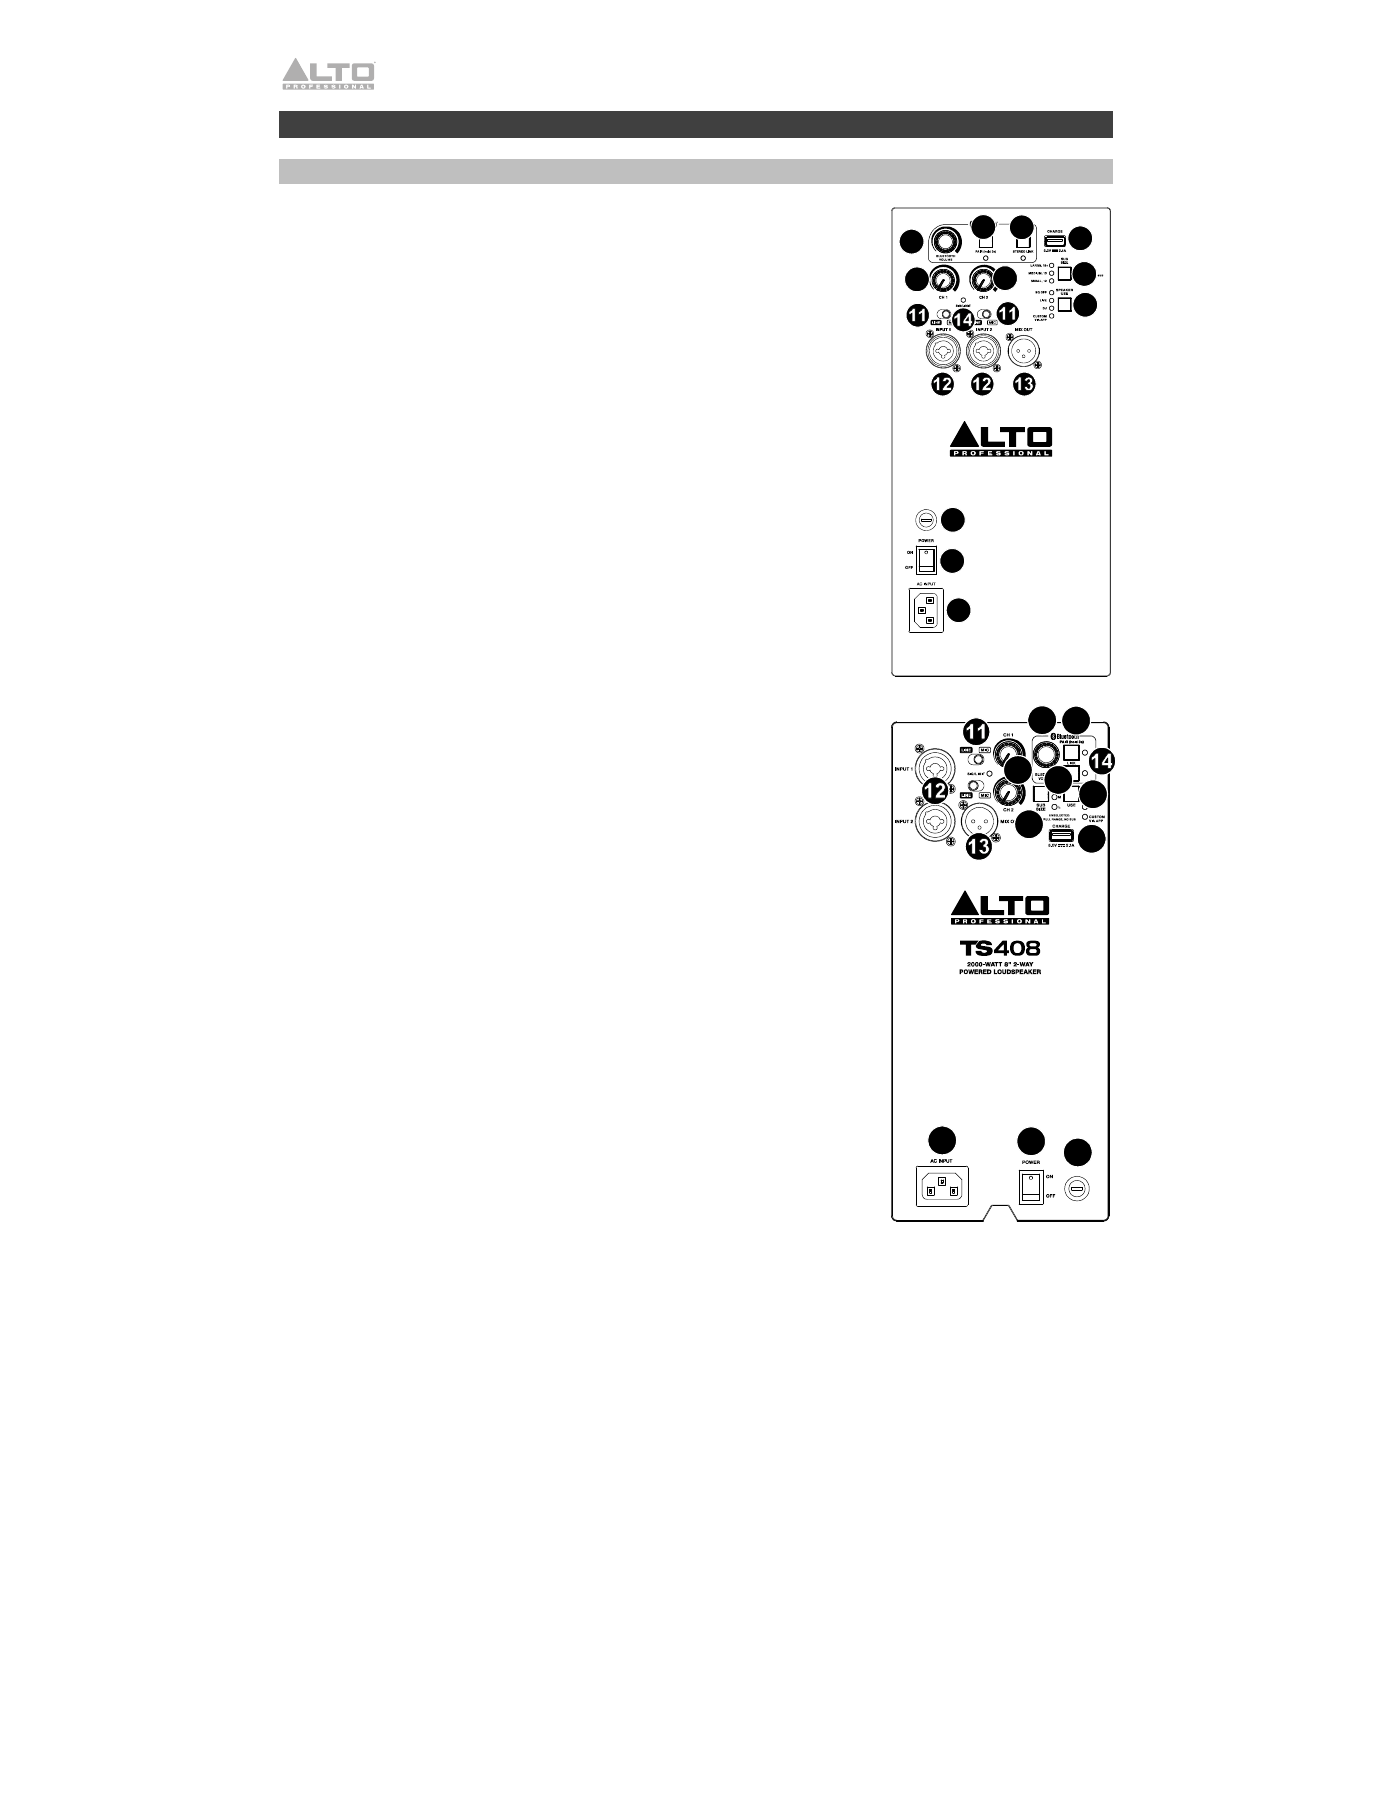
Features
Rear Panel
1.
AC Input
: Use the included power cable to connect this input to a
power outlet. Make sure the
Power
Switch
is set to
off
when
connecting or disconnecting the cable.
2.
Fuse
: If the unit’s fuse is broken, lift this tab to replace the fuse.
Replace it with a fuse with an appropriate rating (printed under the
unit’s power cable input). Using a fuse with an incorrect rating can
damage the unit and/or fuse.
3.
Power Switch
: Use this switch to power the loudspeaker on or off.
4.
Bluetooth Volume Knob
: Adust the input volume for your
connected Bluetooth device.
5.
Pair
: Hold this button for 3 seconds to pair or unpair from a
Bluetooth device. The LED will flash in 1 second intervals when
pairing and will be lit solid blue when Bluetooth-connected.
6.
Stereo Link
: Hold this button for 3 seconds to link or unlink
another TS4 series speaker. The LED will flash in 1 second
intervals when link-pairing and will be lit solid orange when link-
connected.
7.
CH 1/CH 2 Input Level
: Adjusts each level for Inputs 1 and 2.
8.
USB Charge Port (5V, 2.1A)
: Connect your smartphone, tablet, or
similar device here.
9.
Sub Size Button
: Press this button to select a high-pass filter
setting based on the size of a connected subwoofer (Large,
Medium, Small). If no subwoofer is connected or increased low
frequencies are not desired, set this to Full Range, No Sub.
10.
Speaker Use Button
: Press this button to adjust the front-end EQ
applied to the signal for live performance (low frequency bump,
high-frequency roll-off), DJ (enhanced low-frequency and high-
frequency bump), a custom User setting (default setting is a flat
frequency) which can be adjusted in the App, or EQ Off.
11.
Line-Mic Switches:
Adjust these switches for each input to
receive a line-level or mic-level signal.
12.
Inputs 1/2
: Use a standard XLR or 1/4” (6.35 mm) cable (not
included) to connect your audio source to these inputs.
13.
Mix Out
: Use a standard XLR cable (not included) to connect this
output to the input of another loudspeaker (i.e., another TS4
loudspeaker).
14.
Signal
/
Limit LED
: This LED lights up green when an audio signal
is sent to the loudspeaker—it flashes at lower levels and lights
solidly at higher levels. The LED lights up red when output
limit/protection is active—if the LED is lit red continuously, reduce
the volume of your audio source.
1
2
5
6
7
8
4
10
9
3
7
1
2
5
6
7
8
4
10
9
3