Naim Audio Ovator S-800 User Manual
Page 6
E5
OVATOR S-800, S-600 & S-400 – English
4.3 Using Floor-spikes
Ovators are fitted with floor-spikes to define the
mechanical interface with the structure of the listening
room. Floor-spikes should be adjusted to ensure that the
speakers are upright and do not rock. Use the minimum
length of floor-spike needed to hold the lock nut just
above the carpet.
Note:
If Ovator loudspeakers are to be installed on a
non-carpeted floor, the floor-spikes should be used in
conjunction with Naim Floor Protectors and adjusted so
that the tapered part of the floor-spike extends just beyond
the lock nut. Your Naim retailer or distributor will be able to
supply Floor Protectors.
Note:
Ovators are shipped fitted with floor spike covers.
Remove the covers simply by pulling them off.
4.3.1 Adjusting S-800 and S-600 Floor-Spikes
All four floor-spikes are adjustable, however adjustment of
the S-800/600 rear floor-spikes is easier thanks to the top
access provided by its plinth design. To adjust an S-800/600
rear floor-spike first remove the locking set-screw with the
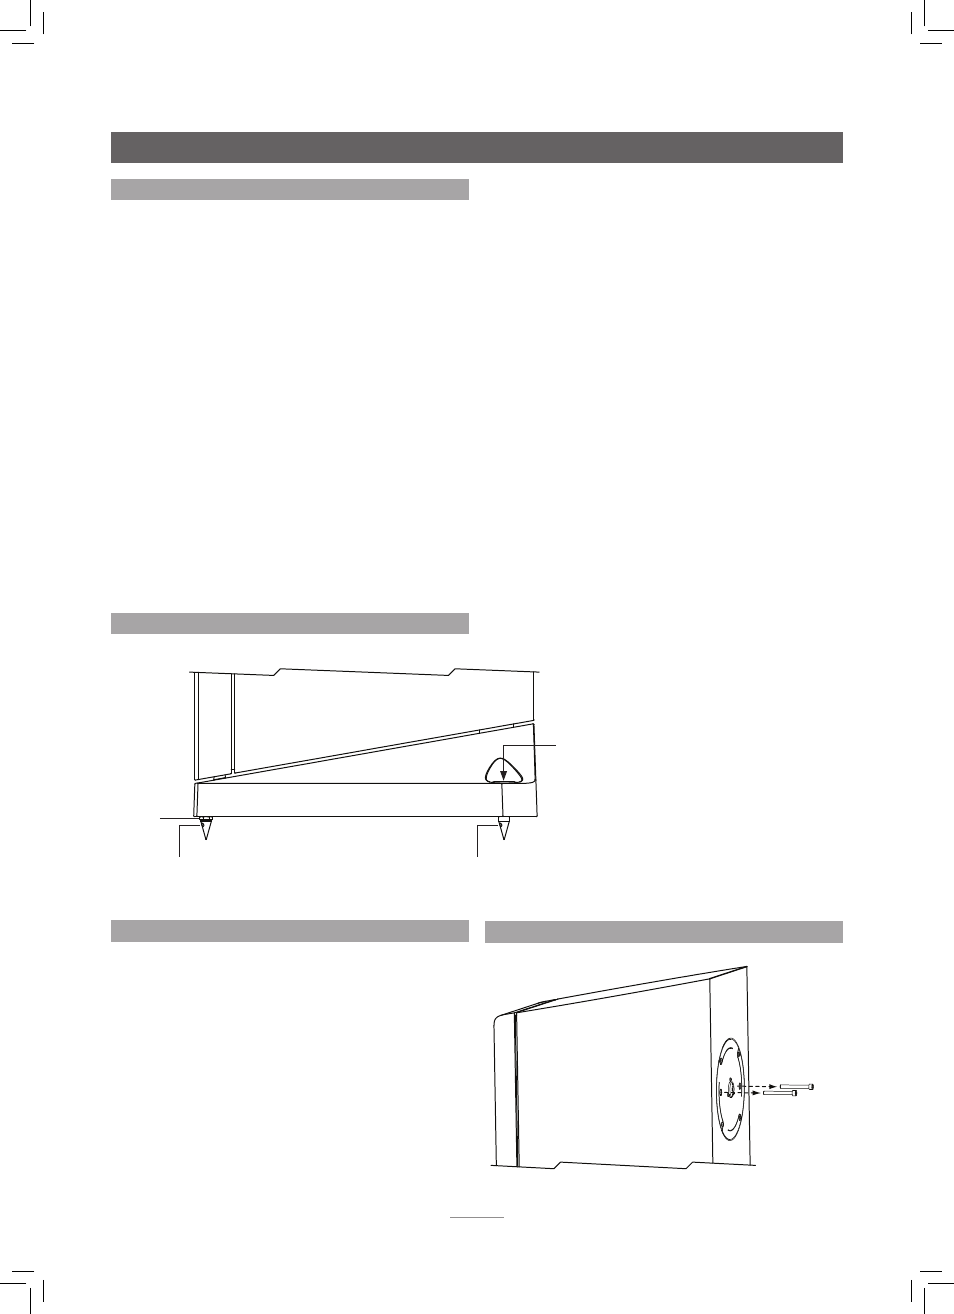
4.4 Adjusting Floor-spikes
4mm Allen key supplied. Then insert the Allen key from
above to turn the adjustment screw clockwise to lengthen
the floor-spike and anti-clockwise to shorten the floor-spike.
If necessary, to stop the floor-spike from turning when
re-tightening the locking set-screw, insert the supplied
tommy-bar in the floor-spike through-hole. Diagram 4.4
illustrates S-800/600 rear floor-spike adjustment.
Depending on the thickness of any carpet, and prior
adjustment of its rear spikes, S-800/600 front floor-spikes
may not need any adjustment. If adjustment is required
however, loosen the lock nut using a 13mm spanner and
turn the floor-spike as appropriate using the supplied
tommy-bar inserted in the floor-spike through-hole.
Re-tighten the lock-nut when adjustment is complete.
Diagram 4.4 illustrates front floor-spike adjustment.
4.3.2 Adjusting S-400 Floor-Spikes
To adjust an S-400 floor-spike first loosen its lock nut using
a 13mm spanner. Turn the floor-spike as appropriate using
the supplied tommy-bar inserted in the floor-spike through-
hole. Re-tighten the lock-nut when adjustment is complete.
The S-800/600 front floor-spike illustrated in Diagram 4.4 also
illustrates S-400 floor-spikes.
remove transit
screws
adjustment
screw
tommy-bar
through-hole
tommy-bar
through-hole
lock-nut
4.5 S-800 & S-600 BMR Transit Screws
The Ovator S-800 and S-600 BMR (balanced mode
radiator) modules are fitted with a twin leaf-spring
suspension system. The suspension system is restrained
during shipping by two transit screws that must be released
before use. The transit screws are located on the rear face
of the speaker directly behind the BMR.
Use the supplied 5mm Allen key to unscrew the transit
screws. Remove the screws and store them safely. Diagram
4.6 illustrates removal of the transit screws.
Note:
The transit screws must be replaced if the
loudspeakers are to be repacked and shipped. Tighten the
screws sufficiently to restrain the suspension system.
4.6 S-800 & S-600 Transit Screw Removal