Altera USB Blaster User Manual
Page 13
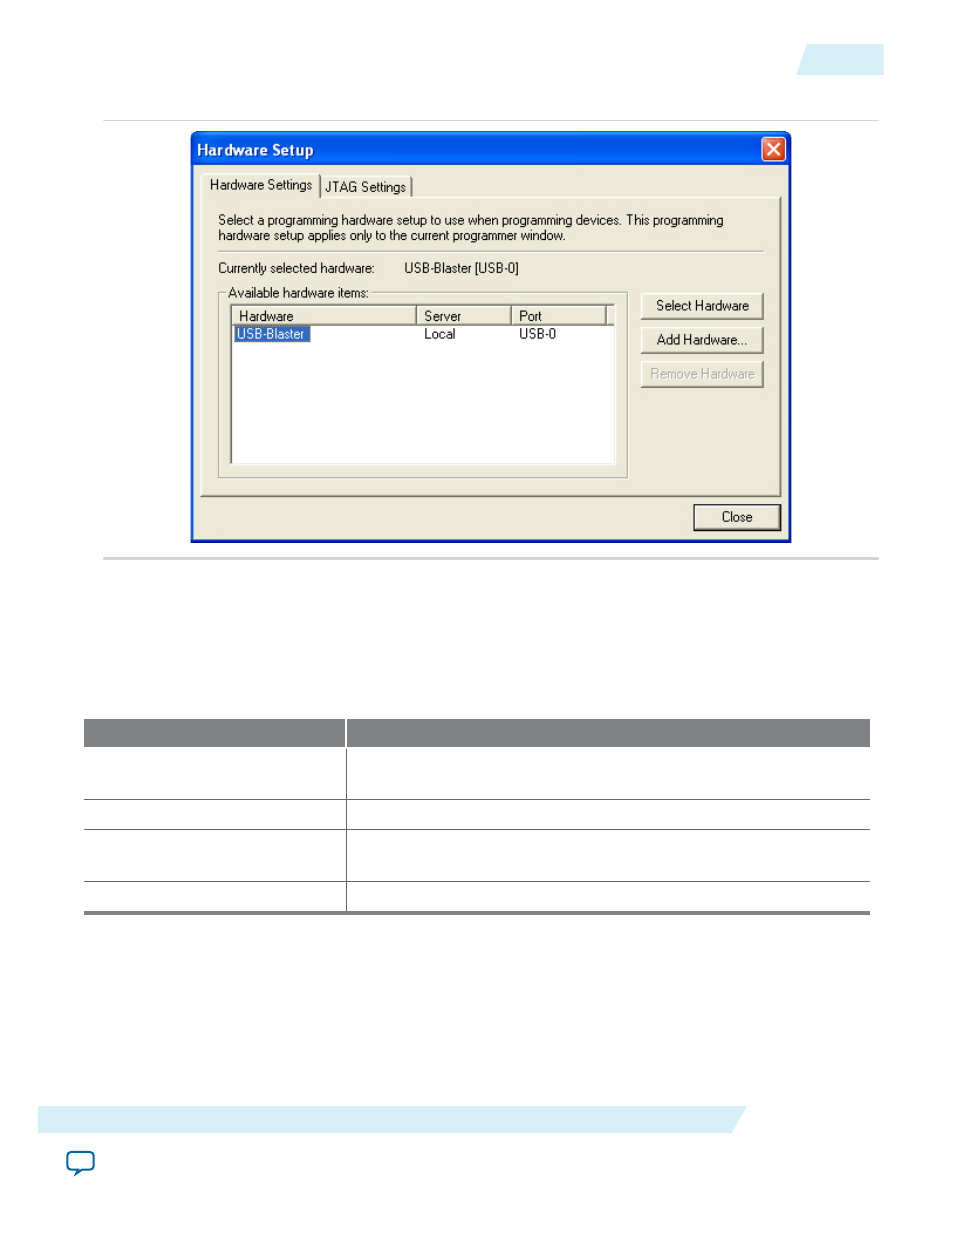
Figure 3-1: Hardware Setup Dialog Box
The Hardware Settings tab of the Hardware Setup dialog box is displayed.
4. From the Currently selected hardware drop-down list, select USB-Blaster [USB-0].
5. Click Close to close the Hardware Setup dialog box.
6. In the Programmer window, select the desired programming mode from the Mode drop-down list.
Table 3-1: Programming Modes
Mode
Description
Joint Test Action Group (JTAG)
Programs or configures all supported Altera devices except EPCS,
EPCQ, and EPCQ-L devices.
In-Socket Programming
USB-Blaster does not support this programming mode.
Passive Serial
Configures all supported Altera devices except EPCS, EPCQ, and
EPCQ-L devices.
Active Serial Programming
Programs a single EPCS, EPCQ, or EPCQ-L device.
Connecting the USB-Blaster Download Cable to the Board
1. Disconnect the power cable from the device board.
2. Connect the USB-Blaster download cable to your PC.
3. Plug the USB-Blaster download cable into the 10-pin header on the device board.
UG-USB81204
2015.05.04
Connecting the USB-Blaster Download Cable to the Board
3-3
Using the USB-Blaster Download Cable
Altera Corporation