Saab 2006 9-2 User Manual
Page 160
5-18
Audio
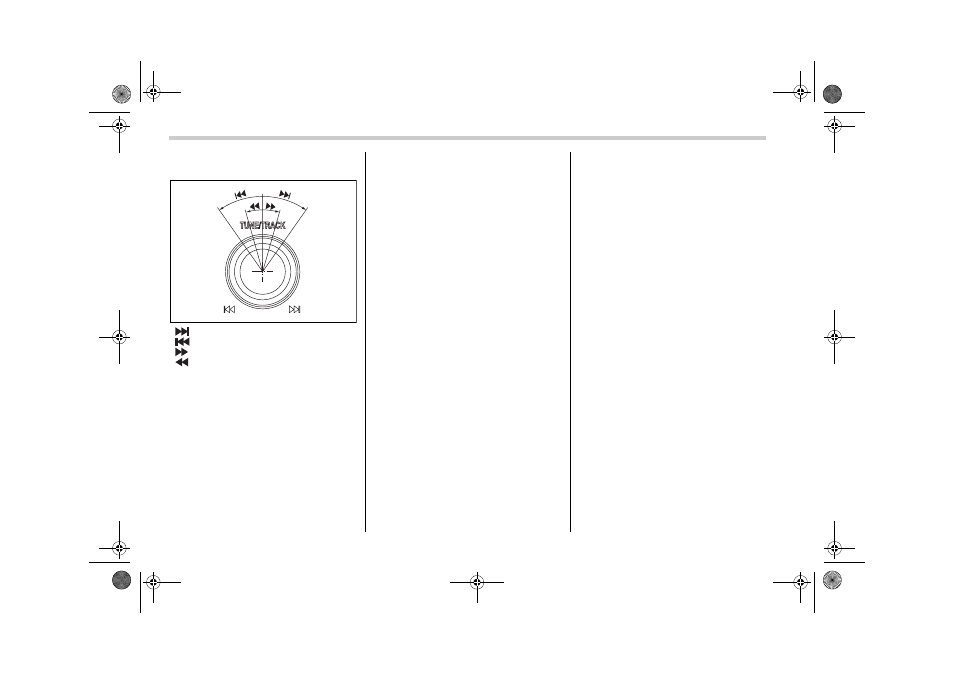
q Selecting a desired track (TRACK)
: Skipping forward
: Skipping backward
: Fast-forwarding
: Fast-reversing
s Skipping forward
Turn the “TRACK” knob (16) clockwise
and release it immediately to skip to the
beginning of the next track. Each time the
knob is turned and released, the indicated
track number will increase.
s Skipping backward
Turn the “TRACK” knob (16) counter-
clockwise and release it immediately to
skip to the beginning of the current track.
If you continue to turn and release the
knob, the indicated track number will de-
crease.
s Fast-forwarding
Turn the “TRACK” knob (16) clockwise
and hold it continuously to fast-forward the
disc.
Release the knob to stop fast-forwarding.
s Fast-reversing
Turn the “TRACK” knob (16) counter-
clockwise and hold it continuously to fast-
reverse the disc.
Release the knob to stop fast-reversing.
q Repeat playback
Press the “RPT” button (11) while a song
is playing to play the song repeatedly. The
“RPT” indicator will come on and the song
will be played continuously. To cancel the
repeat mode, press the button again.
Then the “RPT” indicator goes out, and
normal playback mode is restored.
q Random playback
Press the “RDM” button (12) while a disc
is being played back to play all songs on
the disc in a random order. The “RDM” in-
dicator will come on and all songs on the
disc will be played in a random order.
To cancel the random mode, press the
button again. Then the “RDM” indicator
goes out, and normal playback mode is
restored.
q Scan
When the “SCAN” button (13) is pressed
while the disc is being played back, you
can hear the first 10 seconds of each track
to search for the desired program. To con-
tinue listening to the program, press the
“SCAN” button again. After all tracks on
the disc have been scanned, normal play-
back mode is restored.
q How to unload CDs from the player
s Ejecting a CD from the player
Of the discs loaded, you can select and re-
move only one disc.
1. Press the “Disc select” button (17) of
the disc whose “DISC” indicator is ON.
2. Press the “Eject” button (15). Then the
“DISC” indicator associated with the disc
you have selected will blink, and the disc
will be ejected.
To remove more discs in succession, re-
peat Steps 1 and 2.
s Ejecting all discs from the player
(All disc ejection mode)
1. If you continue to press the “Eject” but-
ton (15), the player will produce a beeping
sound and will enter the all disc ejection
mode.
2. Remove the disc that has been eject-
ed. The other discs loaded will then be
ejected one after another. If you do not re-
500248
A1910BE-A-GSAAB.book Page 18 Tuesday, September 6, 2005 8:37 AM