Installation – CP Electronics VITP-MWS3A User Manual
Page 3
3
Choosing a Suitable Location
The VITP-MW3A is designed to be ceiling mounted and must satisfy the following criteria:
Avoid positioning the unit where direct sunlight may enter the sensor element.
Do not site the sensor within 1m of any lighting, forced air heating or ventilation.
Do not fix the sensor to an unstable or vibrating surface.
Avoid metallic objects directly in front of the sensor head.
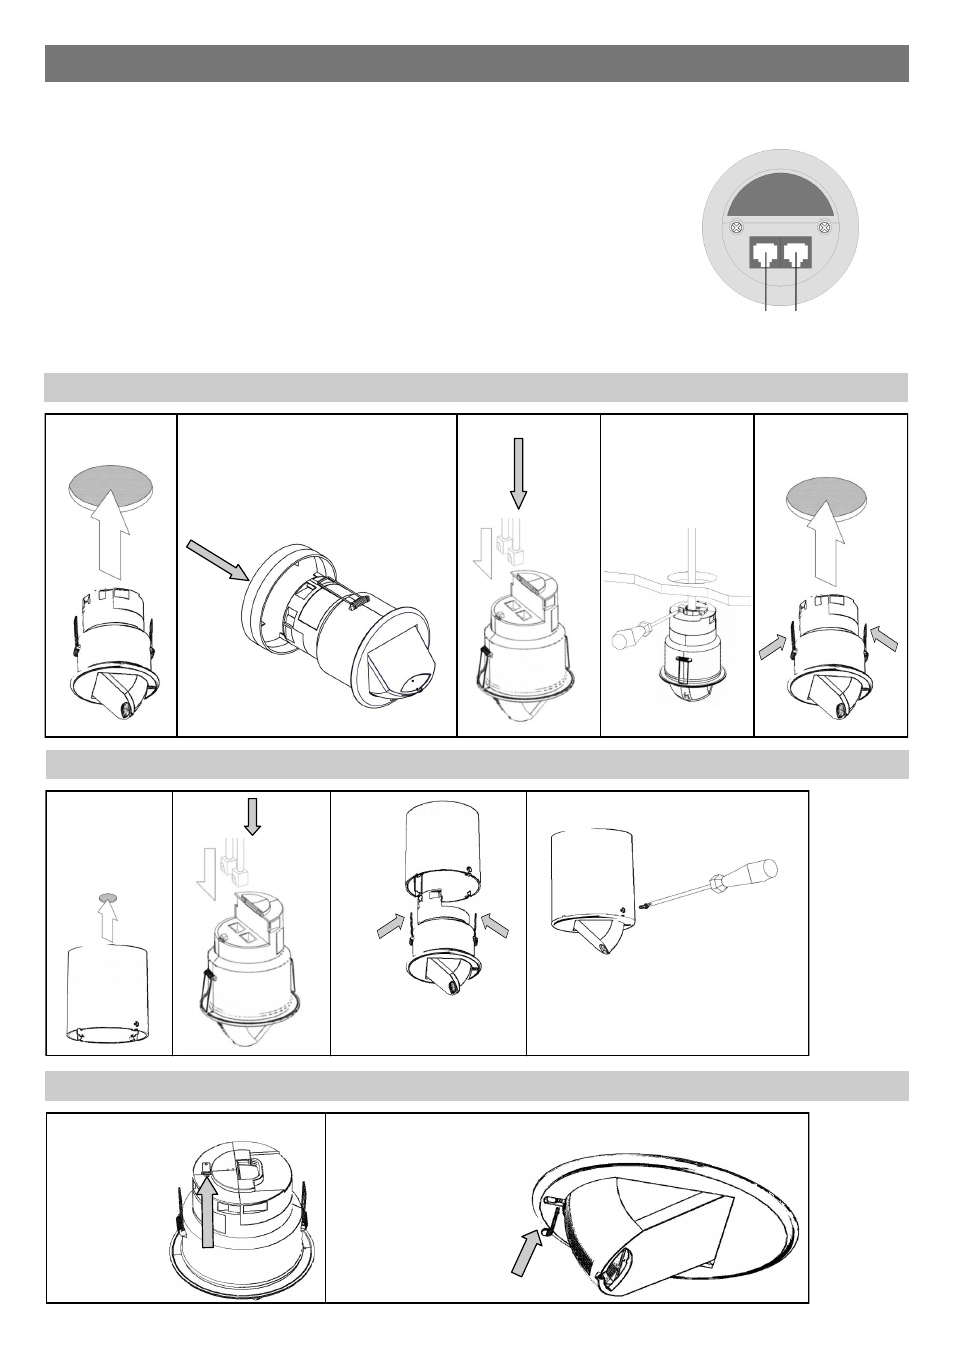
The VITP-MW3A is designed to be mounted using either:
Flush fixing, or
Surface fixing, using the optional Surface Mounting Box (part no. MWS3A-DBB).
Both methods are illustrated below.
Warning - be careful bending springs when mounting unit.
Installation
2 x VitessePlus RJ45 Connections
for Cat 5 patch leads
Flush fixing
Surface fixing
Head locking
1
3
2
4
Hole Ø30mm
MAX
1
2
Remove metal
locking clip from
rear of unit.
Adjust head to
required position.
Push clip into position
shown below to lock
head.
To remove clip, lever
out with a small
screwdriver.
1
5
4
3
Hole Ø74mm
Attach cable clamp
2
If the range is compromised by the
ceiling construction / material. Add the
supplied 20mm spacer ring.