Dvi input mode, Display data channel (ddc) preferred timing – Datapath VQS-01 User Manual
Page 13
13 24/02/2011
Contrast
Using the + and - buttons the image
contrast can be adjusted.
It is possible to save the settings for the particular VGA mode.
Once adjustments have been made, press the Save button and the VGA mode will be saved
for future use.
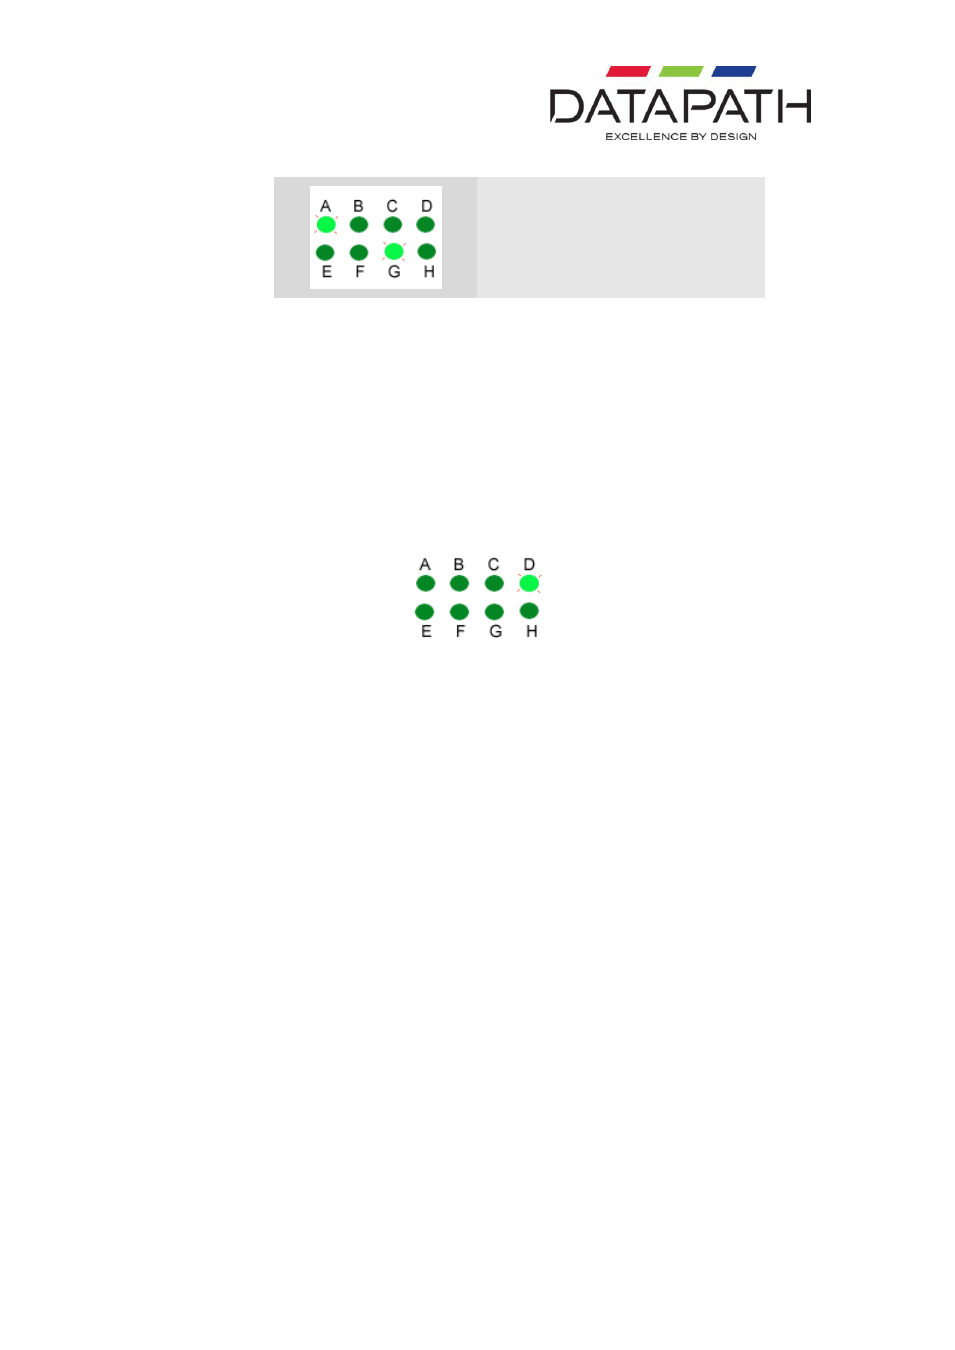
DVI Input Mode
If you have a DVI VGA source then the LED indicator panel will differ. As explained earlier,
when the VQS-01 is powered up it will detect what source is connected, if the source is DVI
then the LED panel will illuminate as follows:
The “D” indicating a valid DVI source.
The VQS-01 automatically detects the signal and translates it to the most optimum display,
therefore, the adjustments to the sample clock, clock phase, positioning, brightness and
contrast are not required.
Other adjustments may be made for both analog and digital DVI sources as follows.
Display Data Channel (DDC) Preferred Timing
The DDC Preferred Timing is read from the VQS-01 by the PC BIOS and operating system to
determine a preferred resolution on power-up. The Preferred Timing is read using the DDC
output from the VQS-01.
The EDID (Extended Display Identification Data) contains basic information about a monitor
and its capabilities. In addition to the preferred timing, the EDID also contains secondary
timing information for another resolution. Both the preferred and secondary timing are read
by the operating system and graphics software and may be included in a list of user-
selectable resolutions. The VQS-01 provides the ability to simultaneously change both the
preferred and secondary timing.
The following table illustrates how to change the EDID preferred and secondary timings.
To change the mode:
Use the Select
button and navigate through the settings until the “A” or “D” LED
(depending on if you have analog or digital monitors connected) is lit the “H” LED is
lit and the “B and “C” LEDs are not lit. At this stage the “E”, “F” and “G” LEDs
indicate the current mode. Use the + and - buttons to navigate through the available
modes as illustrated in the next table. When you reach the last of the available modes
it will loop back to the first.
Note: