Adobe Acrobat 8 3D User Manual
Page 540
533
ADOBE ACROBAT 3D VERSION 8
User Guide
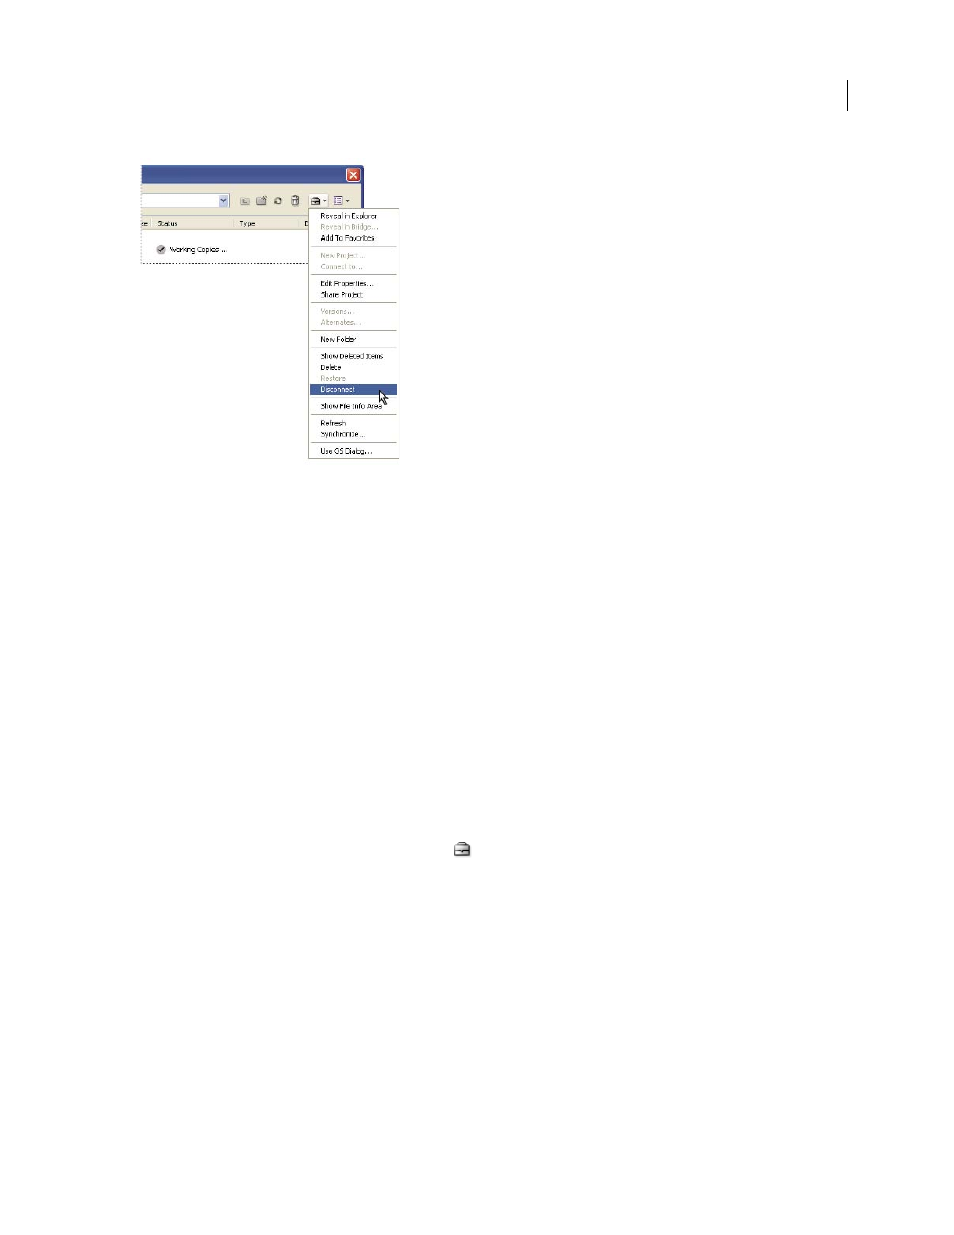
Project Tools menu contains frequently used commands.
See also
“Share or unshare a project” on page 534
“Availability of Version Cue features” on page 527
“About the Adobe dialog box” on page 528
“Disconnecting from projects” on page 541
“Delete files and folders” on page 542
“Log in to and out of the Version Cue Administration utility” on page 550
Create a project
Note: You can perform this task only if you have access to the full Version Cue feature set, available in Adobe Creative
Suite or in a shared workspace. See “Availability of Version Cue features” on page 527 for more information.
1
Choose File > Open. Click Use Adobe Dialog if you’re using the OS dialog box.
2
Click Version Cue in the Favorites panel.
3
Choose New Project from the Project Tools menu
.
4
Choose a location for the project from the Location menu.
5
Enter a name for the project in the Project Name box and a description in the Project Info box. (The description
you enter appears as a tool tip when the pointer is over the project in the list of workspaces.)
6
To make this project and its files available to others, select Share This Project With Others. (If the Version Cue
Workspace is on a computer other than your own, the Version Cue project is shared by default.)
7
Click OK.