Adobe Photoshop CS3 User Manual
Page 225
PHOTOSHOP CS3
User Guide
218
•
If you chose a different transform command or the Free Transform command, click the Switch Between Free
Transform And Warp Modes button
in the options bar.
3
Do one or more of the following:
•
To warp using a specific shape, choose a warp style from the Warp pop-up menu in the options bar.
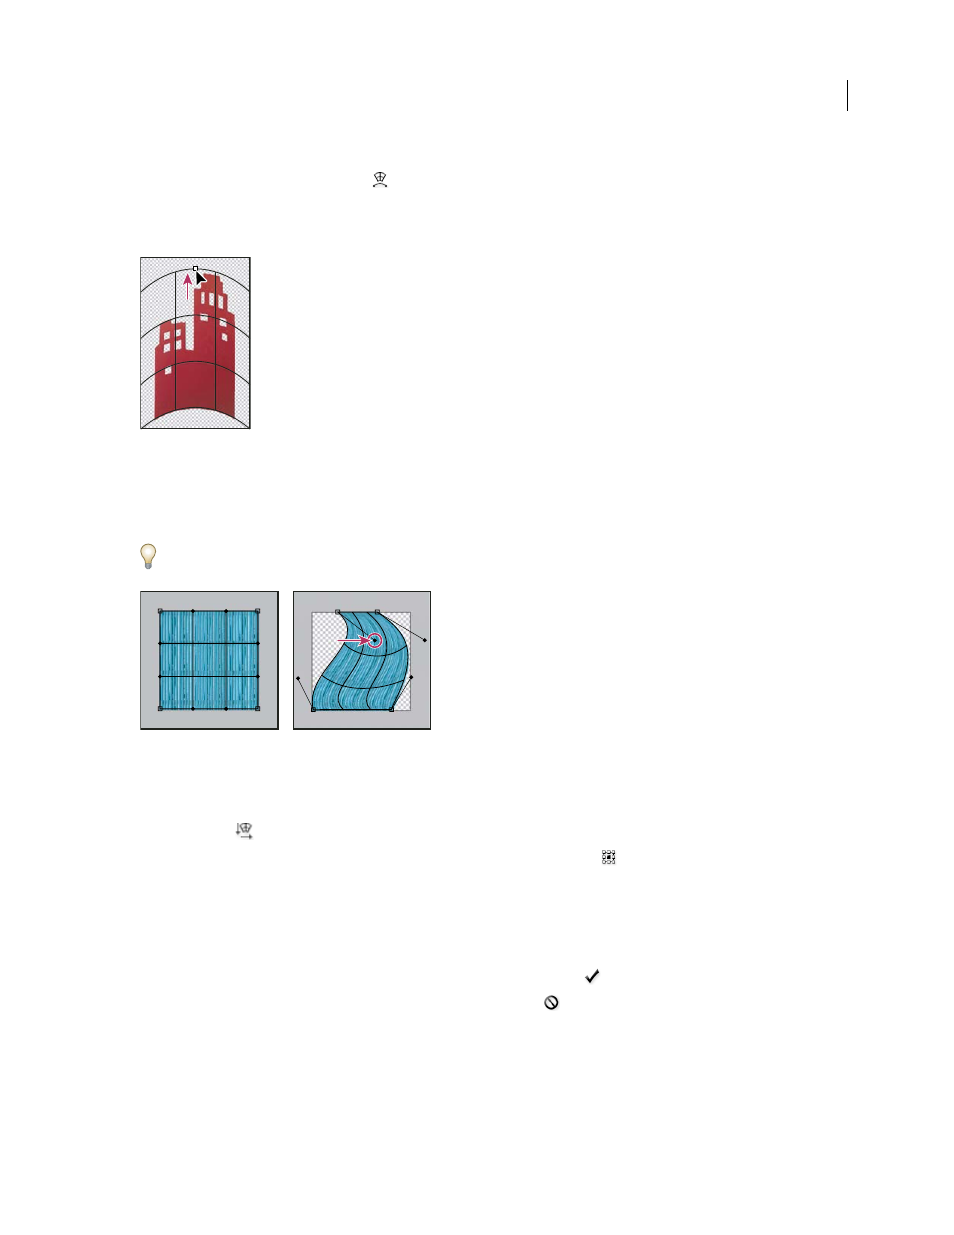
Dragging a control point to warp the mesh
•
To the manipulate the shape, drag the control points, a segment of the bounding box or mesh, or an area within
the mesh. When adjusting a curve, use the control point handles. This is similar to adjusting the handles in the
curved segment of a vector graphic.
To undo the last handle adjustment, choose Edit > Undo.
Manipulating the shape of a warp
A. Original warp mesh B. Adjusting the handles, mesh segments, and areas within the mesh
•
To change the orientation of a warp style that you chose from the Warp menu, click the Change The Warp Orien-
tation button
in the options bar.
•
To change the reference point, click a square on the Reference point locator
in the options bar.
•
To specify the amount of warp using numeric values, enter the values in the Bend (set bend), X (set horizontal
distortion) and Y (set vertical distortion) text boxes in the options bar. You can’t enter numeric values if you have
chosen None or Custom from the Warp Style pop-up menu.
4
Do one of the following:
•
Press Enter (Windows) or Return (Mac OS), or click the Commit button
in the options bar.
•
To cancel the transformation, press Esc or click the Cancel button
in the options bar.
Important: When you warp a bitmap image (versus a shape or path), the image becomes slightly less sharp each time
you commit a transformation; therefore, performing multiple commands before applying the cumulative transformation
is preferable to applying each transformation separately.
A
B