Avalon Firestyles 700 B-Vent-1994 User Manual
Page 37
O
PTIONAL
E
QUIPMENT
(C
ONTINUED
)
P
AGE
37
Re-Routing the Power Cord to the Left or Rear of the Heater (Continued)
5A Pry the button plug from the left side of the ashlip control housing using a screwdriver (see the
illustration below). Insert it in the hole on the right side where the strain relief was removed.
Insert the power cord through the hole on the left side. Route the power cord through the notch
in the ashlip control housing partition and re-connect the power cord by connecting the molex
plugs (see the illustration on the previous page). Place the strain relief over the power cord next
to the ashlip control housing. Compress the strain relief by clamping it with a pair of slip nose
pliers. Then insert it into the ashlip control housing until it locks into place.
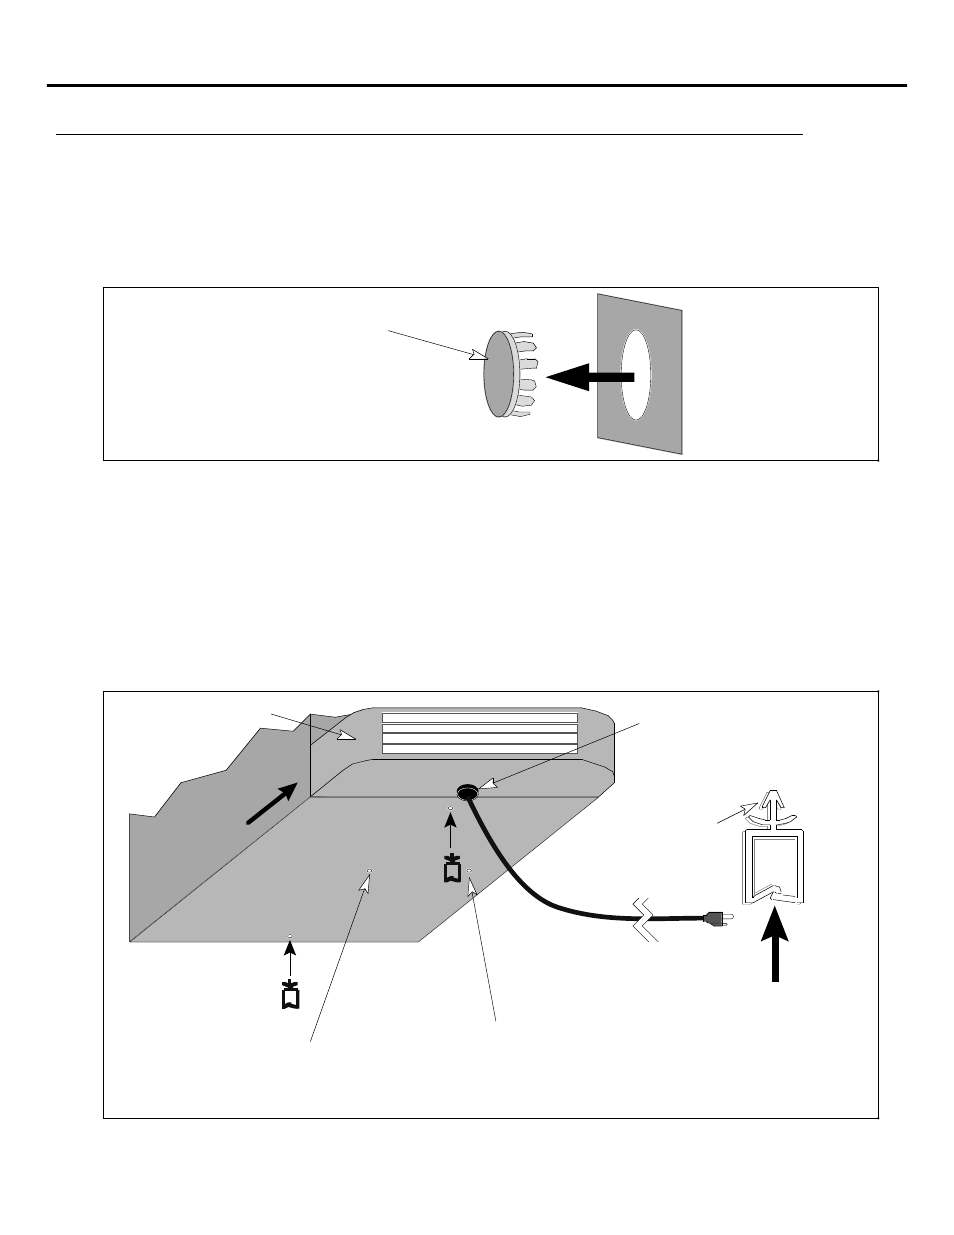
Button Plug
Remove the button
plug by prying it loose
with a screwdriver
5B Included in the accessory pack are three cord mounts and a button plug. Insert the button plug in
the hole on the right where the strain relief was removed. Insert the power cord through the hole
on the bottom of the ashlip control housing. Route the power cord through the notch in the
ashlip control housing partition and re-connect the power cord by connecting the molex plugs
(see the illustration on the previous page). Place the strain relief over the power cord next to the
ashlip control housing. Compress the strain relief by clamping it with a pair of slip nose pliers.
Then insert it into the ashlip control housing until it locks into place. The cord is hidden under
the heater with the use of cord mounts inserted into the baseplate of the heater. Insert the three
cord mounts into the base of the heater (see the illustration below for details). Then insert the
power cord into each cord mount until it latches in place. After installation, pull the slack out of
the power cord.
Cord mount
Insert the power cord
through these two arms
until they lock in place.
FOR STOVES WITH PEDESTALS
Insert a cord mount into the hole on the
right side of the pedestal and route the
cord around the base of the pedestal.
FOR STOVES WITH LEGS
Insert a cord mount into the hole in the
center of the stove and route the cord
down the middle of the stove.
Front of Stove
Ashlip Control Housing
Insert this end in
until these barbs
expand, locking
it in place.
Baseplate
Power Cord
Strain Relief
6. Replace the ashlip control housing, making sure no wiring becomes pinched, and tighten the
three bolts that hold it in place.