Turning outside corners turning inside corners – Baby Lock Enlighten (BLE3ATW-2) Instruction and Reference Guide User Manual
Page 42
B
A
S
I
C
S
E
R
G
I
N
G
T
E
C
H
N
I
Q
U
E
S
40
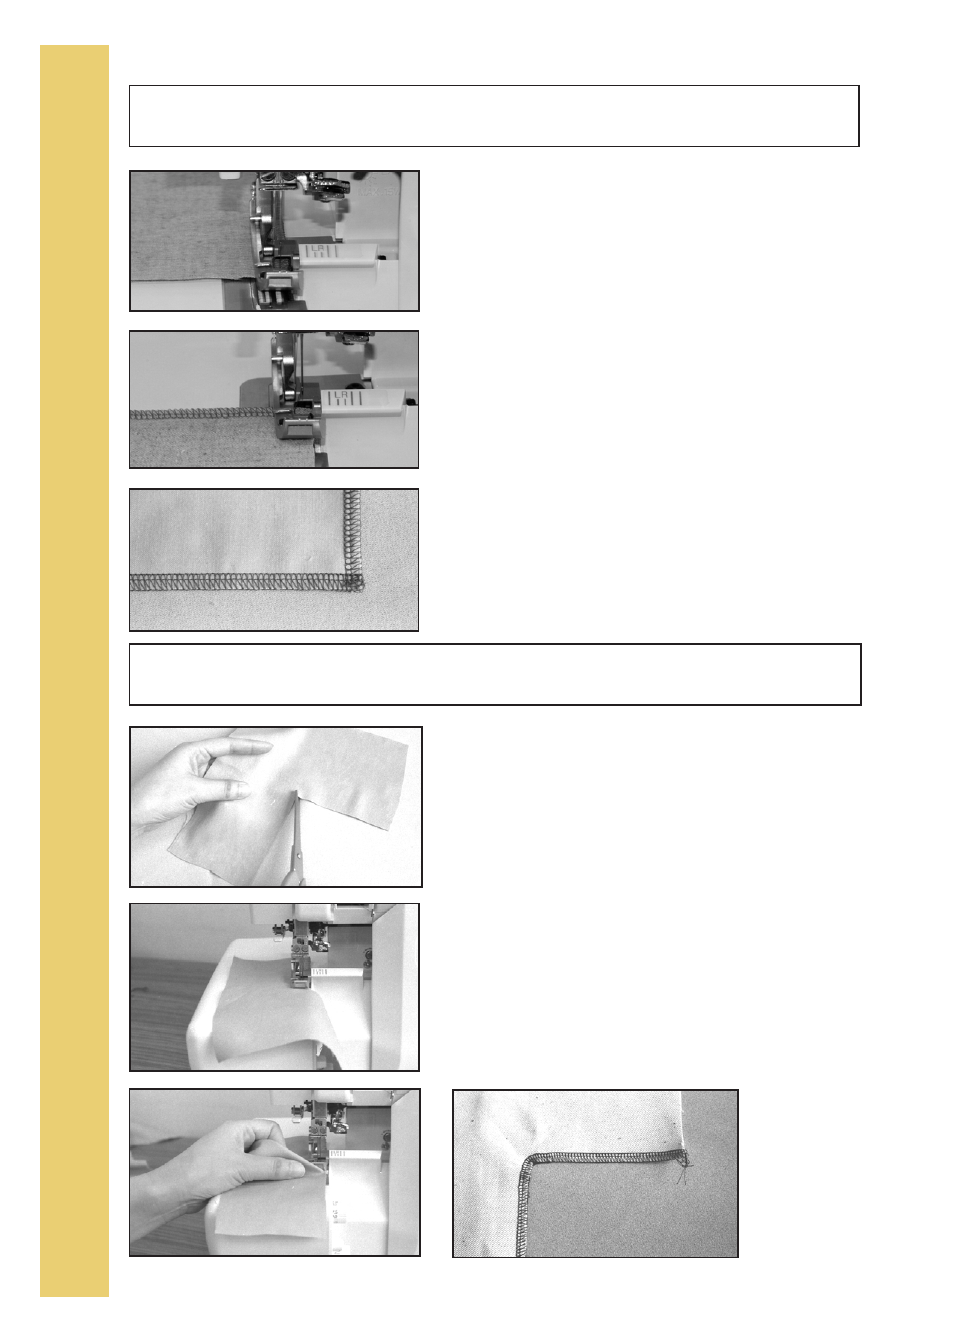
Turning Outside Corners
Turning Inside Corners
A
B
A
B
C
D
C
1. Stitch along one edge until you reach the corner. Take
one stitch off the edge of the fabric (fig. A). (As you
approach the edge, you may want to stop and manually
turn the handwheel towards you.)
2. Raise the needle(s) to the highest position.
3. Clear the stitch fingers, and rotate the fabric to reposition
the needle at the previous row of stitching (fig. B). Gently
pull up on all threads to remove slack and resume
stitching (fig. C).
Note: A loose thread loop at the corner is caused by too
much slack in the needle thread when clearing the stitch
fingers. Try again, turning corners takes a little practice!
1. Reinforce loosely woven fabrics at the corner with
staystitching on the conventional sewing machine. Clip to
the corner (fig. A).
2. Align the fabric edge with the blade, and stitch until the
blade reaches the corner, not the needles. Don't cut into
the corner (fig. B).
3. Lower the needle(s) to anchor the fabric.
4. Raise the presser foot and straighten out the fabric edge,
forming a fabric pleat at the corner (fig. C).
5. Be sure the marked stitching line is straight, then contin-
ue serging the remaining edge. When done correctly, the
pleat will disappear after stitching (fig. D).