Replacing needles replacing cutting blades – Baby Lock Enlighten (BLE3ATW-2) Instruction and Reference Guide User Manual
Page 50
M
A
I
N
T
E
N
A
N
C
E
48
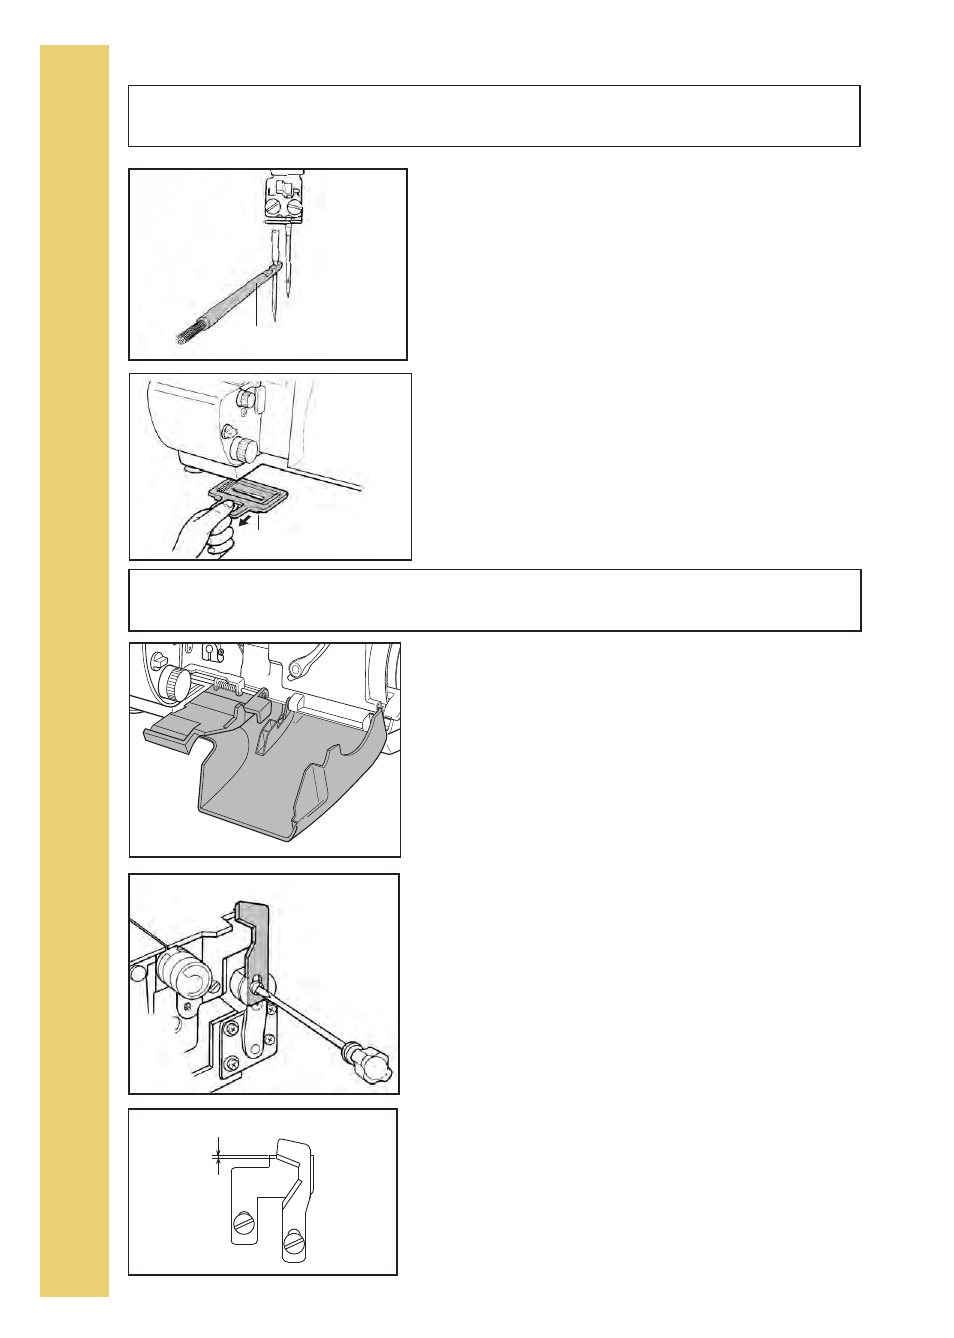
Replacing Needles
Replacing Cutting Blades
A
B
Needle-drop drawer
B
A
Needle insert tool
1. Raise the needle to the highest position by turning the
handwheel toward you.
2. Using the screwdriver from the accessory pouch, loosen the
needle screw for the needle to be changed. "L" screw for the
left needle and "R" screw for the right needle as shown in (fig.
A).
Note: To prevent the needle from falling into the needle plate,
hold it with the needle insert tool as you loosen the needle
screw. (fig. A)
3. Use the needle insert tool or tweezers to insert the new
needle with the flat side to the back. Insert the needle as far
as it will go. Check the needle viewing window. (fig. A)
4. Tighten the needle screw.
Note: If you do drop a needle down into the machine just pull
out the needle-drop drawer at the bottom of the serger. The
needle will be on the drawer. (fig. B)
The lower fixed blade is made of a special long lasting steel and
does not require frequent replacement. If necessary, contact
your nearest Baby Lock retailer for replacement of this blade.
The upper moving blade is made of a softer steel material and
will require replacement. A spare blade is provided with the
machine for replacement if necessary. The spare blade is locat-
ed in the thread spool stand accessory compartment.
If for some reason your machine does not cut or perform as it
should, please take your machine to your nearest Baby Lock
retailer. It is possible that the result of poor cutting may indicate
other problems.
To replace the upper moving blade, follow below instructions.
1. For safety reasons, unplug main power cord.
2. Open front cover and cutting blade cover (fig. A). Remove
presser foot.
3. Turn handwheel so upper moving blade is in its highest
position.
4. Remove screw and upper blade. (fig.B)
5. Insert new blade into blade slot.
6. Insert screw and hold moving blade in its highest position
while tightening the screw.
7. To finalize position of upper blade, turn handwheel so that the
moving blade is in it's lowest position. Loosen the screw so
that the moving blade can be lowered to 1mm overlap of the
top of the fixed blade (fig. C). Tighten the screw.
8. Close cutting blade cover and front cover. Replace the
presser foot
9. Rotate the handwheel one turn to ensure smooth operation of
the machine.
C
1mm