Warning – Belshaw Adamatic Snack Master Snack Food Frying System User Manual
Page 38
Belshaw Bros., Inc.
• www.belshaw.com • Phone 206-322-5474 • Fax 206-322-5425
16
MN-1013EN
Snack Master TS
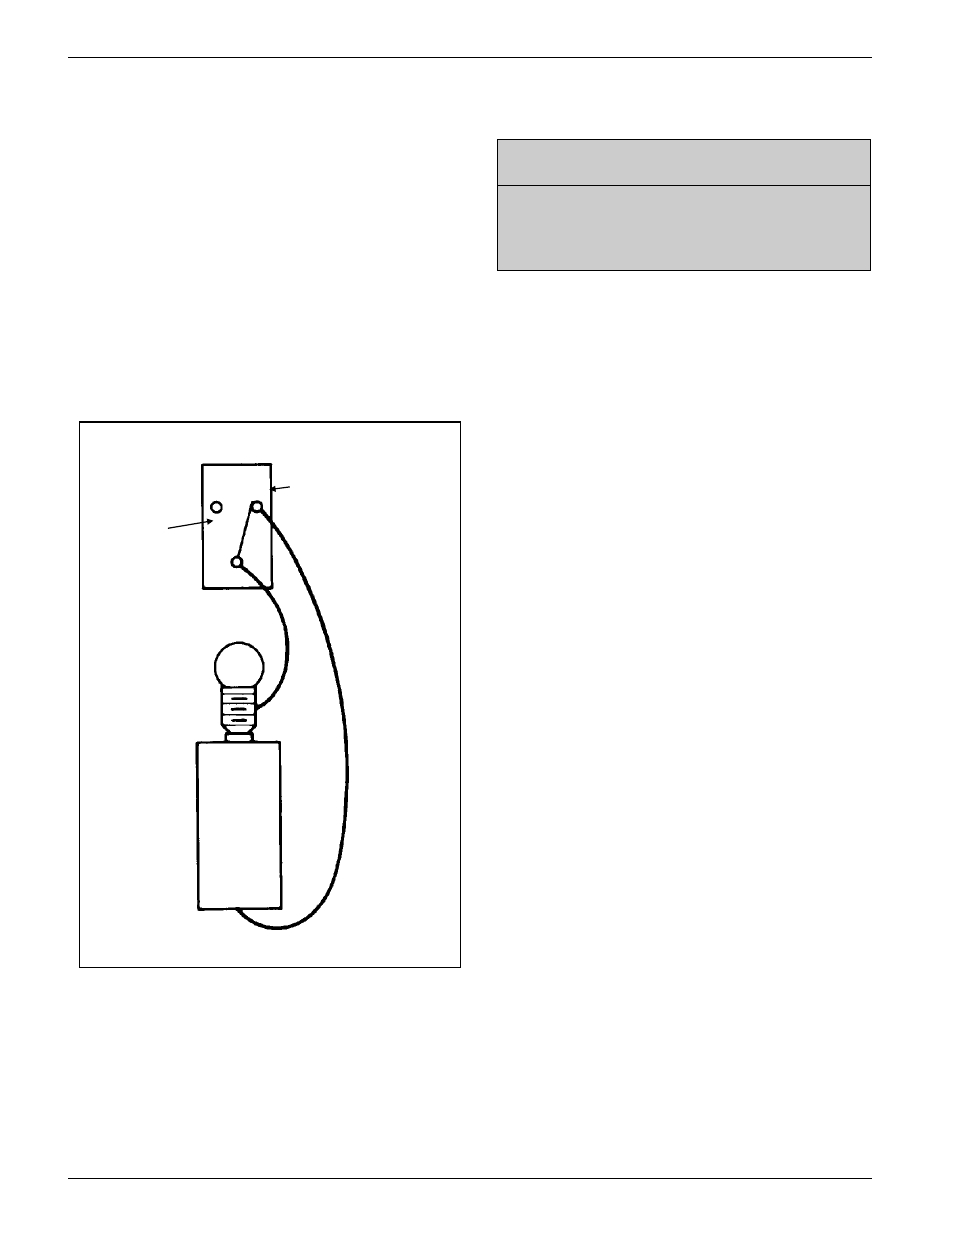
available, make a continuity tester using a
battery and a bulb. (See Figure 4-2.)
4. Connect one wire of the continuity tester to
the microswitch’s common (COM) terminal
and the other wire to the normally open
(NO) terminal, as shown in Figure 4-2. The
switch should show continuity only when
the microswitch actuator arm is depressed.
5. To test the normally closed (NC) terminal,
move the wire from the normally open (NO)
terminal to the normally closed terminal.
Now the switch should show continuity only
when the actuator arm is not depressed.
Figure 5-2. Microswitch Continuity Test.
To test the continuity of the thermostat:
WARNING
To avoid the possibility of electric shock,
disconnect the machine from the power
source before testing.
1. Disconnect the machine from the power
supply.
2. Disconnect the terminal wires from the
thermostat.
3. Connect the continuity tester across the B
terminals indicated in Figure 4-3. This set
of contacts should be closed whenever the
thermostat is on. To test, start with the
thermostat in the OFF position. Then turn
the thermostat up until you hear a distinct
click (at about the 175
°F/79°C setting). At
this time, there should be continuity across
the B terminals.
4. Connect the continuity tester across the A
terminals. Start with the thermostat in the
OFF position and turn the thermostat up
until you hear a distinct click. If there is no
continuity (the indicator or light does not
come on), proceed to step 5.
5. With the continuity tester still connected,
turn the thermostat knob to OFF and remove
the knob. There is an adjusting screw in the
center of the knob stem. Turn it counter-
clockwise until there is continuity. If there
is no continuity (the indicator or light does
not come on), then the thermostat is
defective. If there is continuity, proceed to
step 6.
NC NO
COM
switch
terminals
microswitch
+
battery
−