Creating distribution groups, Creating distribution, Groups – BrightSign HD2000 Network Manager Guide User Manual
Page 20
16
Chapter
3
•
•
•
•
•
•
6
Click the Time Zone list and select the time zone where this unit is located.
7
(Optional) Enter a Name and Description for this unit.
8
Click Save.
TIP:
If you prefer to enter your unit information in a spreadsheet, you can download your Units
information to your computer by clicking Download Units File. Open the file in a spreadsheet on
your computer, enter your unit information, and then save the file. When you’re ready to upload
your unit information to BrightSign Network Manager, click Import Unit File, click Browse and
select the location of the unit file, and then click Upload.
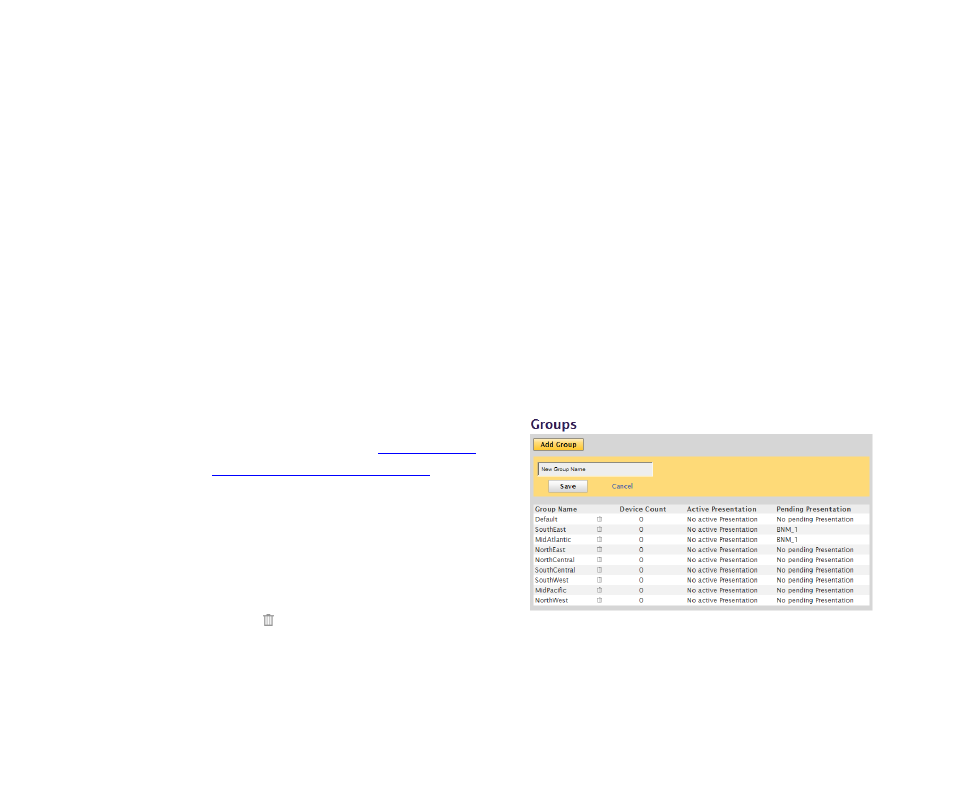
Creating distribution groups
Groups enable you to test your presentation and then distribute them to a specific set of
BrightSigns. For example, you can create groups based on the region or department in which the
BrightSigns reside.
BrightSign Network Manager includes two default groups: Default and LocalTest. LocalTest is the
group you use to test your presentations on your local network.
1
Sign into your BrightSign Network
Manager account (see
for details).
2
Click the Groups tab.
3
Click Add Group.
4
Enter a name for this group.
5
Click Save.
TIP:
To delete a distribution group, click the
Delete icon. When the Delete Group
message appears, select the group into which you want to transfer any units assigned to the
group you’re deleting, and then click OK.