Elfa Artic User Manual
Ample,artic,grace
www.elfa.com
Page 1 of 8
1
Customer service / Kundendienst
Deutschland
Tel. 05242 3789375 Fax. 05242 9683632.
E-post:[email protected]
Ample,Artic,Grace
ASSEMBLY GUIDE / MONTAGEANLEITUNG /
INSTRUCTIONS DE MONTAGE / INSTRUKCJA MONTAŻU
Service client
France
Tél. +33 472 330 731 – Fax +33 472 345 260
e-mail: [email protected]
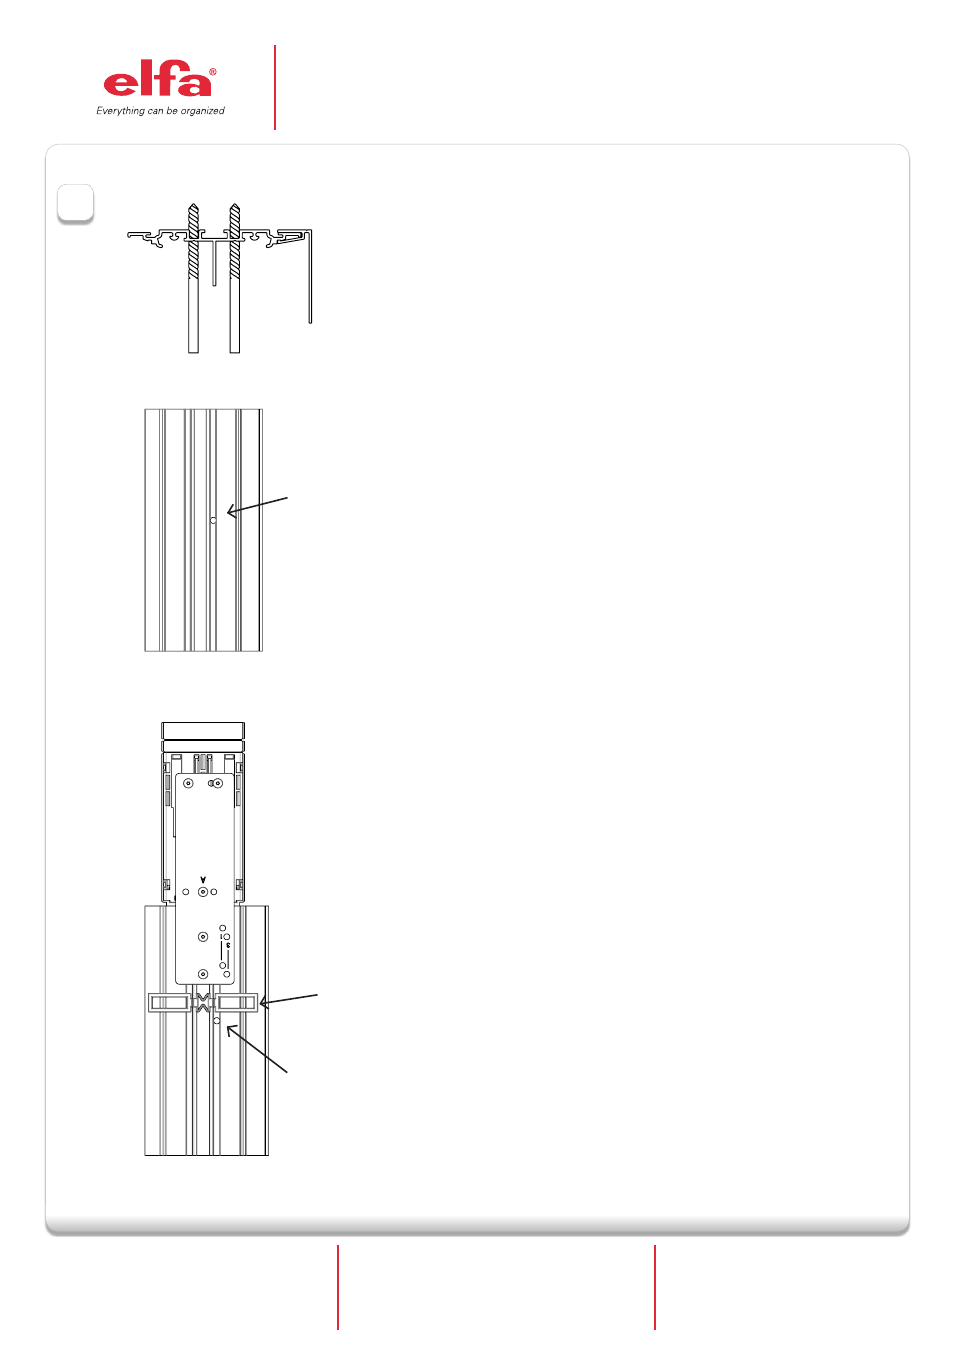
The top track is delivered without drilled holes. The top track is to be secured to the
ceiling with screws. Drill the appropriate points of attachment with a 5 mm drill and
secure the top track with screws at the front edge of the opening. See fig. 1 a and 1 b.
If the opening has a soft close mechanism, place the pre-mounted spacers, marked A in
fic. 1 c, close to the drilled 5 mm holes.
If more attachment points are choosen than there is pre-mounted spacers, place a 2 mm
thick object as an own spacer near the holes before tightening the screw.
Drilling and mounting the top track
Serwis
Polska
Tel. 42 611 64 01 Fax. 42 611 64 02
E-post:[email protected]
Ø5mm
A
Ø5mm
Fig. 1 a
Fig. 1 b
Fig. 1 c
Die obere Laufschiene (Fig.1a) muss an die Decke geschraubt werden.
Bohren Sie hierfür die entsprechenden Befestigungspunkte (Fig. 1b)mit einem 5mm
Bohrer vor und schrauben danndie obere Laufschiene bündig mit der Vorderkante der
Öffnung an der Decke fest.
Die Laufschiene muss in Waage montiert werden.
Wenn die Laufschiene mit einem Softschließbeschlag (Fig. 1c) geliefert wird platzieren Sie
bitte die Abstandhalter aus Kunststoff (A) in der Nähe der Bohrungen.
Montage Deckenschiene (oben)
Le rail haut doit être vissé au plafond. Il est livré non percé, afin que vous choisissiez les
emplacements les mieux appropriés pour les perforations (environ 20cm de chaque
extrémité du rail et les autres réparties sur le rail – pour 2 mètres de rail, 1 perforation à
chaque extrémité + 1 au centre suffiront).
Pour cela pré-percez avec un foret de 5mm (fig.1 bis et 1 ter), marquez ces perforations
sur votre plafond, mettez les chevilles à l’emplacement de vos marquages, puis vissez le
rail avec des vis à tête fraisée.
Si vous avez un système de fermeture amortie, placez les entretoises pré-montées
(marquées A sur la fig. 1c), près de chaque perforation de Ø 5 mm.
Perçage et montage du rail haut.
Szyna górna jest dostarczana bez wywierconych otworów. Powinna zostać
przykręcona do sufitu za pomocą wkrętów. Wywierć otwory w szynie wiertłem 5mm
po zewnętrznej stronie szyny. Rys 1a i 1b.
Jeśli montujesz szynę z cichym zamknięciem, umieść plastikowe dystanse (A rys.
1c) blisko wywierconych otworów. Jeśli koniczne jest wywiercenie większej ilości
otworów niż ilość dystansów, umieść 2mm grubości przedmioty blisko otworów
przed dokręceniem śrub.
Nawiercanie i montaż szyny górnej.