Preparation start here – InSinkErator HC3300 User Manual
Page 3
Property Damage: Do not pinch or break copper tubing.
Do not distort the last 25mm of tubing.
HC1100/GN1100
■
Unpack hot water tap components.
■
On a firm, flat surface, carefully
straighten the copper tubing.
A
These instructions are separated
into main sections, indicated by
numbers, and subsections,
indicated by capital letters. The
manual is set-up this way to
allow you to take a break at any
point after completing a section
or subsection without affecting
the installation process.
Provides a step-by-step narrative describing the installation step, with tick boxes that can be marked as you
progress through the installation.
Contains simple illustrations that provide visual instruction to support the narrative.
CAUTIONS and WARNINGS that will require your attention during the step.
1
2
3
1
2
3
HOW TO USE THIS INSTRUCTION MANUAL
OVERVIEW OF A COMPLETED SET-UP
B
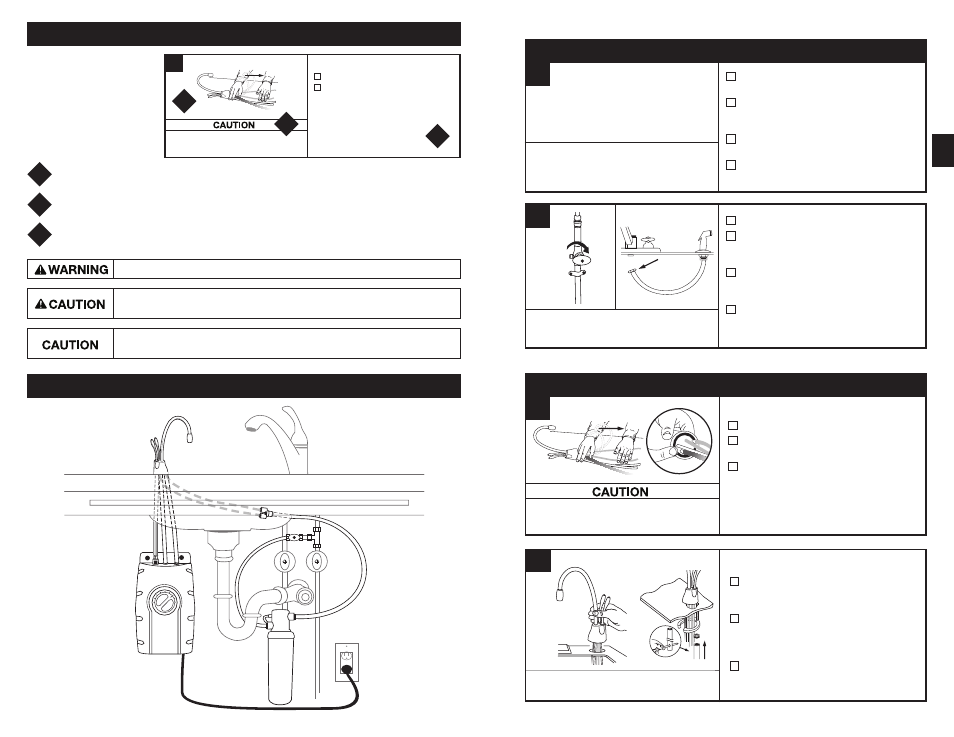
PREPARATION
START HERE
PROPER INSTALLATION SHOULD TAKE ABOUT 2-4 HOURS
■
Identify locations for the tap, tank and
filter (if applicable).
■
Check to make sure there is proper
clearance (see chart at left) for tap
handles to be fully opened.
■
Check to make sure counter is not too
thick (see chart at left).
■
Make sure there is an earth (grounded)
electrical outlet under the sink.
■
Turn off water supply.
■
If using the sink sprayer hose hole,
remove nut that connects sprayer hose
at bottom of tap.
■
Using adjustable spanner, remove nut
connecting sprayer washer flange in
sprayer hole.
■
Close hose opening with either a plug
or a cap
(not supplied).
1
The wall outlet for the tap must have power
supplied to it continuously and must be fused.
It should not be controlled by the same wall
switch that operates the food waste disposer.
If you have to drill through sink or
worktop, you may need to rent or
purchase the appropriate tools.
Required minimum from centre of hole to wall
Maximum counter thickness is 76mm.
A
3
A potentially hazardous situation, which, if not avoided, could result in death or serious injury.
Caution, used with the safety alert symbol, indicates a hazardous situation which, if not
avoided, could result in minor or moderate injury.
Caution, without the safety alert symbol, is used to address practices not related to
personal injury.
Property Damage: Do not pinch or break copper tubing.
Do not distort the last 25mm of tubing.
HC1100/GN1100
■
Unpack hot water tap components.
■
On a firm, flat surface, carefully
straighten the copper tubing.
■
Ensure that the black O-ring is properly
seated in the base of the tap head (the
groove on the underside of the tap).
A
INSTALLING THE TAP - HC1100/GN1100
2
HC1100/GN1100
■
Feed tubes down through the hole
in the sink or countertop until the base
is at rest.
■
From under the sink, place the
semi-circular mounting plate and hex
nut onto the threaded stud. Ensure tap
head is at desired angle.
■
Insert screwdriver into hole on side of
hex tool (creating a “T”), and use tool
to tighten nut and secure tap.
B
An assistant may be needed to hold
the tap in place while securing.
HC3300 ............. 64mm
H3300 ............... 64mm
HC1100 ............. 67mm
GN1100 ............. 83mm