Assembly instructions, Ap p e nd ix, Included parts – Kawai CL26 User Manual
Page 34
34
Ap
p
e
nd
ix
Assembly Instructions
Please read these assembly instructions thoroughly before attempting to assemble the CL26 digital piano.
Please ensure that two or more people work on assembling the CL26 digital piano.
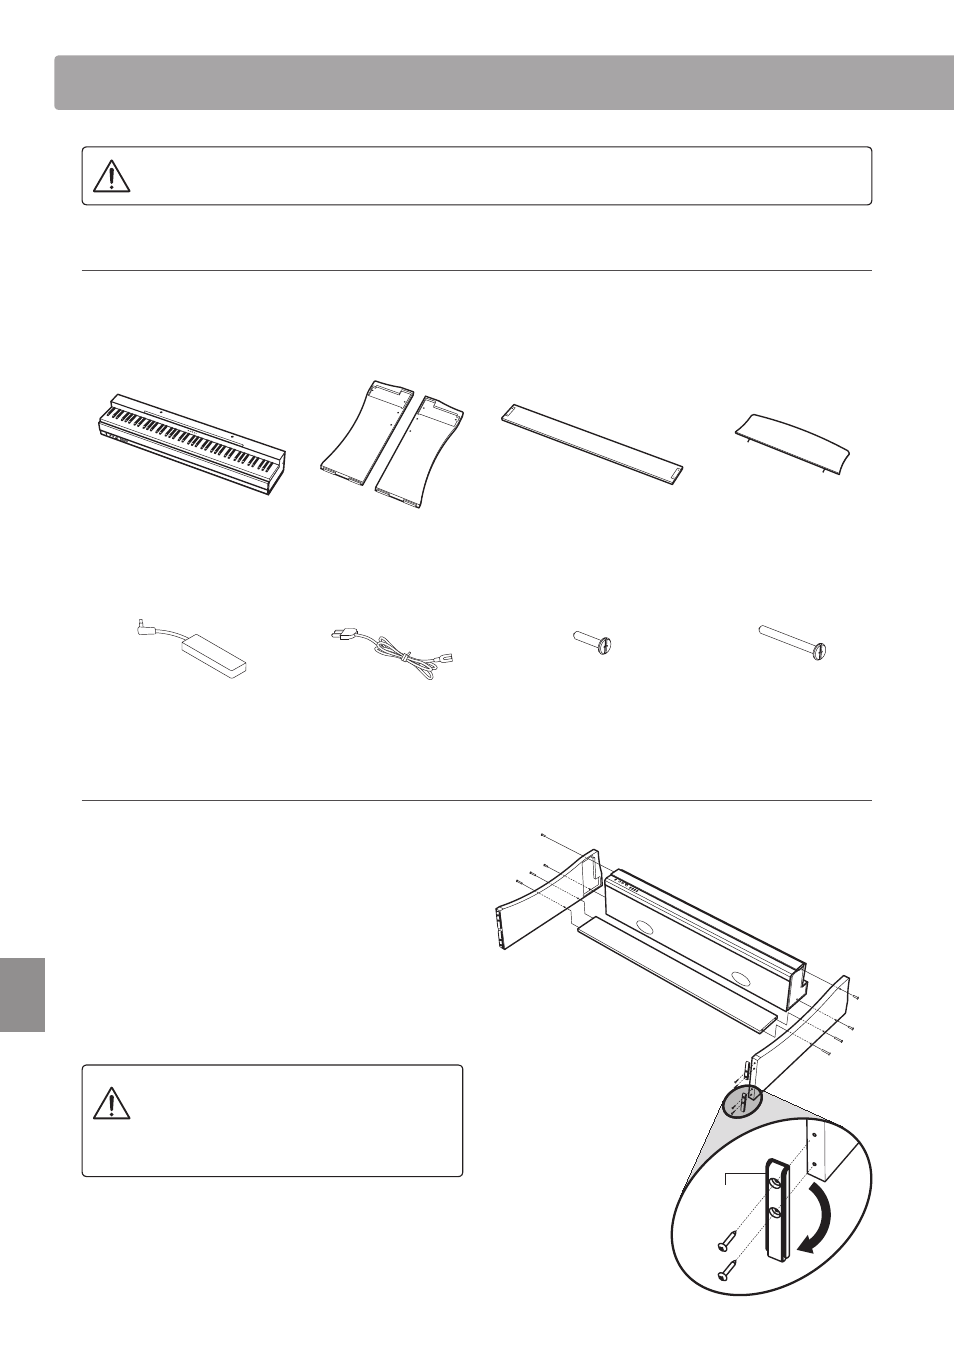
Included parts
Before attempting to assemble the CL26 digital piano, please ensure that all parts below are included.
A Phillips-head screwdriver (not included) will also be required in order to assemble the instrument.
To prevent scratches during assembly, it is recommended to cover hard floor surfaces with a towel or blanket.
e AC Adaptor
h Screw (long) x 4
g Screw (short) x 4
f Power Cable
b Side Panels (left, right)
a Main Unit
c Back Board
d Music Rest
1. Attaching the Main Body a, Side Panels b, and Back Board c
Place the Main Unit a on the floor with its back side facing
down, then place the left and right Side Panels b beside the
Main Unit, as shown in the illustration.
Attach the Side Panels b to the Main Unit a using four short
screws g in the top two holes on either side.
Attach the Back Board c to the Side Panels b using four long
screws h in the bottom two holes on either side.
Securely tighten all eight screws, ensuring that the Main Unit a,
Side Panels b, and Bottom Board c make close contact, and
that there are no large gaps between the assembled parts.
Tighten all screws securely to ensure that the
Main Unit and Back Board are firmly attached
to the Side Panels.
Failing to do so may result in serious injury.
Remove, reposition, then reattach the glides located on the
underside of the left and right Side Panels b so that they
protrude.
h
h
h
h
g
g
g
g
b
Glide