La Crosse Technology C86234 User Manual
Page 8
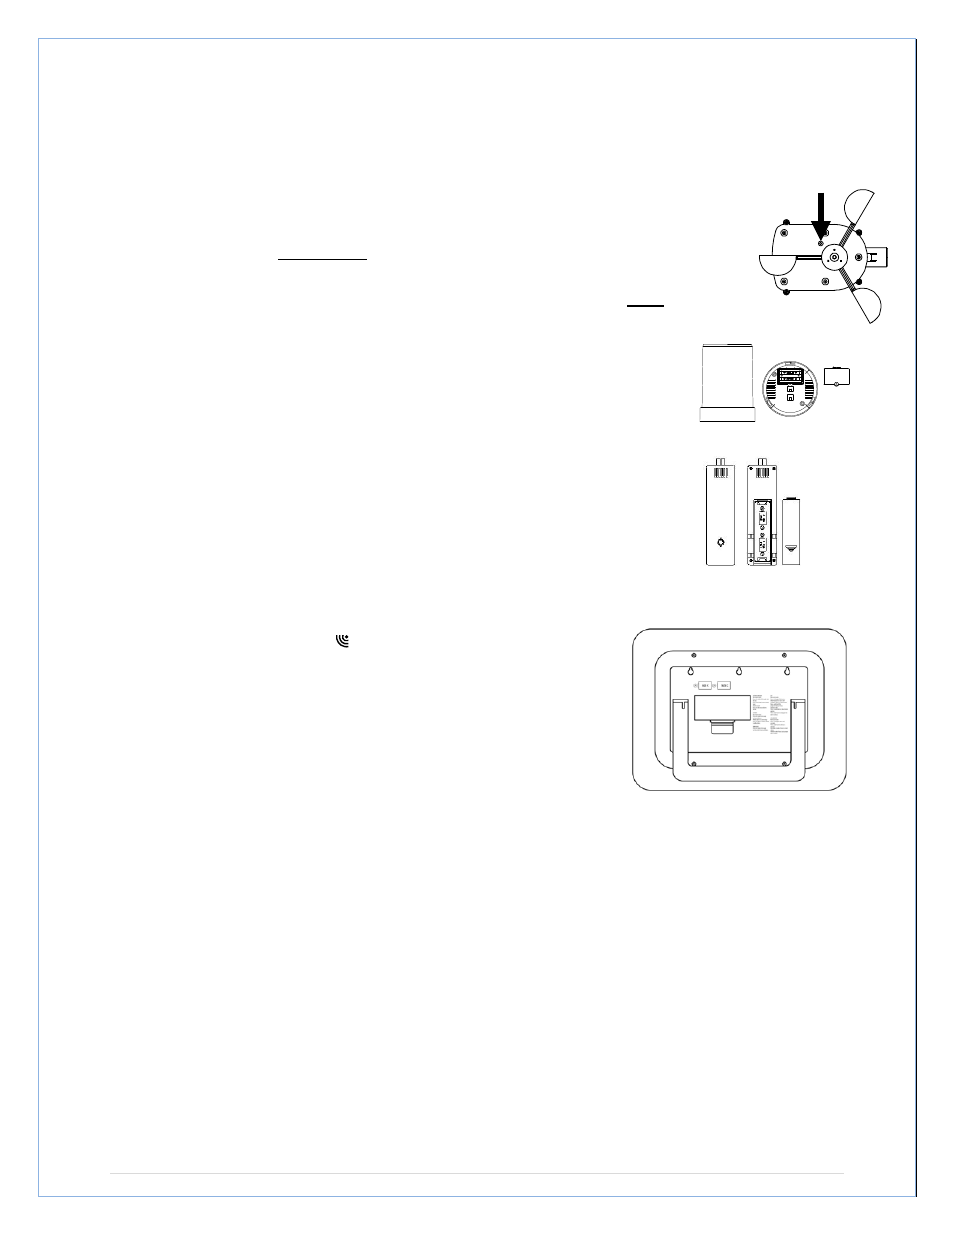
Press Reset Button on
Bottom of Wind Sensor
(Solar Panel Must Face
Light)
STEP 1:
• Complete initial setup on a table with all components within 10 feet of each other.
STEP 2:
• It is important to allow sufficient light to reach the solar panel while activating
the wind sensor. Make sure the lights are on in the setup room and the solar
panel is facing a 60W light bulb or brighter.
• Ensure the panel is not covered, and then remove the black protective foil on the
solar panel. Remove the tape covering the reset hole.
• Use the provided plastic reset rod to gently press the reset button once in the hole
on the bottom of the sensor.
STEP 3:
• Insert two "AA" size batteries into the rain sensor with the correct polarity.
STEP 4:
• Insert two "C" size batteries into the thermo-hygro sensor with the correct
polarity. Allow all sensors to run for two minutes before inserting batteries
in the weather station.
STEP 5:
• Insert two "C" size batteries into the wireless display with the correct
polarity.
• NOTE: Every time the wireless display receives data from the
sensors, the wireless icons will blink once and then return to
solid if the last transmission was successful. A wind speed or
rainfall amount that reads "0" does not mean reception failure. It
means that there was no wind or rain at the time of the last
measurement. The thermo-hygro sensor syncs with the wind
and rain sensors and sends all outdoor sensor data to the
display. The thermo-hygro sensor tries for 4 minutes to sync to
the wind sensor and then 4 minutes for the rain sensor. If not
successful within 4 minutes, the thermo-hygro sensor will stop looking for the other sensors.
• Wait 10 minutes for reception from all sensors before setting time and date or mounting
sensors outside.
STEP 6:
Set Time and Date. See “Manual Settings” below.
SETUP TROUBLESHOOTING: If the sensor data fails to display for any of the outdoor sensors
within 10 minutes, (“- - -“are displayed), remove the batteries from all units for 1 minute and start
the Setup procedure again at Step 1.
P a g e
| 8