Step 3, final assembling – Luxi Electronics DIY-28DS10 User Manual
Page 5
Website:
www.luxielectronics.com
Email:
Phone: +1 (949) 654-2047
Address: Irvine, CA, USA
HD DIY user manual regular wires
Revision: 2.00
Date: 1/26/2015
US patents: 8002572, 8500489 issued; additional patents issued or pending in multiple countries
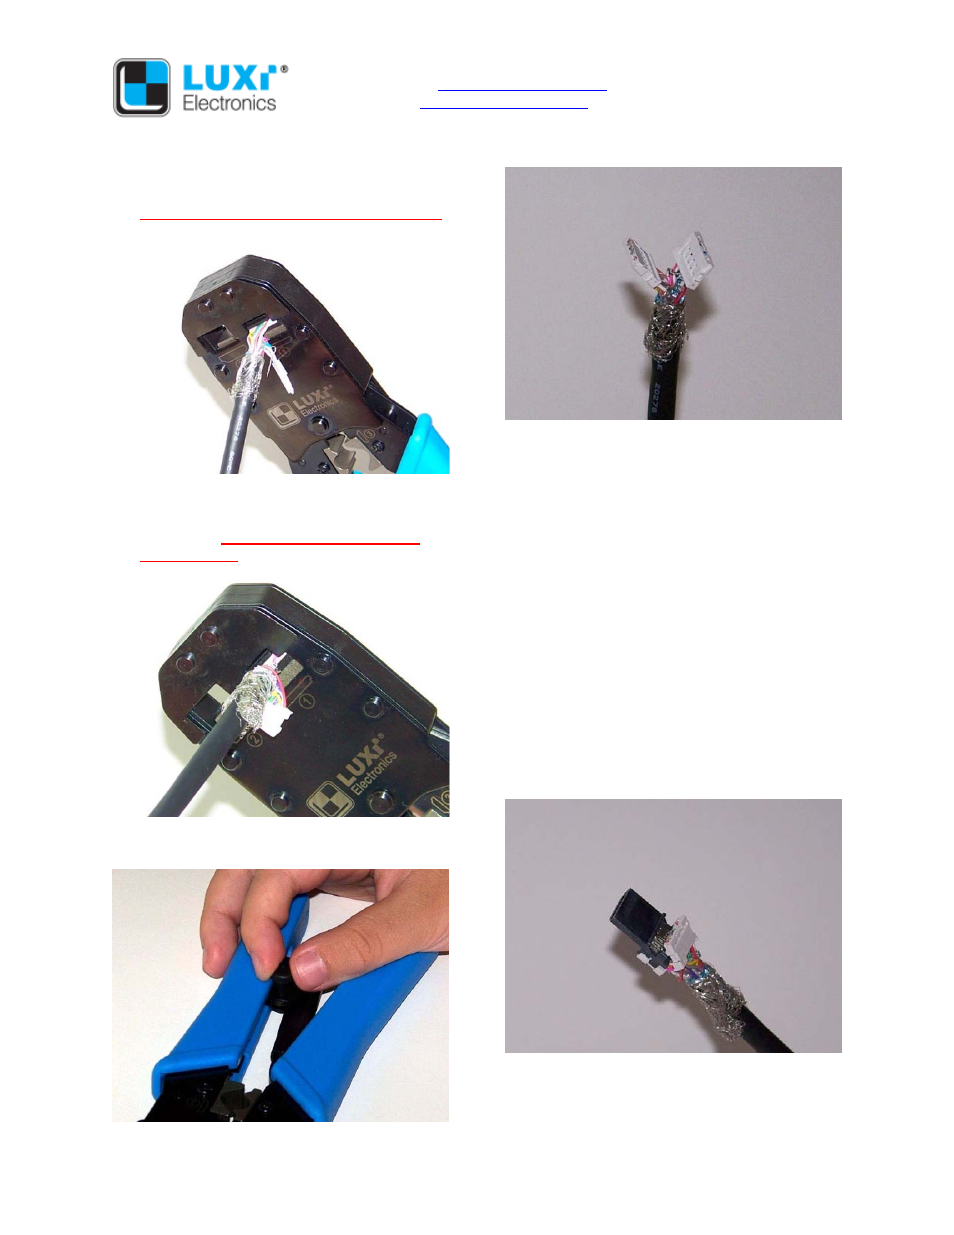
2.3 Insert one of the wire holders all the way into
No. 1 hole of the hand tool following the
marked orientation; perform a pre-crimp.
Inspect the wire ends for any potential short
2.4 Slide and line up the other wire holder to
about the same position; repeat the pre-
crimp to it.
Inspect the wire ends for any
potential short
2.5 This tool has a ratchet design. If you ever
need to release the latch, turn the thumb nail
in the marked direction
2.6 Check the finished wire holders
During the pre-crimp the recessed blade would
cuts off the wires and a tiny slice of the wire
holder; this is normal.
Check the cut wire ends for any potential short;
check the drain wires from 4 twisted pairs to
make sure they don’t touch each other, and
don’t touch the overall cable shield or won’t
touch the metal shells in the next step. Use
small piece of electric tape to cover it if
necessary. The touched drain wires may trigger
false reading of the tester (some LEDs might not
lit) but won’t affect overall signal performance.
Step 3, final assembling
3.1 Line up the two wire holders onto the
connector core; make sure the top holder
goes on top; inner side engage with the pins