System settings, Edit, Timeline – MacroSystem Smart Edit 8 Manual extension User Manual
Page 4
4
W
elcome to Smart Edit 8, the new generation software
for creative video editing . Smart Edit 8 comes with
countless new functions and intricate improvements,
which will help you to create more professional and sophisti-
cated video with your Casablanca editing system .
Having installed Smart Edit 8 on your Casablanca, you can
begin studying the following new possibilities, as detailed over
the next pages .
System Settings
Saving screen colors
The new Smart Edit software has improved and expanded
on the ability to change the system colors . Enter the System
Settings from the main menu, then go to Screen and Change
interface colors . Here, you will now find the already familiar
archives option for loading, saving and deleting archive entries .
Any color combination schemes can be saved here any time
and reloaded at a later stage . The archives already contain a
few standard color schemes to get you going .
Further settings
Select System Settings, the press “Additional Settings” to
enter a menu that allows you to make some basic set up
changes . The following new setting options have been added
with the new version:
`Volume´: This allows you to set the volume level for your con-
nected monitor . This is particularly useful for notebook models .
In many cases, notebooks also offer a volume control slider or
knob for setting the headphone volume level .
`Sound after creation´: This setting is used for choosing the
sound that is played whenever the system is done with render-
ing . In addition, you can set the minimum rendering time for
playing the sound . This function is useful if you wish to use
longer rendering times for doing other things and do not want
to miss the end of the rendering process .
`Show often used effects´: Place a tick in this box if you wish to
see the last ten effects used at the top of the effect list . This is
a kind of `favorites´ list . The list will not be shown if you remove
the box mark
Edit
In the Edit menu, to the right of the `i´ button
beneath the Storyboard, you‘ll find a new
button for starting the Storyboard render
process . This renders all Storyboard effects
as well as the audio . This gives you the ability
to play the Storyboard during editing without seeing any
unrendered parts .
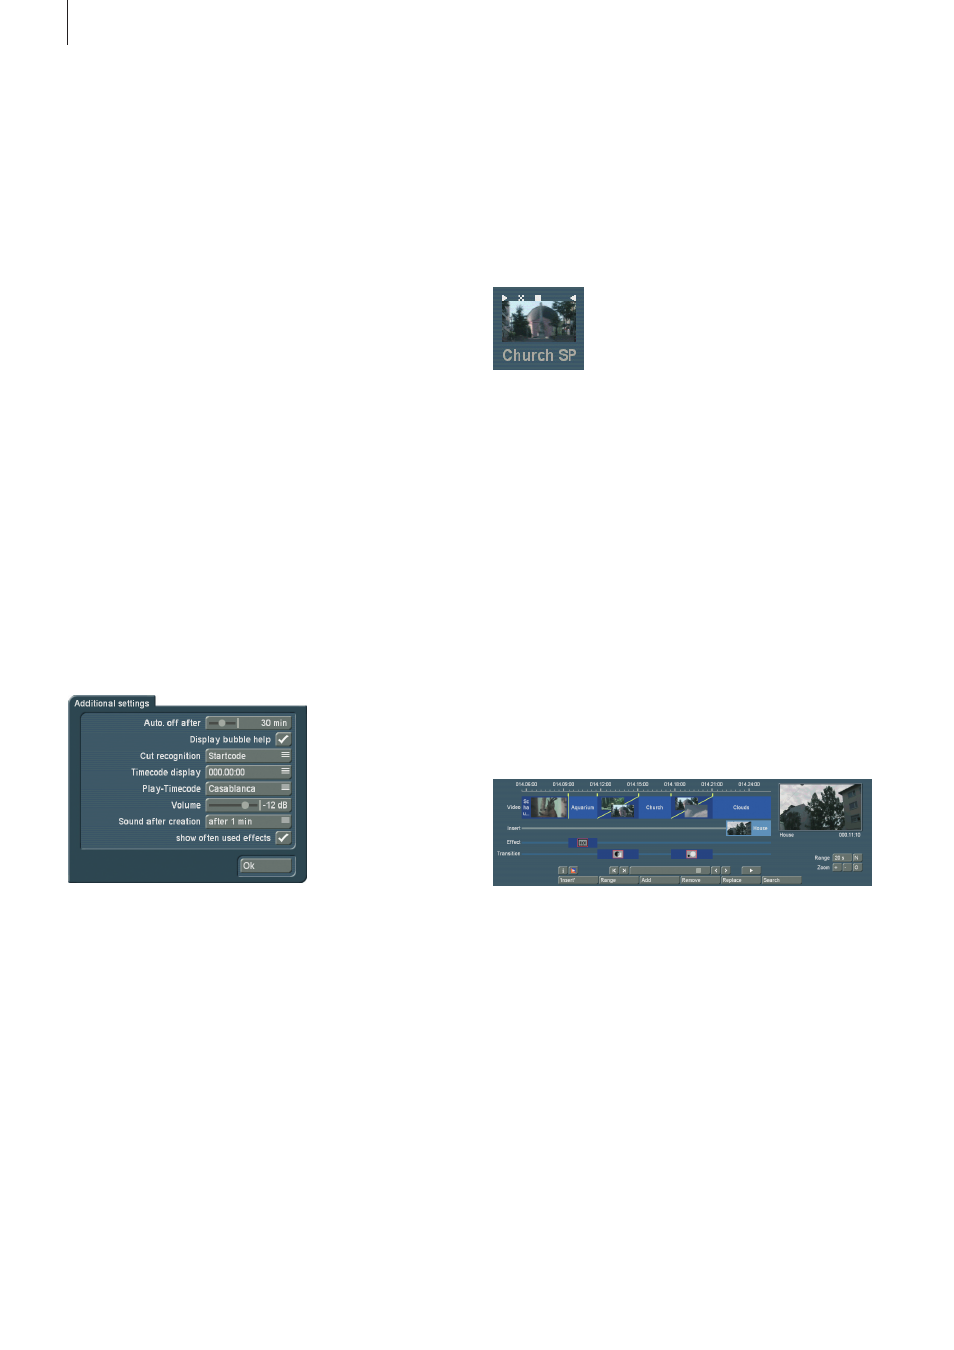
Scenes added to the Storyboard are marked with a small
triangle in the top right corner . This triangle replaces the small
dot used previously for this purpose . In addition to the triangle,
a scene in the scene bin can sport several different icons:
‚>‘ = The scene is trimmed in the IN area
‚<‘ = The scene is trimmed in the OUT area
‚x‘ = The scene is rendered, is an empty scene, has been
imported or contains rendered parts
‚^‘ = The scene is also used in the Storyboard
‚n‘ = The scene is marked
‚p‘ = This is the current scene
Timeline
With the new system software, you can make use of the
Timeline display as opposed to the Storyboard method . This is
often preferred by many professional video editors .
In the Storyboard, all added scenes are shown as a sequence
of pictures, each representing a specific scene . Effects, inserts
and titles are also shown as pictures in the Storyboard . This
allows for a very clean and uncluttered display of the sequence
of scenes and effects used . Important information such as the
length of the scene in relation to the entire Storyboard can not
be seen right away however .
When viewing the project as a Timeline, you instead see
scenes and effects as bars positioned on a time axis . The
length of the bars is shown in proportion to the length of the
entire project . In addition, you can compare scene lengths
directly with each other .
Effects and inserts are also shown as bars in the Timeline . In
order to improve the overview, they are shown as separate