Finish, Importing fonts, Audio editing – MacroSystem Smart Edit 8 Manual extension User Manual
Page 8: Combining audio tracks
8
sample to the audio list and name it `Mix´ . From here, you can
continue editing it .
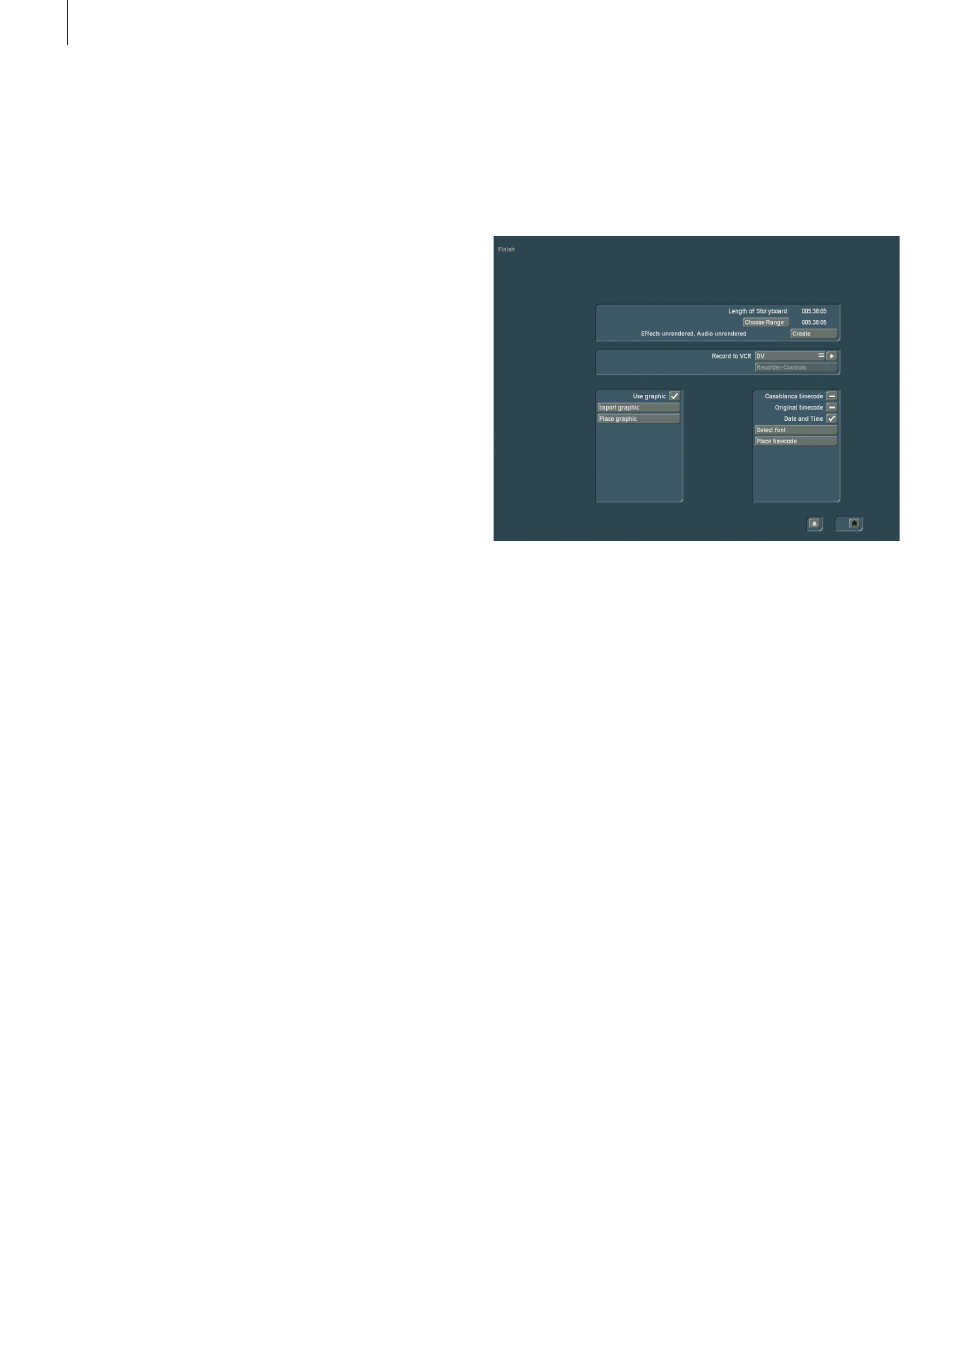
Finish
The lower part of the `Finish´ menu has been redesigned and
now offers the ability to add further overlays to your film . For
example, if you wish to add a logo to your film, or the recor-
ding date . These options are always set up for the current
project . Applying the overlay to a part of the film only is not
possible . This is only possible in DV projects, not HD projects .
You can import and position a graphic (a still image, no ani-
mation), or one of the available time formats . Use the following
settings:
`Use graphic´: Activate this function (place a tick) to render an
image into your film . The function uses the last imported image
until you import a new one . If there is no image available, you
will be asked to select one .
`Import graphic´: If you wish to use an image (format: png
–True Color) on a medium (e .g . CD, DVD, USB stick), connect
or insert the medium first . Then, press the button to import the
image . The selection menu allows you to choose from all of the
recognized mediums . Select the storage medium and press
OK . After this, you will see the contents of the medium so that
you can select the image and import it .
`Place graphic´: The last imported image can also be freely
positioned in the film . You can also alter the size of the image
and optimize the position . It is not possible to save multiple
images on your system . You must import an image from an
external medium .
`Casablanca timecode´: This displays the time code of the
film . The format used (mmm:ss:ff or hh:mm:ss:ff) depends on
the `Timecode display´ chose in System Settings > Additional
Settings .
`Move effect down´: This moves the currently selected effect
within the stack list to the bottom .
The effects are applied from the top to the bottom to the final
rendered effect . It is important in which order the effect list
is assembled . Moving effects up and down therefore has an
effect on the result . Every effect is influenced by the previous
effect . The moving preview is shown on the right menu side,
giving you an indication of your arrangement .
Importing fonts
In all menus which allow you to select a font type, you can now
also import a TrueType font . This expands on the available font
packages with single TrueType fonts from an external medium
such as a CD . Press `Import font(s)´ in the menu and select the
medium containing the fonts that you wish to import . Confirm
the selection and now choose from the available fonts them-
selves . This will result in a preview . Use the multi select func-
tion to choose more than one font for importing . The number
of fonts that you can import is limited to 100 . Once all required
fonts have been marked with a tick, click on OK and the import
will begin . Once finished, the fonts will be added to your font
list, carrying the font name . The symbol for such fonts is an `A´
with a superscripted `x´ in front .
If you want to delete any of these fonts, click onto `Delete
font(s)´, then mark the fonts in the menu and the confirm
with OK .
Audio editing
Combining audio tracks
You can combine multiple audio tracks to once single audio
piece . This is helpful to create space if all audio tracks are in
use and you wish to use another audio clip in the project . Use
the Opt button (the audio mix menu) to combine audio tracks .
The result is a new sample that is added to the selected audio
track . The combined audio tracks are deleted . The new sample
can also be saved in the audio clipboard as a backup .
The menu for `Merge tracks´ has the following options:
`Replace in Storyboard´: Activating this option (tick is placed)
the resulting sample is added to the selected audio track
automatically .
`insert to´: This allows you to set up in which audio track the
new sample is to be placed .
`Create sample´: Activate this button (place tick) to add the