Operators, Clipboard, Effect stack – MacroSystem Smart Edit 8 Manual extension User Manual
Page 7: Countdown
7
Smart Edit 8 Manual extension
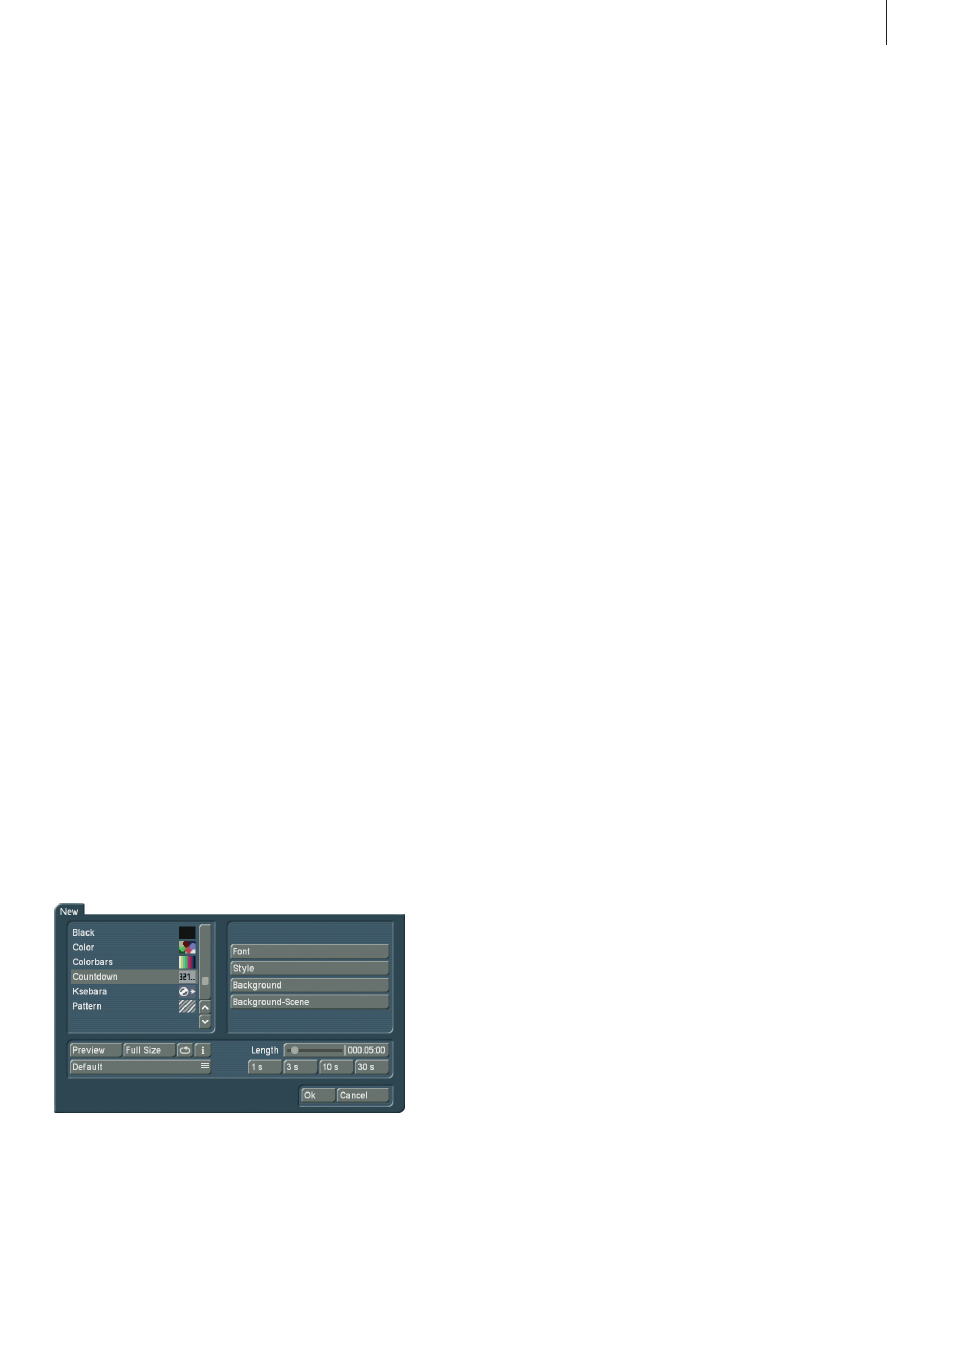
picture . The current project‘s scene bin will be shown, allowing
you to select a suitable image from the available scenes . If the
background scene is shorter than the countdown, the scene
will repeat . If it is longer, only the necessary part will be shown .
Clipboard
This button is a buffer for storing scenes and clips . Select the
`Clipboard´ to enter a selection menu that allows you to place
and recover scenes from and into your current project . The top
part of this menu contains a list of all available scenes in the
clipboard . When you enter this menu the very first time, the list
will be empty . The menu contains the following options:
Add actual scene: Add the currently selected scene in the
scene bin to the clipboard .
Add other scene: Add another scene (other than the selected
one) to the clipboard .
Add scene from different project: You can add any scene from
any other project to the Storyboard . First, select the project
and then the scene from the scene bin of the project .
Remove scene(s): This option is only active if you have marked
at least one scene in the list . All scenes marked with a tick are
then deleted .
Import scene(s): This option is only active if you have marked
at least one scene in the list . All scenes marked with a tick are
then imported into your project .
Options: Here, you can set if the trimmed parts of a scene
are also affected . In addition, there is an option for importing
scenes in a different format .
The clipboard for audio is used in the same fashion .
Effect stack
This effect allows you to bundle as many image processing
effects in a single rendering process and apply them in one
go . Open the setting menu for this effect . In the top left of the
menu, you‘ll find a list of the effects . There are also the follow-
ing menu points:
`Add effect´: Select an effect from the list of image processing
effects . This effect is then added to the effect stack .
`Remove effect´: Removes an effect from the effect stack .
`Move effect up´: This moves the currently selected effect
within the stack list to the top .
marked scenes by pressing `Delete´ . You will be asked if you
wish to delete merely the current scene or all marked scenes .
Press `All marked´ to delete all marked scenes . Use the `Undo´
button to restore the deleted scenes . Please note that you can
only restore the last 10 deleted scenes with this function . If you
deleted more scenes than 10, the remaining scenes
will be lost .
You can also mark scenes in the Storyboard, not just the
scene bin . You can do this in exact the same way as with the
scene bin .
The actions are themselves are done in the same fashion too .
Note that no scene should be activated when you want to pro-
cess an action in the Storyboard – otherwise the action menu
will remain inactive .
Marked scenes remain marked as long as you remain in the
edit menu . If you exit the edit menu, the marked scenes will be
unmarked .
Operators
Smart Edit 8 offers new effect operators . The Countdown
operator and the clipboard have been expanded in their func-
tionality . DVD-Arabesk has been moved to the main menu and
Ksebara is now found in the edit menu, under `New´ .
Every effect list is now divided into different parts: The top part
is the `favorites list´, separated with the division line . These are
the effects that have been used the most recently . The list con-
tains the 10 most used effects . It allows you to select the most
frequent effects faster . Underneath the line, you can find the
regular effect list, with all the effects installed . You can deac-
tivate the effect favorites if you like . To do this, enter System
Settings > Additional Settings, deactivate the tick `Show often
used effects´ . Place the tick again to activate the function .
Countdown
This function creates a countdown effect . For each second,
it shows a number counting backwards . You can change the
font and style used and even present a background picture .
If you want to show a background picture instead of a color
or pattern, set the alpha channel value to 0% . This makes the
selection translucent and allows you to select a background