Introduction, English, Foreword – Marantz DR6000N User Manual
Page 4: Warnings, Ce marking (only eu version), Equipment mains working system, How to connect a plug, Copyright
1
ENGLISH
Congratulations on the acquisition of your CD-Recorder. This
CD-Recorder now enables you to record, play and erase your
own audio Compact Discs. Naturally the recorder can also be
used to play all pre-recorded CDs.
With the exception of legal restrictions pertaining to copying,
you can now create your own high-quality audio recordings on
CD. The discs used to record must bear the logos shown be-
low. Copyright fees have been paid on these discs in some
countries. Recording on other types of discs (e.g. CD-R for pro-
fessional recordings) is not possible.
There are two types of recordable AUDIO discs:
CD-R(W) discs have a compatibility to play/record on the CD-
Recorders based on the ORENGE BOOK Part II/III. But the
discs might not be able to be played/recorded properly depend-
ing on the combinations of the discs and CD-Recorders.
1
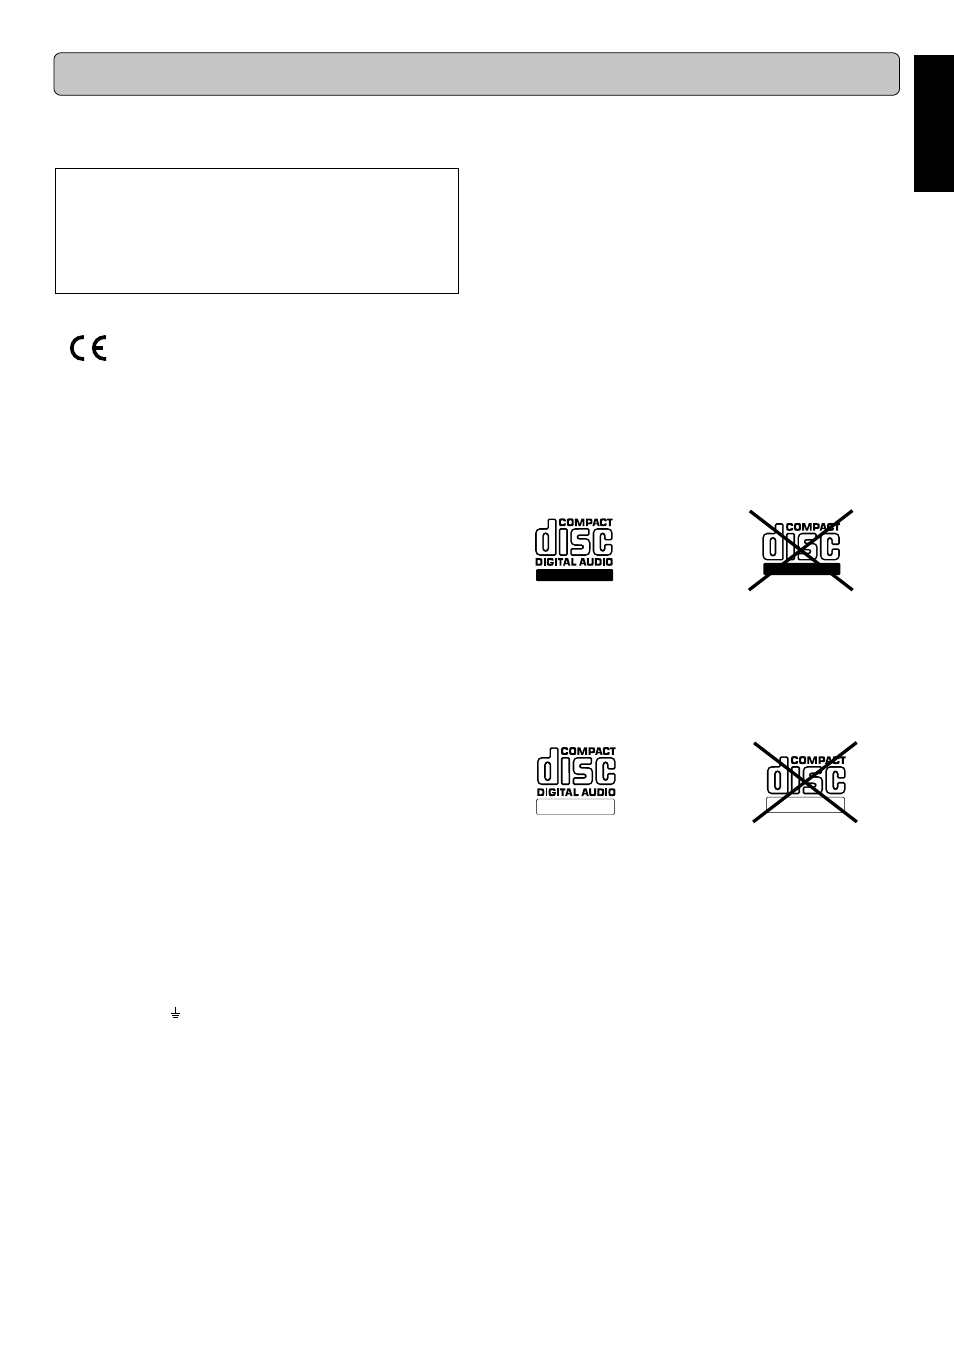
CD Recordable Audio (record once):
Fully recorded and subsequently finalized audio CD-R discs
can be played on CD players and recorders that are suitable
for CD-R discs. A CD-R disc can be recognized by the fol-
lowing logo:
2
CD ReWritable Audio (multiple recording):
Recorded and finalized audio CD-RW discs can be played
on CD players and recorders that are suitable for CD-RW
discs. An increasing number of players and recorders will be
suitable for these discs in the future. A CD-RW disc can be
recognized by the following logo:
The CD-R(W)disc for ‘DIGITAL AUDIO’ can be both recording
and playing on this CD-Recorder. In addition, this CD-Re-
corder can play the CD-R(W) disc for ‘PROFESSIONAL RE-
CORDING’, but cannot record it.
Once you start using the recorder, you will discover how easy it
is to ‘make’ your own CDs. Nevertheless, we recommend that
you use an erasable (CD-RW) digital audio disc on your first
attempt, while following the instructions given here.
Attention!
Recordings may only be made for personal use.
It is forbidden to copy material protected by copyright, in-
cluding computer programs, films, television and audio
recordings. This appliance may not be used for applica-
tions of this type.
Note:
Some CD players can not play the finalized CD-R(W) discs be-
cause of the low reflectivity of such discs.
Because of laser power differences, some DVD players cannot
play the finalized CD-R(W) discs.
Read the text carefully and keep the instructions close at hand
so that you can refer to them if necessary.
Recordable
Recordable
INTRODUCTION
Foreword
This section must be read carefully before any connection is
made to the mains supply.
WARNINGS
Do not expose the equipment to rain or moisture.
Do not remove the cover from the equipment.
Do not insert anything into the equipment through the
ventilation holes.
Do not handle the mains lead with wet hands.
CE marking (only EU version)
This product is in conformity with the EMC directive
and low-voltage directive.
Equipment mains working system
Your Marantz product complies with the household power and
safety requirements in your area.
“/N1” Version product can be powered by 230 V AC only.
IMPORTANT: (FOR U.K. version only)
This apparatus is fitted with an approved moulded 13 Amp plug.
To change a fuse in this type of plug proceed as follows:
1. Remove fuse cover and fuse.
2. Fix new fuse which should be a BS1362 5A, A.S.T.A. or BSI
approved type.
3. Refit the fuse cover.
If the fitted plug is not suitable for your socket outlets, it should
be cut off and an appropriate plug fitted in its place.
If the mains plug contains a fuse, this should have a value of
5A. If a plug without a fuse is used, the fuse at the distribution
board should not be greater than 5A.
Note :
The severed plug must be destroyed to avoid a possible shock
hazard should it be inserted into a 13A socket elsewhere.
HOW TO CONNECT A PLUG
The wires in the mains lead are coloured in accordance with the
following code:
BLUE—“NEUTRAL” (“N”)
BROWN—“LIVE” (“L”)
1. The BLUE wire must be connected to the terminal which is
marked with the letter “N” or coloured BLACK.
2. The BROWN wire must be connected to the terminal which is
marked with the letter “L” or coloured RED.
3. Do not connect either wires to the earth terminal in the
plug which is marked by the letter “E” or by the safety
earth symbol or coloured green or green-and-yellow.
Before replacing the plug cover, make certain that the cord grip
is clamped over the sheath of the lead — not simply over the
two wires.
Copyright
Recording and playback of some material may require permis-
sion. For further information refer to the following:
-
Copyright Act 1956
-
Dramatic and Musical Performers Act 1958
-
Performers Protection Acts 1963 and 1972
-
Any subsequent statutory enactments and orders
ReWritable
ReWritable