ONICON D-100 N2 User Manual
Page 11
11451 Belcher Road South, Largo, FL 33773 • USA • Tel +1 (727) 447-6140 • Fax (727) 442-5699 • [email protected]
D-100-N2 Network Interface Installation Guide 05/14 - 0659-4 / 18344
Page 11
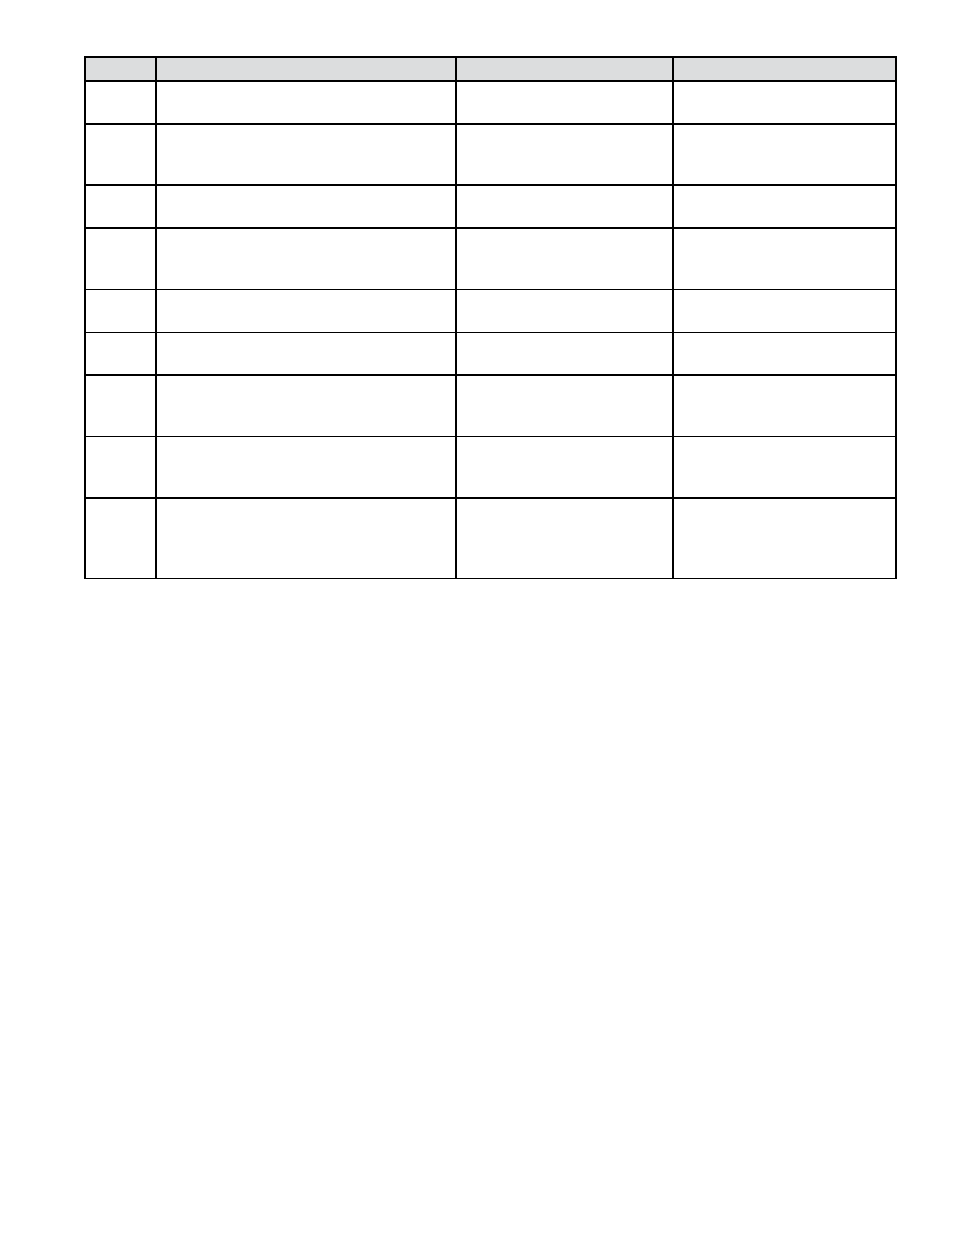
STEP
ACTION
REACTION
COMMENT
5
Press the RESET button.
The second character blinks.
The RESET button is on the
front panel.
6
Successively press the SCROLL
button to increment the number to
the desired value from 0-9.
The number increments by
one each time you press the
button.
The SCROLL button is on the
front panel.
7
Press the RESET button.
The third character blinks.
The RESET button is on the
front panel
8
Successively press the SCROLL
button to increment the number to
the desired value from 0-9.
The number increments by
one each time you press the
button.
The SCROLL button is on the
front panel.
9
Once the correct value has been
entered, press PROGRAM.
The FRONT PANEL RESET
page appears.
It is not necessary to change
anything on this page.
10
Press the PROGRAM button.
The SAVE CHANGES page
appears.
The new device address
must be saved to take effect.
11
Press the SCROLL button.
The N changes to Y on the
SAVE CHANGES page.
The Y must be selected in
order for the new address to
take effect.
12
Press the PROGRAM button.
The new address is saved
and the display reverts to
the RUN mode.
13
Open the front panel and locate the
RESET switch. Press to reset the D-100.
When polled, the D-100
will automatically begin
to communicate with the
network.
RESET is located along the
top of the processor board.
(See appendix page.)