Setting up the l-350 as a tabber, Fan-folded tabs, Figure 5 – Rena L-350 User Manual
Page 8: Figure 4 figure 5 figure 5a
-6-
Figure 5a
Tabs Only
Figure 5
Labels/Stamps
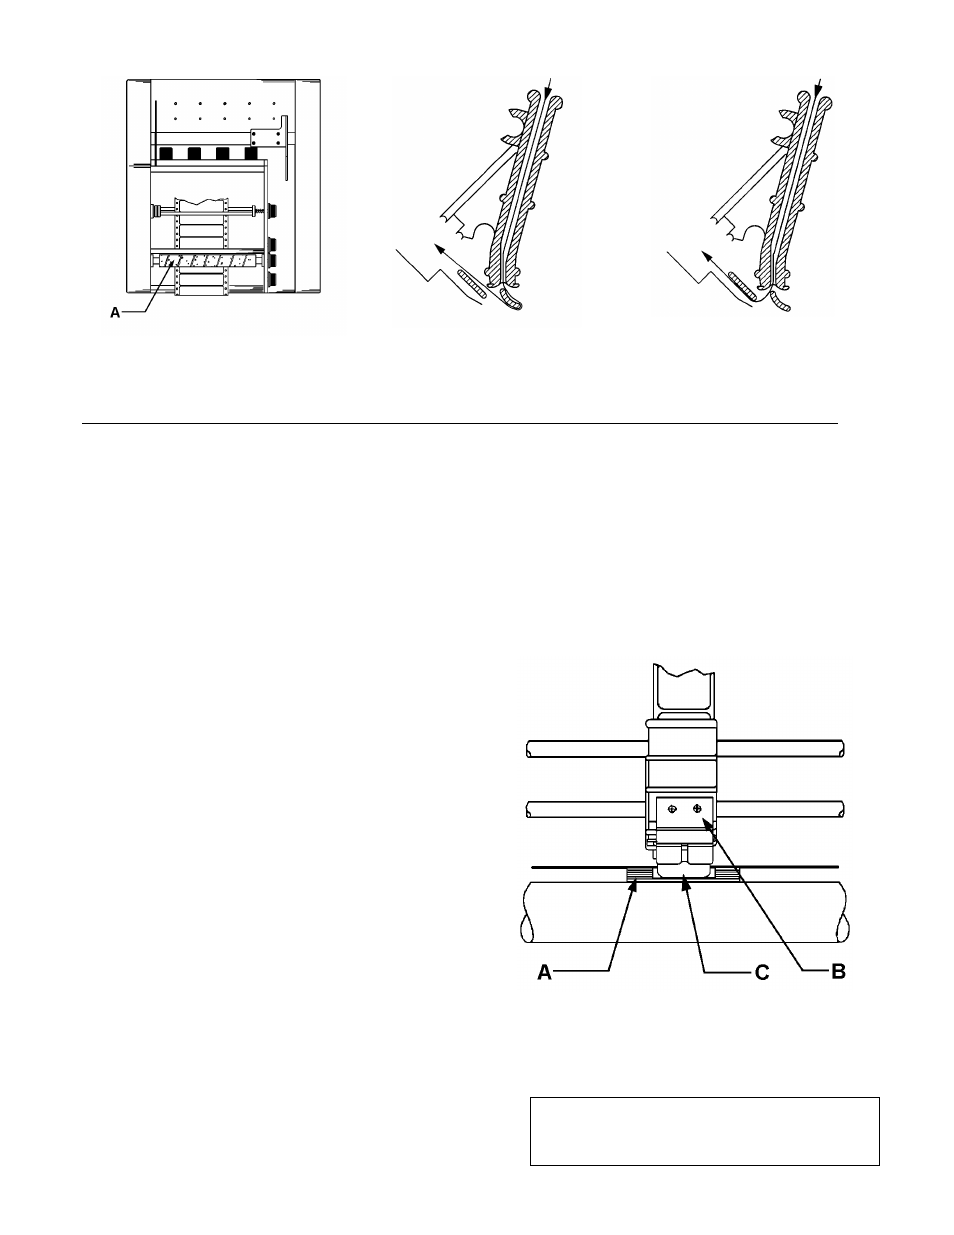
SETTING UP THE L-350 AS A TABBER
FAN-FOLDED TABS
1. Remove the top exit roller from the plastic brackets.
2. Place a stack of fan-folded tabs on the tray with the tabs facing up.
3. Remove the first nine inches of tabs from the backing paper to form a leader.
4. Disengage the label advance rollers [Figure 4A] by turning LABEL PRESSURE knob
[Figure 3A] to the OFF position.
5. Thread the tabs into the L-350 following the TAB THREADING DIAGRAM [Figure
5a].
6. Position the tabs by moving the entire
stack to desired location. Loosen the
guides [Figure 3B] and align them
with the stack of tabs.
7. Tighten guides.
8. Pull the backing paper until the first
tab starts to peel off.
9. Slide folding guide spring [Figure 6A]
to a position directly below sensor
guide [Figure 6B].
10. Turn the LABEL ADVANCE [Figure 3D]
COUNTER-CLOCKWISE until a tab is in
the slot [Figure 6C].
11. Align folding guide spring [Figure 6A] so that
the tab is centered in the slot {Figure 6C].
12. Remove tab from the slot and reinstall media pressure roller.
13. Set media height by adjusting MEDIA THICKNESS knob [Figure 3E].
14. Position tab/label switch to T position.
Figure 6
Figure 4
Figure 5
Figure 5a
Label/Stamp
Tabs
Tip: The Right Media Side Guide should be
installed; if you are trying to apply a label
within one inch of the outer edge of the media.