Caution, Warning, Headlight – Royal Vacuums UR30085 User Manual
Page 26: Belt
13
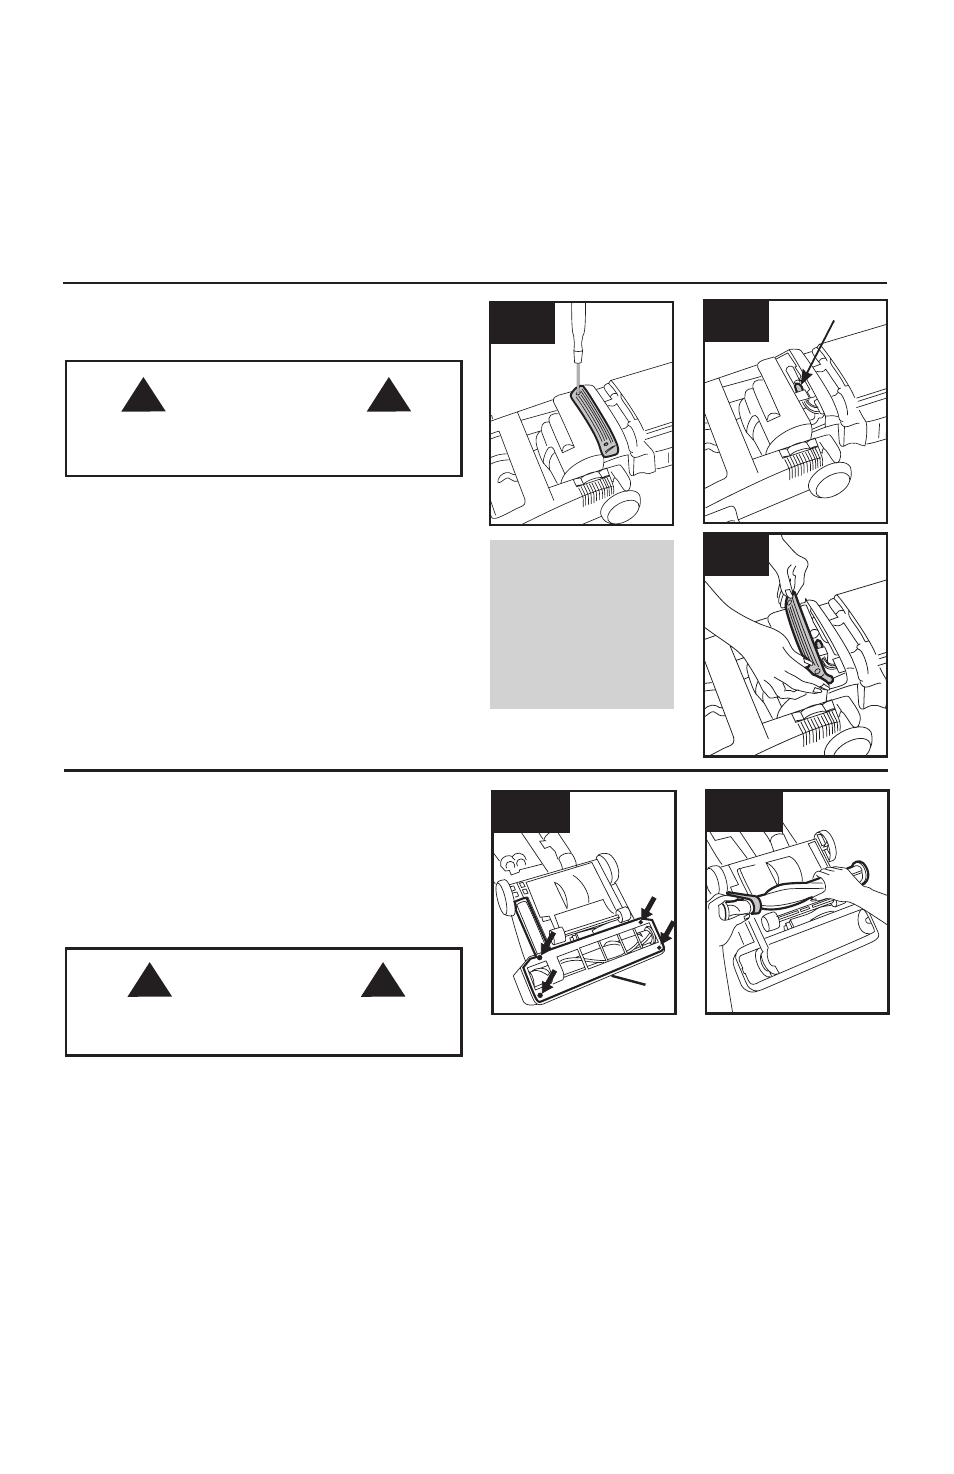
removing lens
4.7 Using a screwdriver, remove the two screws as
shown and lift off lens.
installing bulb
4.8 Pull old bulb straight out of socket. Push new bulb
straight into socket until locked in place.
Excessive force is not required.
replacing lens
4.9 Reposition lens and secure with the two screws.
headlight:
how to replace
What to buy
This cleaner uses a
12 volt, wedge base
type 912 bulb, Royal
®
part No. 27313-101.
4.7
4.8
4.9
Check agitator shield
Because your cleaner picks up so well, we strongly recommend you check for debris accumulation under the agitator shield
each time you clean the filters.
Removing debris under the shield will help maintain your cleaner’s excellent pick up and suction. Remove debris as
follows:
1. Disconnect cleaner from electrical outlet.
2. Check for dirt accumulation by removing bottom plate (Fig. 4-10), removing agitator (Fig. 4-11), and lifting
agitator shield (Fig. 4-13).
3. Remove any debris and replace shield, agitator and bottom plate (Figs. 4-13 to 4-15).
belt:
how to replace
The belt on your Royal cleaner causes the agitator to rotate
and is important for the effective operation of the cleaner.
The belt is located under the bottom plate of the cleaner
and should be checked from time to time to be sure it is in
good condition.
CAUTION
!
!
To reduce the risk of injury from moving parts,
unplug vacuum before servicing.
When to replace
To check belt, remove bottom plate as shown in “How to
replace”. Replace belt if it is stretched, cut or broken.
how to replace
Place handle in low position and turn cleaner over so bot-
tom side is up.
4.10 Remove the 4 screws as shown with a Phillips
screwdriver.
Lift off bottom plate (A).
4.11 Remove agitator brushroll and used belt.
Discard used belt.
4.10
A
4.11
WARNING
!
!
To reduce the risk of electric shock, unplug vacuum
before cleaning or servicing.