Super Systems SuperDATA Installation User Manual
Page 4
Super Data Workstation
Page 4
Installation Procedure
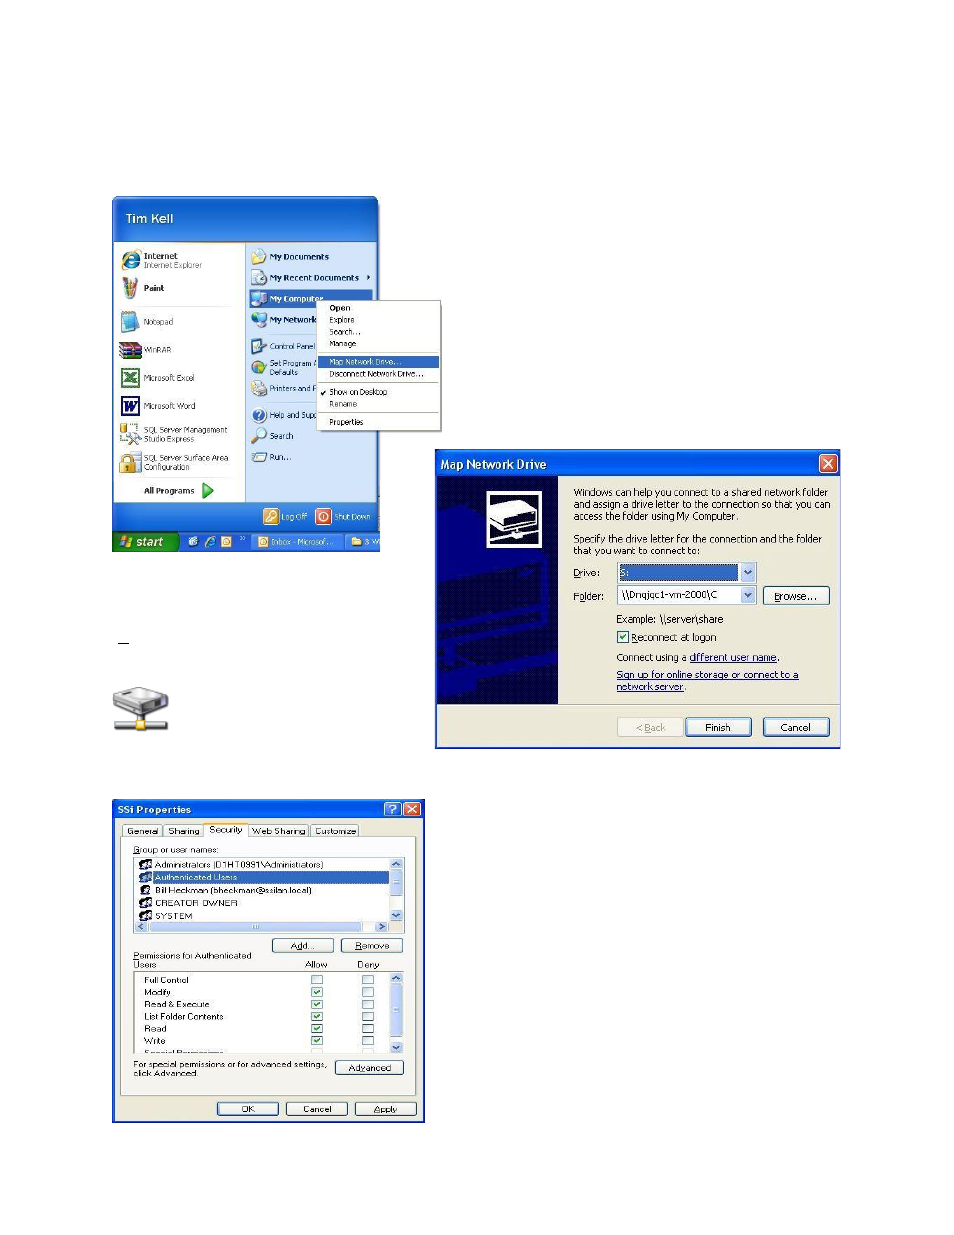
1. Map the Super Systems computer on the network as Drive “S”.
The first step in installing Super Data on the workstation is to map a network drive pointing back to the
Super Systems computer.
From the Start Menu, right-click on the “My Computer”
menu item and select the “Map Network Drive…”
option.
If the “My Computer” menu item is not present, the
user can also right-click on the “My Computer” icon on
the desktop and select the “Map Network Drive…”
option.
This will display the
Map Network Drive
screen. The drive letter can be selected
from the first drop-down list next to
“Drive:”. If drive “S” is available, select that
drive. If drive “S” is not available, there will
be a path next to the drive letter, and there
will be a network drive icon with
that letter in the “My Computer”
screen.
It is not necessary to map the drive as “S”,
however, it is suggested to use drive letter “S”, if it is available. If another drive letter must be used, it is
suggested that the user start toward the end of the alphabet, which is at the top of the drop-down list,
since Windows will normally assign drive letters to any
new device (USB flash drive, etc) starting with the next
available drive letter from the beginning of the alphabet.
Click on the Browse button and browse to the Super
Systems Inc Super Data server PC and use the root drive
that contains the “SSi” folder.
Note: The “SSi” folder is
normally stored on the “C” drive of the server PC.
The
path will resemble the “Folder:” section above -
\\<Computer>\C, where <Computer> is the name of the
Super Data server PC.
Click on the Finish button.
It is recommended to ensure that any users on the
workstation will have full access to the server’s “SSi”
folder. Navigate to the server’s “C” drive and right-click
on the “SSi” folder. This will display a sub-menu. Select
“Properties”. From the
SSi Properties
screen, click on the
“Security” tab. Select the “Authenticated Users” item and