6" & 7" two-piece full contoured cover, Covers for 9" ledge pools – Swim'n Play Slim Style Oval Pool User Manual
Page 28
28
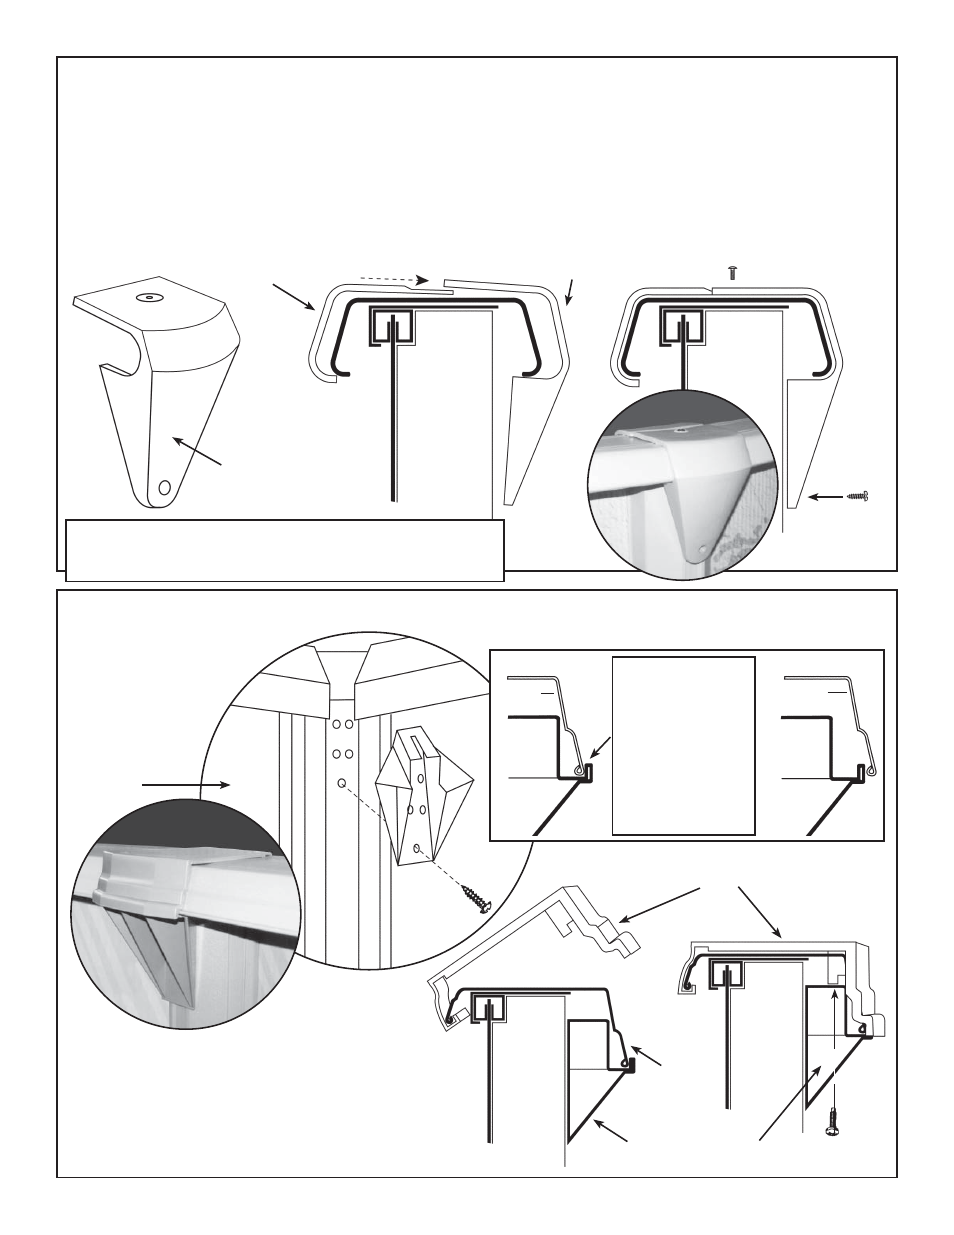
6" & 7" TWO-PIECE FULL CONTOURED COVER
Slide inside cover (the cover which will be closest to the inside of the pool) into position and
place outside cover onto top of inside cover aligning the holes together with cage nut attached to
the top plate and secure using the 1/4”-20 x 3/4” screw provided. The two (2) edges of the covers
should be parallel. Before tightening the screws, press the two covers firmly together.
Line up the hole in bottom of cover with the hole in the vertical and fasten securely using the
No. 10 x 1” self tapping sheet metal screw provided.
INSIDE COVER
OUTSIDE FULL
CONTOURED COVER
OUTSIDE
FULL CONTOURED
COVER
1/4”-20 X 3/4”
STAINLESS STEEL SCREW
If your pool vertical does not have a hole, simply use the cover
as a template and drill through the vertical using a 9/64"
diameter drill bit, being careful not to damage the pool wall.
#10X1” SELF
TAPPING SCREW
1/4”-14x1” SELF
TAPPING SCREW
COVERS FOR 9" LEDGE POOLS
NOTE: CAGE NUTS AND TOP COVER
SCREWS NOT NEEDED FOR THIS STYLE.
Using a #10 x 1"
sheet metal screw,
attach the bottom
cover to the
vertical using
the hole shown
at right.
TOP COVER
COVER BOTTOM
LEDGE
It is very
important
that the ledge be
fitted inside the
tab in the
bottom cover as
shown below.
Make sure that the
ledge remains in
this position.
CORRECT
INCORRECT
LEDGE
LEDGE
COVER
BOTTOM
COVER
BOTTOM
Hook the underside inside part of the top
cover under the ledge as shown. Then lower the
top cover until it rests evenly on the ledge. Place
a ¼"-14 x 1" self-tapping screw through the slot
in the bottom cover and screw into the hole in the
top cover. Be careful not to overtighten!