Optima 40 - sb – Archgard 40-DVI40N User Manual
Page 13
Optima 40 - SB
13
SURROUND INSTALLATION
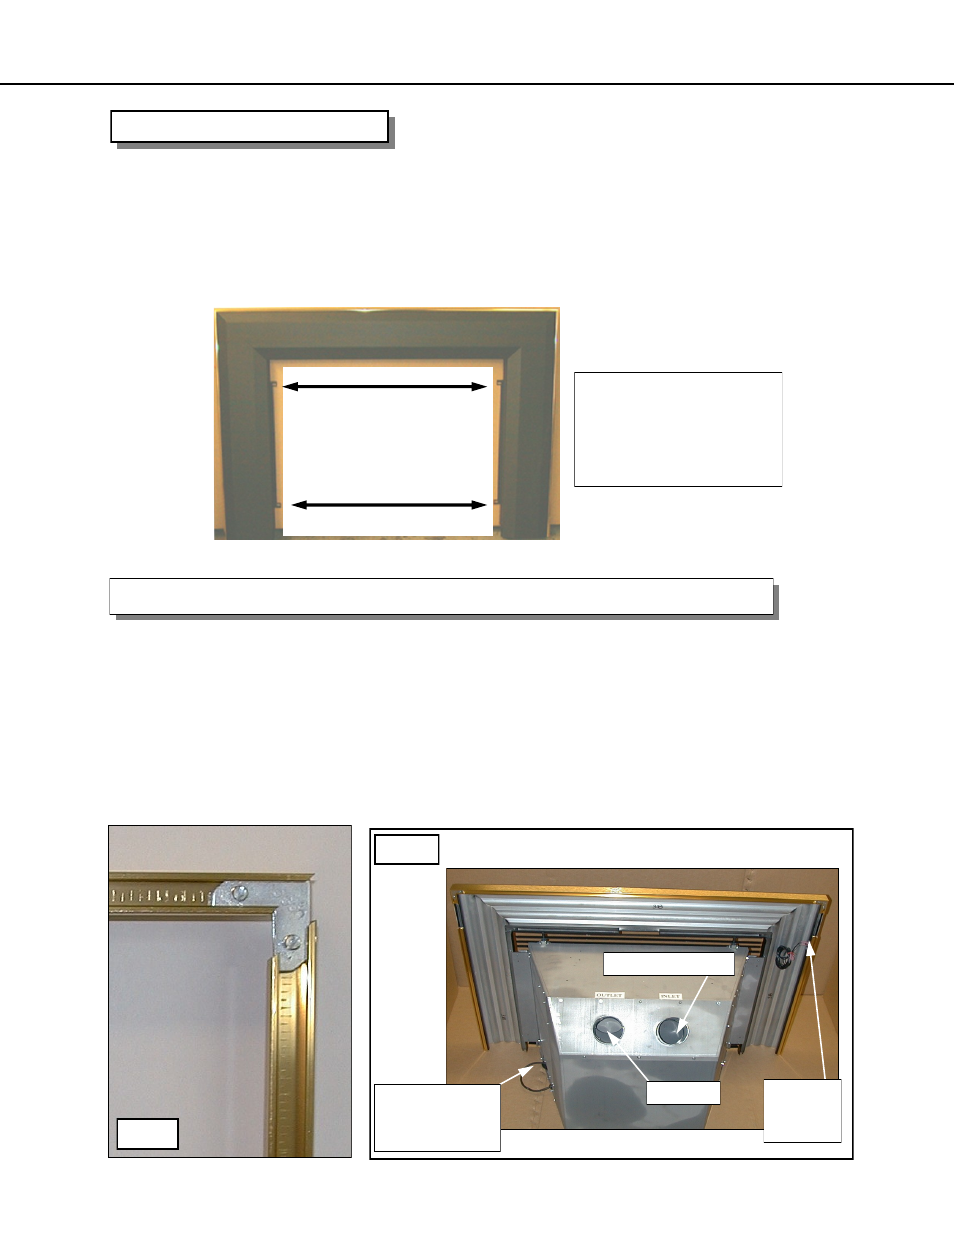
Make sure the gas and electrical lines are properly connected to the appliance. Slide the unit
into the fireplace and slide the excess flue liner material back onto the chimney. Before the
appliance is fully recessed into the fireplace attach the surround onto the appliance. The return
flange on the side of the surround fits on the inside of the mounting rails on the appliance.
Attach the surround to the appliance at the locations shown with the four (4) screws provided.
Then finish with the wiring connection to the on/off switch on the side of the trim. Now fully
“seat” the unit into its final position.
SCREW
LOCATIONS
CAUTION:
Only trim kit (s) supplied
by the manufacturer may
be used in the installation
of this appliance.
1. Using the trim clips provided, join the left side trim (which has notch cut for rocker switch)
to the top trim as shown in Fig.1. Repeat with the right side trim.
2. Peel the backing from the sticky tape, then slip the assembled trim over the surround.
3. Locate the rocker (on/off) switch (with the ON side up) and push it in the notch located on
the left side.
4. Remove the coiled wires from the left side of the firebox and connect it to the rocker
switch tabs.
5. The switch wires have crimped connections that are factory installed. Simply connect the
crimped connections to the on/off (rocker) switch located on the surround.
TRIM INSTRUCTIONS FOR THE SKBAB, SKCAB & SKLB SURROUNDS
Fig. 1
Fig. 2
Fresh Air Intake
On/Off
Rocker
Switch
Exhaust
Gas Inlet side
and power cord
outlet