Jpeg2000 stand alone dvr user guide, 6 client software operation – ARM Electronics JHD User Manual
Page 51
JPEG2000 Stand alone DVR User Guide
- 51 -
6-6 Client software operation
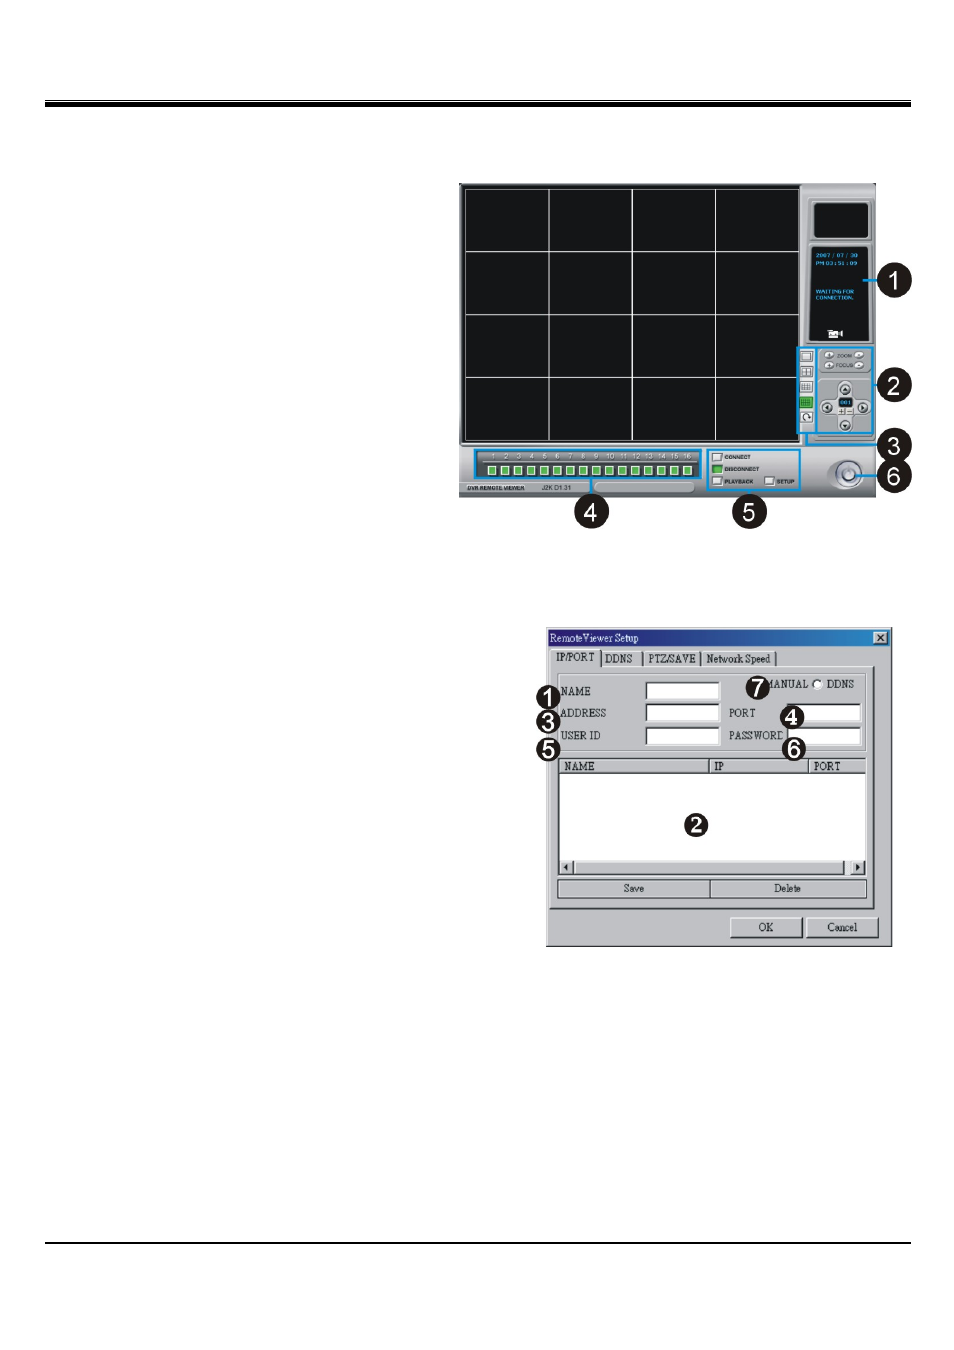
[Remote viewer interface]
1.[Status window]
To show the current status.
2.[PTZ Camera Control]
To control PTZ Camera Zoom/Focus/Direction.
3.[Screen Split]
To select Full/4/9/16 split screen display.
4.[Channel Selection]
To select CAM1~16 when full or split screen
display.
5.[Connect/Disconnect/Playback/Setup]
CONNECT- Connect to DVR
DISCONNECT- Stop the connection with
DVR.
SETUP- To enter the setup.
6.[Power]
To close the remote program. The connection to the DVR will break off after the remote software is closed.
6-6-1 Client software setup
[IP/PORT]
1.DVR NAME]
Enter the DVR’s location or name.
2.[IP LIST]
Show the list of saved DVR IP addresses. If you are
connecting to a DVR in this list, you can simply click it
from the list, enter the DVR Admin’s password, and press
SAVE and then OK. Click CONNECT from Remote Viewer
Interface to connect.
3.[IP ADDRESS]
Enter the DVR’s IP address.
If the DVR is connected to a router, you have to enter a real IP address, instead of using a virtue IP address.
4.[PORT]
Enter the DVR’s port number.
5.[USER ID]
Eenter the user ID as “ADMIN”.
6.[PASSWORD]
Enter the DVR Admin’s password.
7.[MANUAL/DDNS]
If you have static IP address or are not using DDNS service, select MANUAL. If you are using DDNS service,
select DDNS and click the tab DDNS on the top and enter DDNS setup page.