Jpeg2000 stand alone dvr user guide, Appendix.5 router setup, Network installation and setup – ARM Electronics JHD User Manual
Page 67
JPEG2000 Stand alone DVR User Guide
- 67 -
Network installation and setup
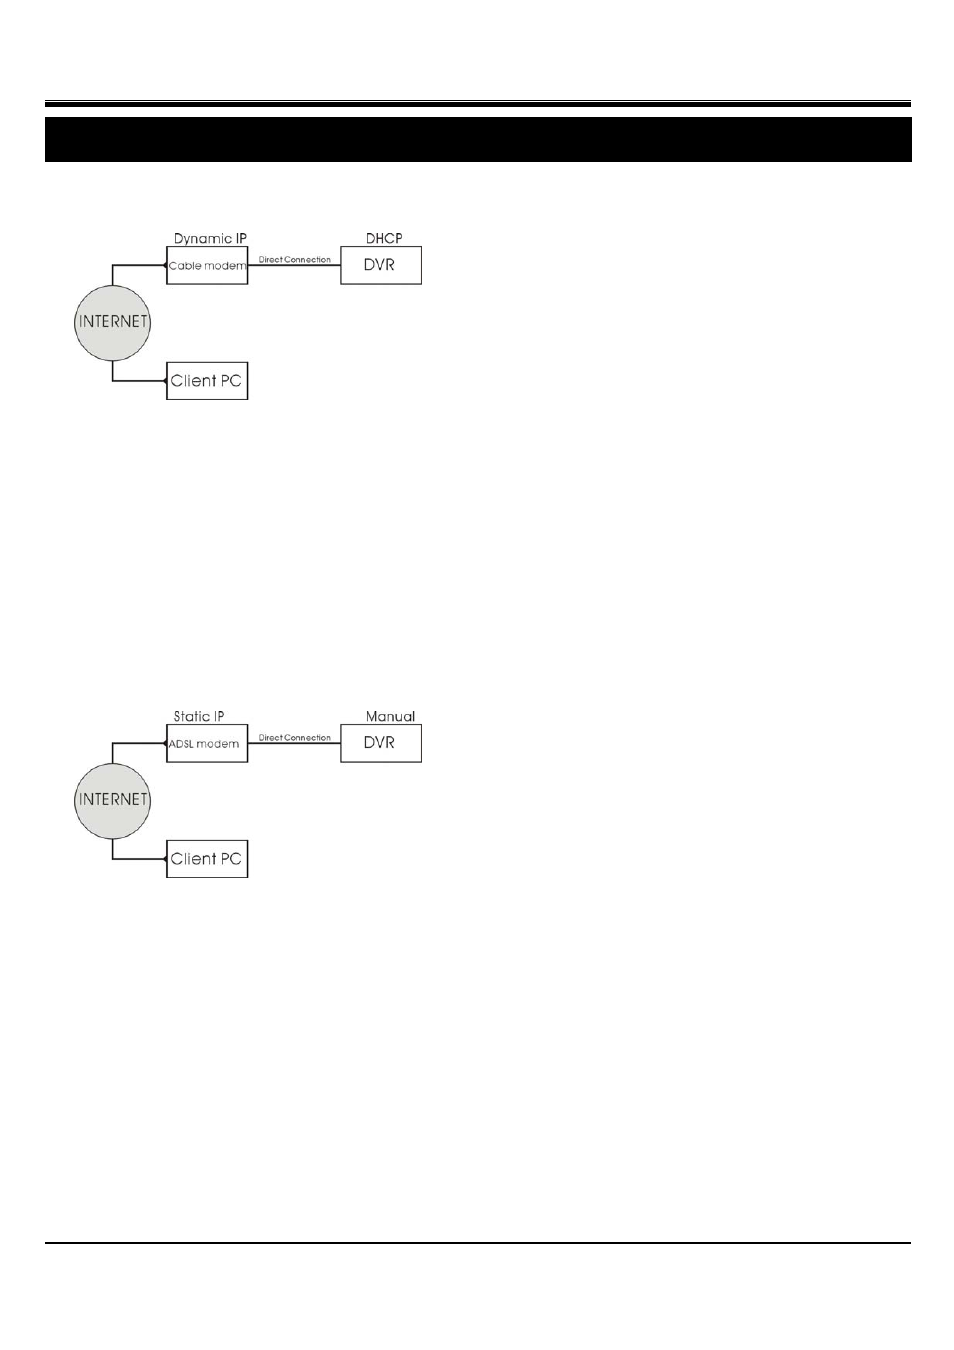
[Via Cable]
Connect the Network cable of Cable Modem output to DVR.
Enter [SYSTEM MENU]f [EXTERNAL DEVICE] f [TP/IP SETUP]f[DHCP SETUP]f[DHCP MODE].
Place the cursor at DHCP MODE and press ENTER to switch the DHCP MODE to [AUTOMATIC]. Then,
move the cursor over [DETECT IP] and press ENTER to detect IP. DVR will automatically get the IP ADDRESS,
SUBNET MASK, and GATEWAY from the Cable Modem and shows the IP information on the DVR.
Press MENU and go back to the previous setup page, [TP/IP SETUP]. Go to [IP CONFIG SETUP] to set up the
port number. You can either use the default port number or assign a new one.
[Via ADSL]
First, identiry if you have Static IP or Dynamic IP service. If you do not know, ask your ISP (Internet Service
Provider). If you have Static IP, your ISP should provide you a static IP address, which will never change even
when you reboot your modem.
[Via ADSL with Static IP address]
Connect the Network cable of Cable Modem output to DVR
Enter [SYSTEM MENU]f [EXTERNAL DEVICE] f [TP/IP SETUP]f [IP CONFIG SETUP]. Enter the IP
address, gateway, subnet mask provided by your ISP. Then, assign a port number to the DVR, or you can use
the default one as well.
If you find that you cannot enter or change any addresses, check if DHCP is set to Automatic. Press MENU to
go back to the previous page, [TCP/IP Setup], and then enter [DHCP SETUP]. Select DHCP MODE and press
ENTER to switch DHCP to MANUAL
In some very rare cases, we found the DVR did not support certain Static IP Addresses. If it happens, add a
Router to the network system. The setup is the same as the next session, [Via ADSL with Dynammic IP.]
Appendix.5
Router setup