Figure 11 – H3C Technologies H3C WA2600 Series WLAN Access Points User Manual
Page 19
Advertising
13
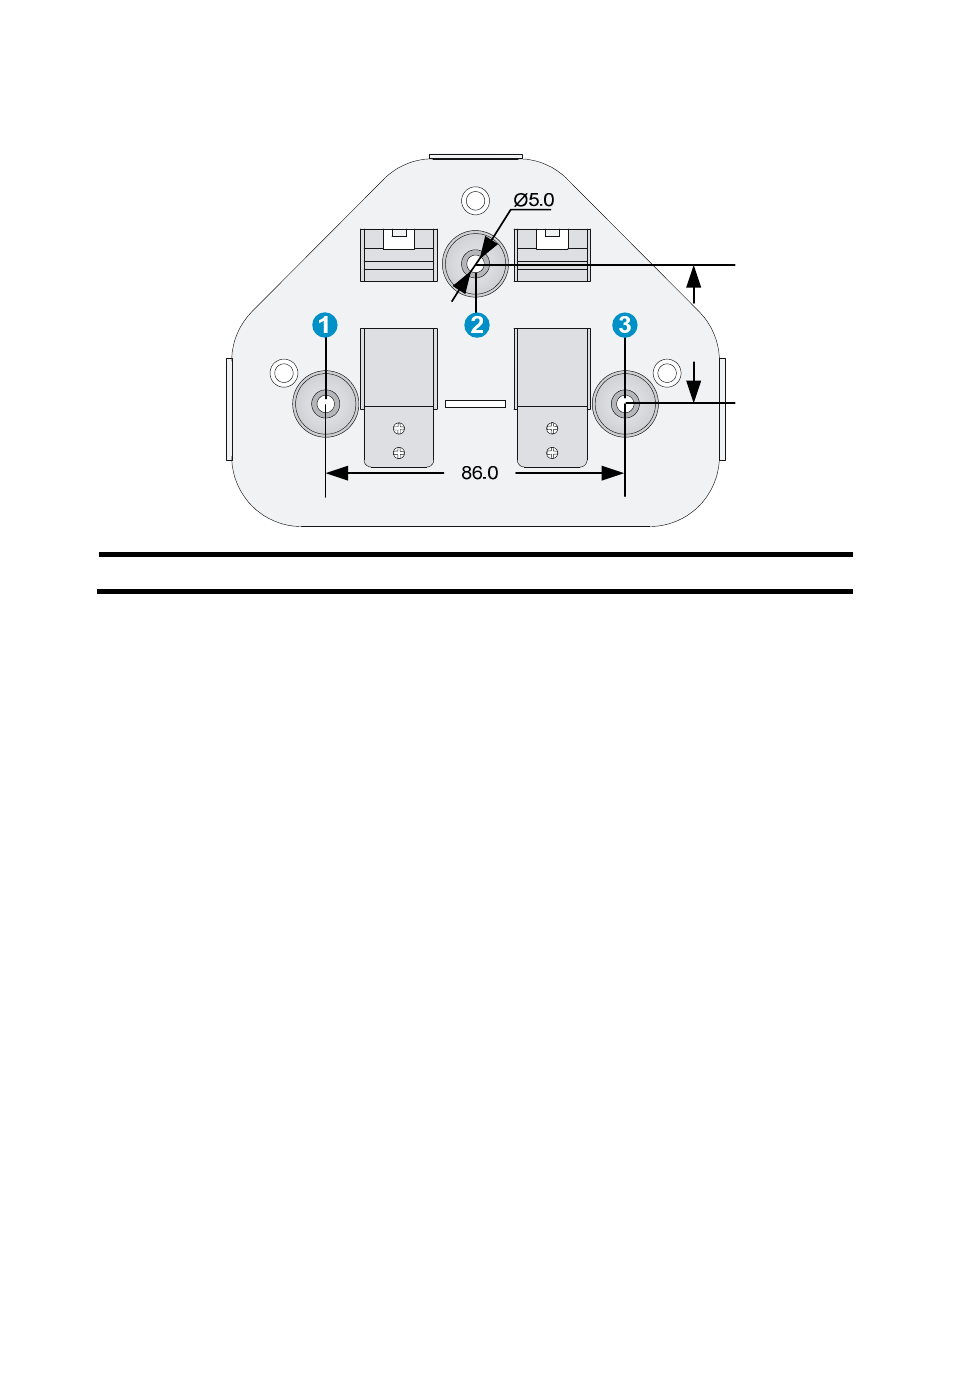
Figure 11 Bolt holes on the wall-mounting bracket (in mm)
(1) through (3) Bolt holes
To install the AP on a ceiling:
1.
Drill two 5.0 mm (0.20 in) diameter holes in the ceiling where you want
to mount the AP. The distance between the two holes must be the same
as the distance between the two bolt holes on the mounting bracket.
2.
Insert the hex-head bolts into the bolt holes on the mounting bracket and
the holes in the ceiling. From above the ceiling, fasten the hex nuts to the
hex-head bolts to fix the mounting bracket to the ceiling.
3.
Connect the AP to the network by using an Ethernet cable.
4.
Install the AP to the wall-mounting bracket. For more information, see
“
.”
40.0
Advertising