Front module installation – Grass Valley 8985FS v.1.3.2 User Manual
Page 18
18
8985FSP/FS — Instruction Manual
Installation
Front Module Installation
After installing the rear module and the Genlock submodule if required,
and setting the Frame bus jumpering if required, install the front module as
follows:
1.
Remove the front cover of the frame if required.
2.
Locate the corresponding front slot.
3.
Set the on-board jumper Local/Remote jumper, J5 on the module circuit
board, for local and remote operation (LOC/REM position, pins 2-3) or
to lock out remote control (LOCAL position, pins 1-2).
4.
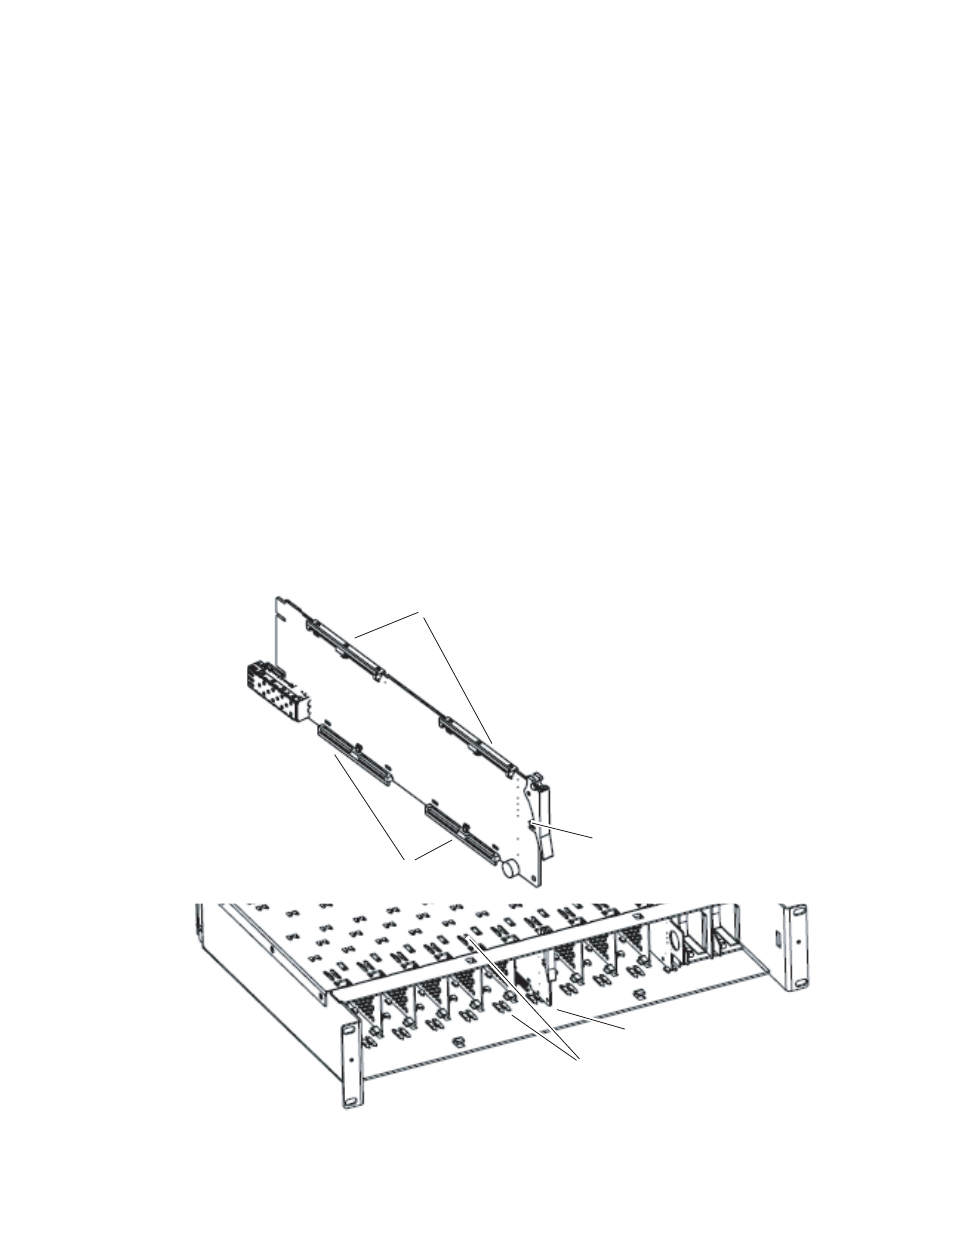
Insert the front module so that the plastic card guides on the module
top and bottom edges go over the upper and lower raised rail guides on
the right of the top and bottom of the slot (
5.
Carefully slide the module into the rear connector.
6.
Lock the front module ejector tab into the locking pin.
Note
Before removing the front module, first remove the Fiber Optic submodule if
present, from the rear module.
Figure 5. Front Module Installation
8431_07
Slide top and bottom card carriers on module
over top and bottom guides on right of slot.
Module installed
Locking Pin
Card Carriers
Card Carriers
Front Module Side View