Codec module removal – Grass Valley K2 Solo 3G Client Service Manual v.9.0 User Manual
Page 90
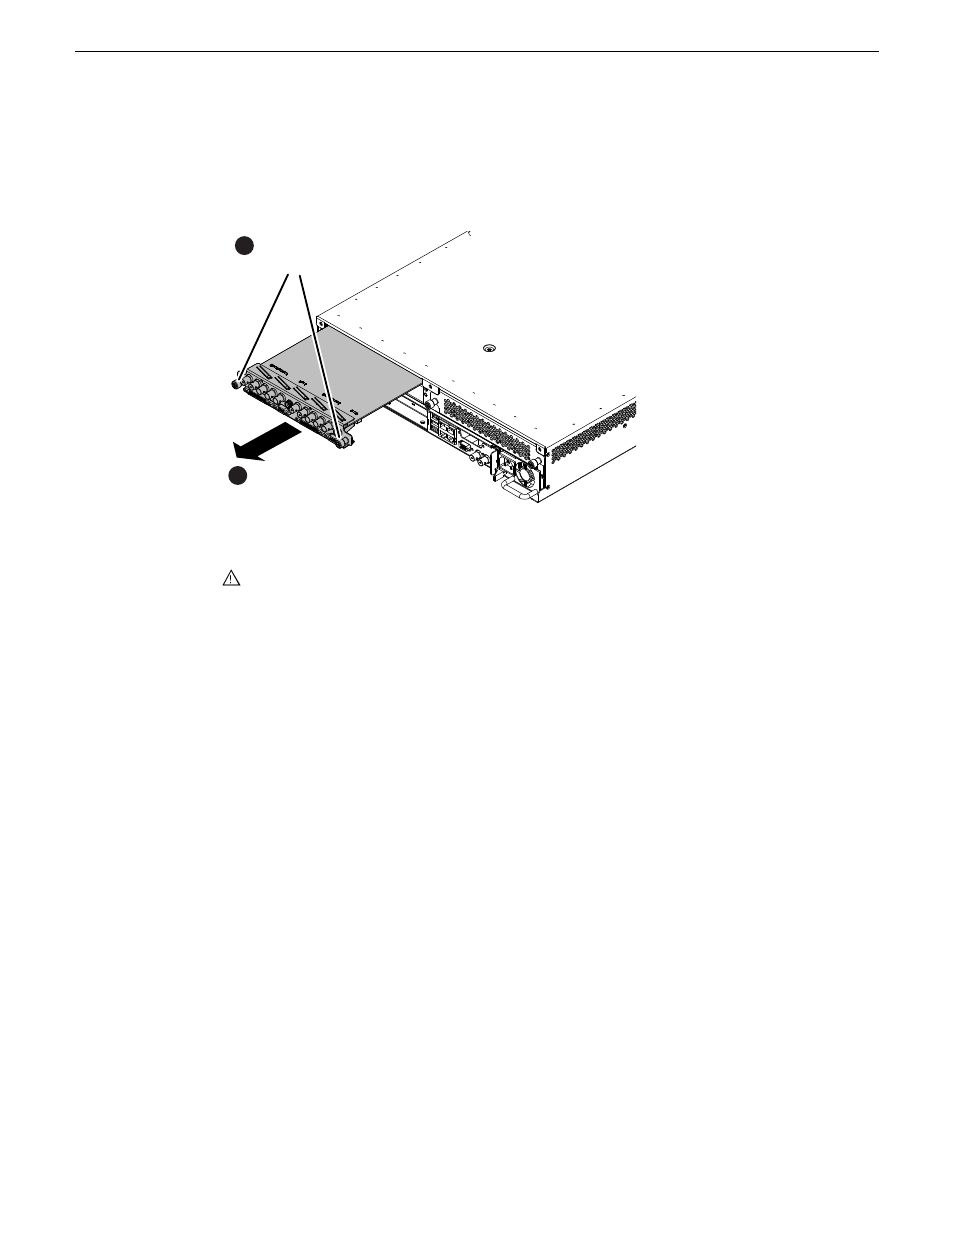
Codec module removal
Access the codec module from the rear panel. Remove as illustrated.
Slide out
2
Loosen
thumbscrews
1
NOTE: With a firm grip on the metal (EMI) bracket, ensure the board is level and parallel
to the card guides to avoid damage to the components on the edge opposite the rear panel.
CAUTION: Improper handling can damage components on the board. Do not allow the
board to come in contact with the chassis sheet metal during removal or installation. The
components on the edge opposite the rear panel are the most susceptible to damage.
Before installing, inspect the codec module chamber and make sure no cables are protruding into
the path of the codec module.
You must also remove any codec option (mezzanine) cards from the faulty codec module and
install them on the replacement codec module.
After installing the replacement codec module, install the current version of K2 software. An
over-install is all that is required. You do not need to first un-install the software. This ensures that
the board is flashed with the proper version to be compatible with K2 software.
90
K2 Solo 3G Service Manual
06 November 2012
Removing and replacing FRUs