Calibrating the 3d touch probe -10, Yx z – HEIDENHAIN TNC 407 (280 580) ISO Programming User Manual
Page 71
TNC 426/TNC 425/TNC 415 B/TNC 407
2 - 1 0
2
Manual Operation and Setup
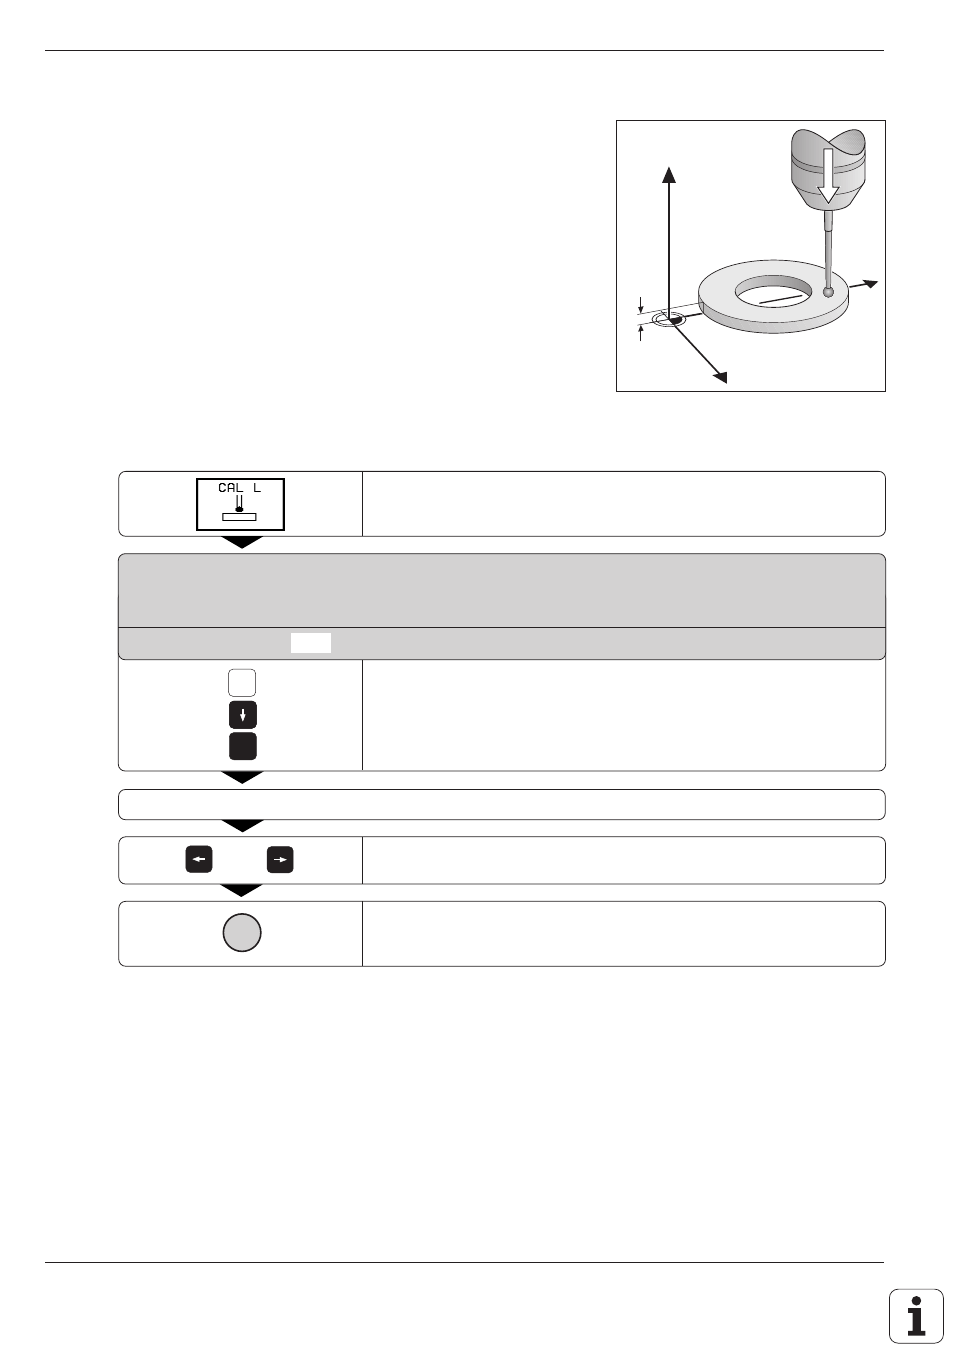
Fig. 2.9:
Calibrating the touch probe length
Y
X
Z
5
I
Z
5
e.g.
e.g.
or
Calibrating the 3D touch probe
The touch probe must be calibrated in the following cases:
• for commissioning
• after stylus breakage
• when the stylus is changed
• when the probing feed rate is changed
• in the case of irregularities, such as those resulting from warming
of the machine.
During calibration, the TNC finds the "effective" length of the stylus and
the "effective" radius of the ball tip. To calibrate the touch probe, clamp a
ring gauge of known height and known inside radius to the machine table.
To calibrate the effective length:
Set the datum in the tool axis such that for the machine tool table, Z=0.
Select the calibration function for the touch probe length.
MANUAL OPERATION
Z+ Z–
TOOL AXIS = Z
If necessary, enter the tool axis.
Move the highlight to DATUM.
Enter the height of the ring gauge (here, 5 mm).
Move the touch probe to a position just above the ring gauge.
If necessary, change the displayed traverse direction.
The touch probe contacts the upper surface of the ring gauge.