LeMond RevMaster Pro User Manual
Page 12
12
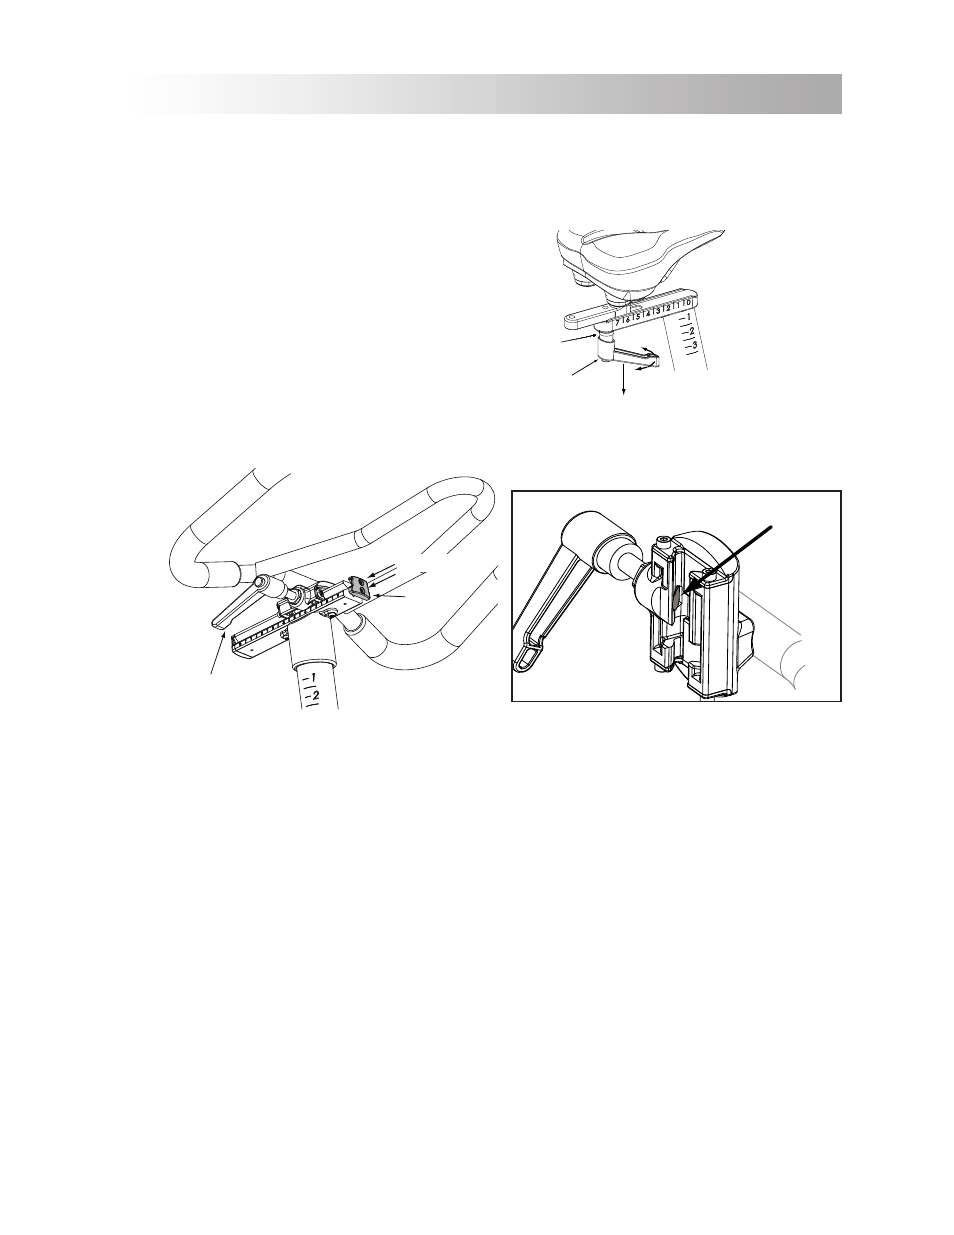
Position the seat assembly atop the seat track on the seat post. Lightly grease the end of the
6.
threads on an adjustment lever. Loosely thread the adjustment lever through the brass washer,
through the hole in the seat track, and into the seat assembly. Slide the seat to the desired position
and tighten the adjustment lever.
Brass
Washer
Pull Out and Rotate
Adjustment
Lever
Note: The handle on the adjustment lever has a
ratchet function. Once you have tightened
a lever, pull out on the handle and rotate it
so it does not stick out. Release the handle
to lock it into place.
Loosen the adjustment lever on the
7.
handlebar assembly. Slide the assembly
onto the track on the handlebar post and tighten the adjustment lever. (Use the adjustment lever’s
ratchet function as necessary.)
Pressure Pad
Track Cap
Adjustment
Lever
M4 X 6 (2)
Note: There is a pressure pad at the end of the adjustment lever that is held in place by shipping foam. The
foam is pushed out of the way when you slide the assembly onto the track. If the pad should come
loose, replace it before sliding the assembly onto the track.
Install the handlebar track cap onto the end of the track with two (2) M4 X 6 mm screws.
8.
The pedals are marked as if you are seated on the bike, “R” for right, and “L” for left. Carefully thread
9.
the right pedal into the crank arm with your fingers - do not cross thread the pedal in the crank arm!
Use the 15 mm wrench tool to tighten the pedal. Repeat this step for the left pedal.
Note: The left pedal is reverse-threaded.
To install the bottle holder, loosen the attached clamp fasteners and separate the clamp so it will fit
10.
around the handlebar tube. Tighten the clamp fasteners with a hex key to secure the clamp to the
handlebar.
ASSEMBLY INSTRUCTIONS