LinPlug Alpha User Manual
Page 16
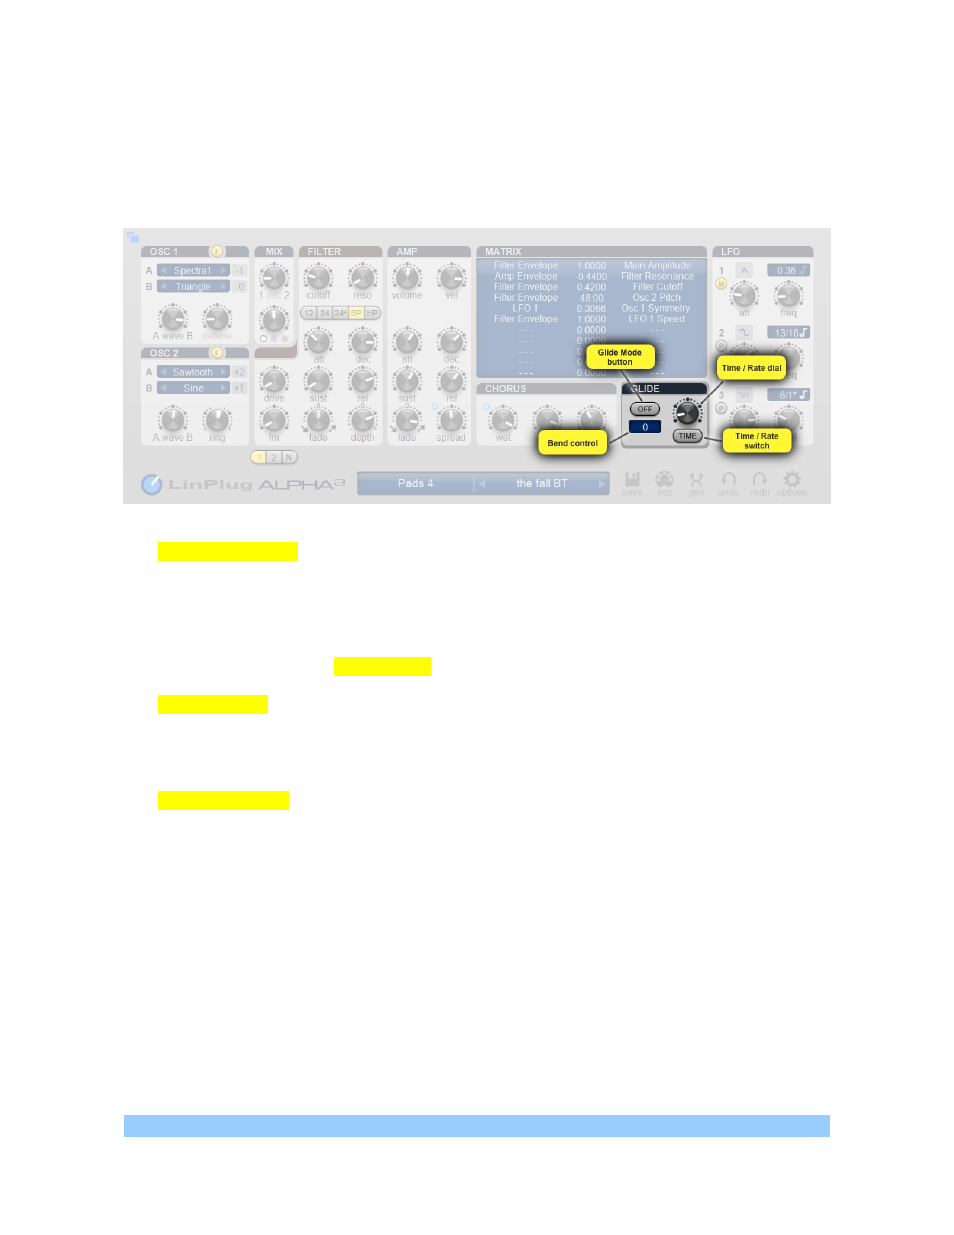
Glide
"Glide" continuously changes the pitch from one note to the next, connecting the notes and
letting you smoothly "glide" from one to the other.
The Glide Mode button has 4 values: Off, On, Held and Bend. The On and Off functions turn
"Glide" on and off. When "Glide" is on, the Time/Rate dial is used to set the time it takes for
the pitch of one note to reach that of a following note. The "Held" setting works as follows. If
notes overlap then Glide is applied, however if they don't overlap, then the notes are played
without Glide. This makes it possible to apply Glide only to selected notes. "Bend" allows you
to apply a predetermined pitch bend at the start of each note. When using “Bend”, the actual
bend range is set using the Bend control within the range of -48 to +48 semitones.
The Time/Rate dial is used to adjust the time it takes for the glide to happen. Turned fully
counter clockwise the glide is so fast that its hardly noticeable. If the dial is turned fully
clockwise it takes very long for the notes to glide from the previous notes pitch to their own
pitch.
The Time/Rate button has two settings: Time and Rate. These settings determine the
manner in which the pitch of one note moves to that of the a following note. When set to
"Time", it takes a constant amount of time to move from one note to the next, no matter what
notes follow each other. In this case it will take the same amount of time to reach the
destination pitch regardless of whether the preceding note was a semitone away or an
octave away. When set to "Rate", the pitch of one note moves to that of a following note at a
constant rate. This means that the amount of time it takes to move from one note to the next
depends upon how far apart the pitches of the two notes are. The further apart the notes, the
longer it will take for the pitch of the first note to reach that of the following note.
Note: The Time/Rate switch has no effect in “Bend” mode.
LinPlug Alpha 3.3 Series User Manual
Page 16