Casio CTK-7200 User Manual
Page 94
Using the Song Sequencer
E-92
1.
Perform steps 1 to 3 of the procedure under “To
start an event editor operation” on page E-87 to
display the event editor screen.
2.
Press the L-16 (START/STOP) button.
• This starts playback of the song being edited from the
first measure where the cursor is currently located.
• Playback stops automatically when it reaches the end
of a song. To stop playback part way through, press the
L-16 (START/STOP) button.
1.
Perform the procedure under “To start an event
editor operation” on page E-87.
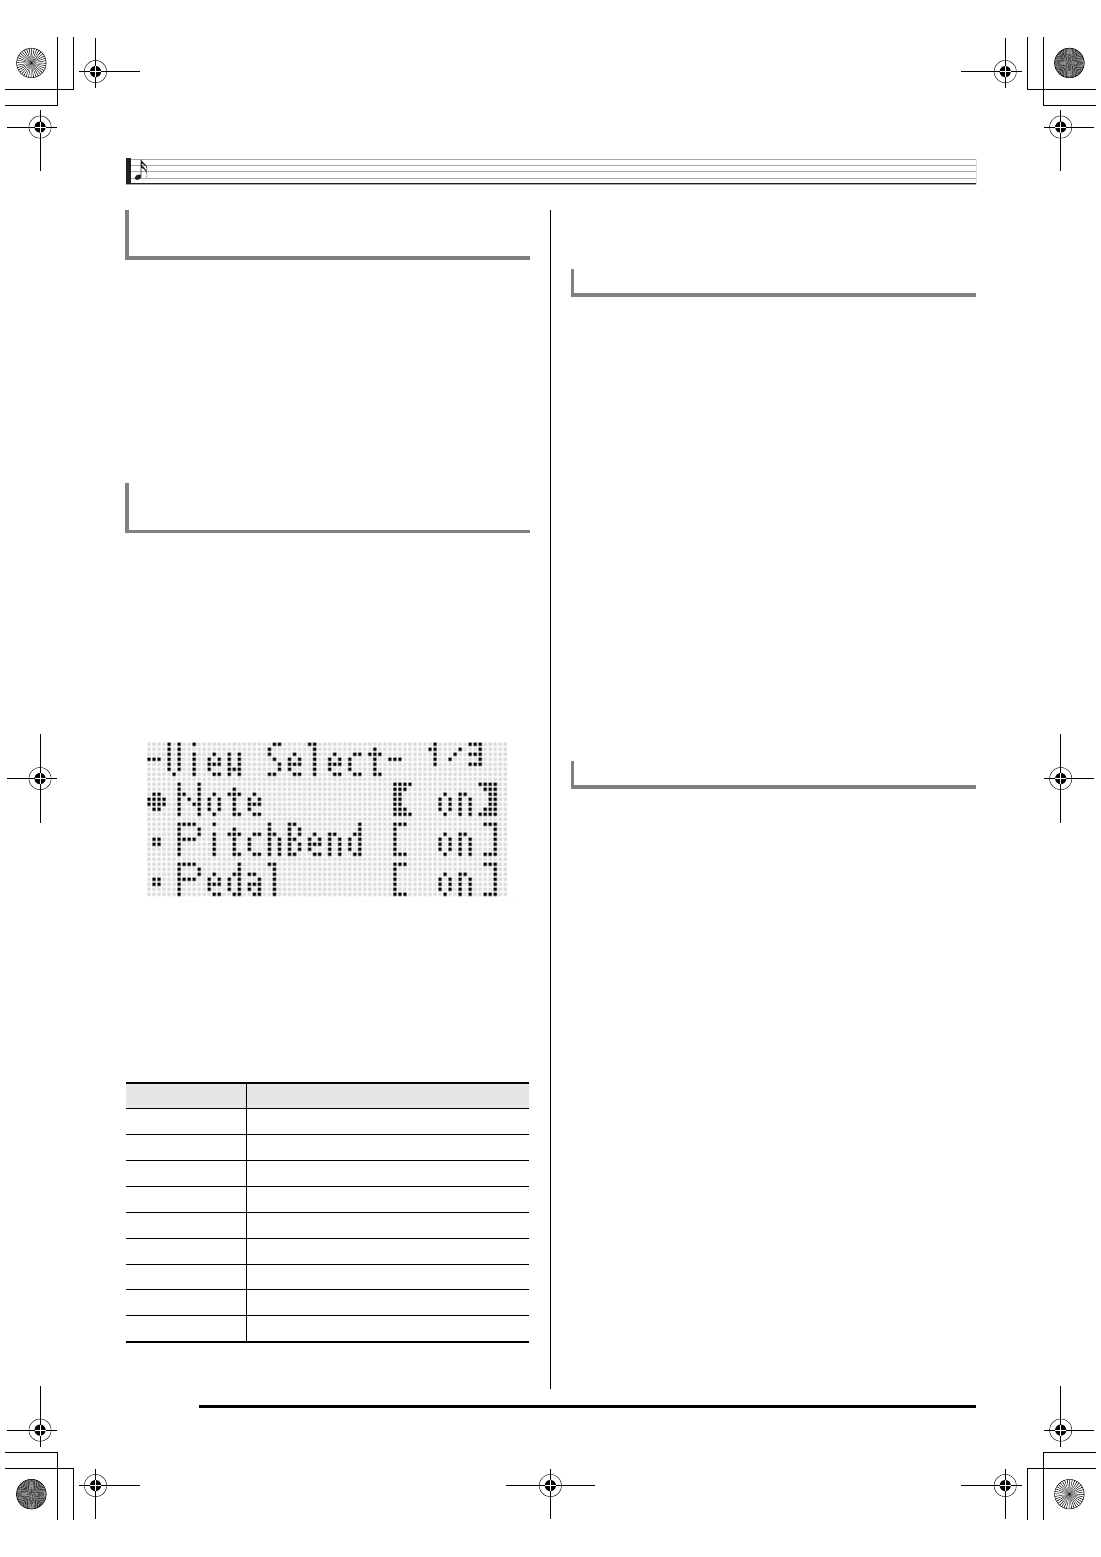
2.
Use R-17 (i) button to display page three of
the event editor menu, with the 0 located at
“ViewSelect”.
3.
Press the R-16 (ENTER) button.
• This displays the “View Select” screen.
4.
Use the R-17 (t, y) buttons to move the 0
between the setting items, and the dial or R-14
(–, +) buttons to toggle the currently selected
setting between “on” (shown) and “oFF”
(hidden).
• The table below shows the event that corresponds to
each setting item.
• For information about each event, see “Event Types
and Screen Content” (page E-88).
5.
Press the R-15 (EXIT) button to apply the
settings and exit the “View Select” screen.
1.
Display the event editor screen of the track that
includes the event you want to edit.
• See “To select a track for editing” (page E-91).
2.
Use the R-17 (t, y) buttons to move the
cursor to the event you want to edit.
• You can use the L-14 (dFF) and L-13 (sREW)
buttons to move the cursor by measure-by-measure.
3.
Use the R-17 (u, i) buttons to move the
cursor, and then use the dial or R-14 (–, +)
buttons to change the value at the cursor
position.
• The cursor flashes during a value change operation.
• During note event recording, you can change the pitch
of a note by pressing a keyboard key. If the cursor is
located at the “VEL” position, the velocity value will
change at the same time as the note pitch.
4.
To apply the changed value, press the R-16
(ENTER) button.
• This causes the cursor to stop flashing.
1.
Display the event editor screen of the track that
includes the events you want to delete.
• See “To select a track for editing” (page E-91).
2.
Use the R-17 (t, y) buttons to move the
cursor to the event you want to delete.
3.
Press the C-10 (DELETE) button.
• The event at the current cursor position will be deleted
as soon as you press the C-10 (DELETE) button.
To play back a song from the event editor
screen (Quick Play)
To select the types of events that appear on
the Event Editor screen (View Select)
Setting Item
Corresponding Event
Note
Note event
PitchBend
Pitch Bend event
Pedal
Sustain, soft, sostenuto events
Rhythm
Rhythm event
Chord
Chord event
Tempo
Tempo event
Tone
Tone event
Mixer
Mixer event (excluding Tone event)
Others
All other events besides those above.
To edit an existing event
To delete an individual event
CTK7200_e.book 92 ページ 2014年3月7日 金曜日 午後3時4分