Silvercrest SON 90 A1 User Manual
Page 117
- 115 -
Removing needle(s)
Attention!
Before exchanging the needles, remove the power plug. This prevents an
unintended starting of the machine. If you do not, you run a risk of serious
injury!
TTiip
p!!
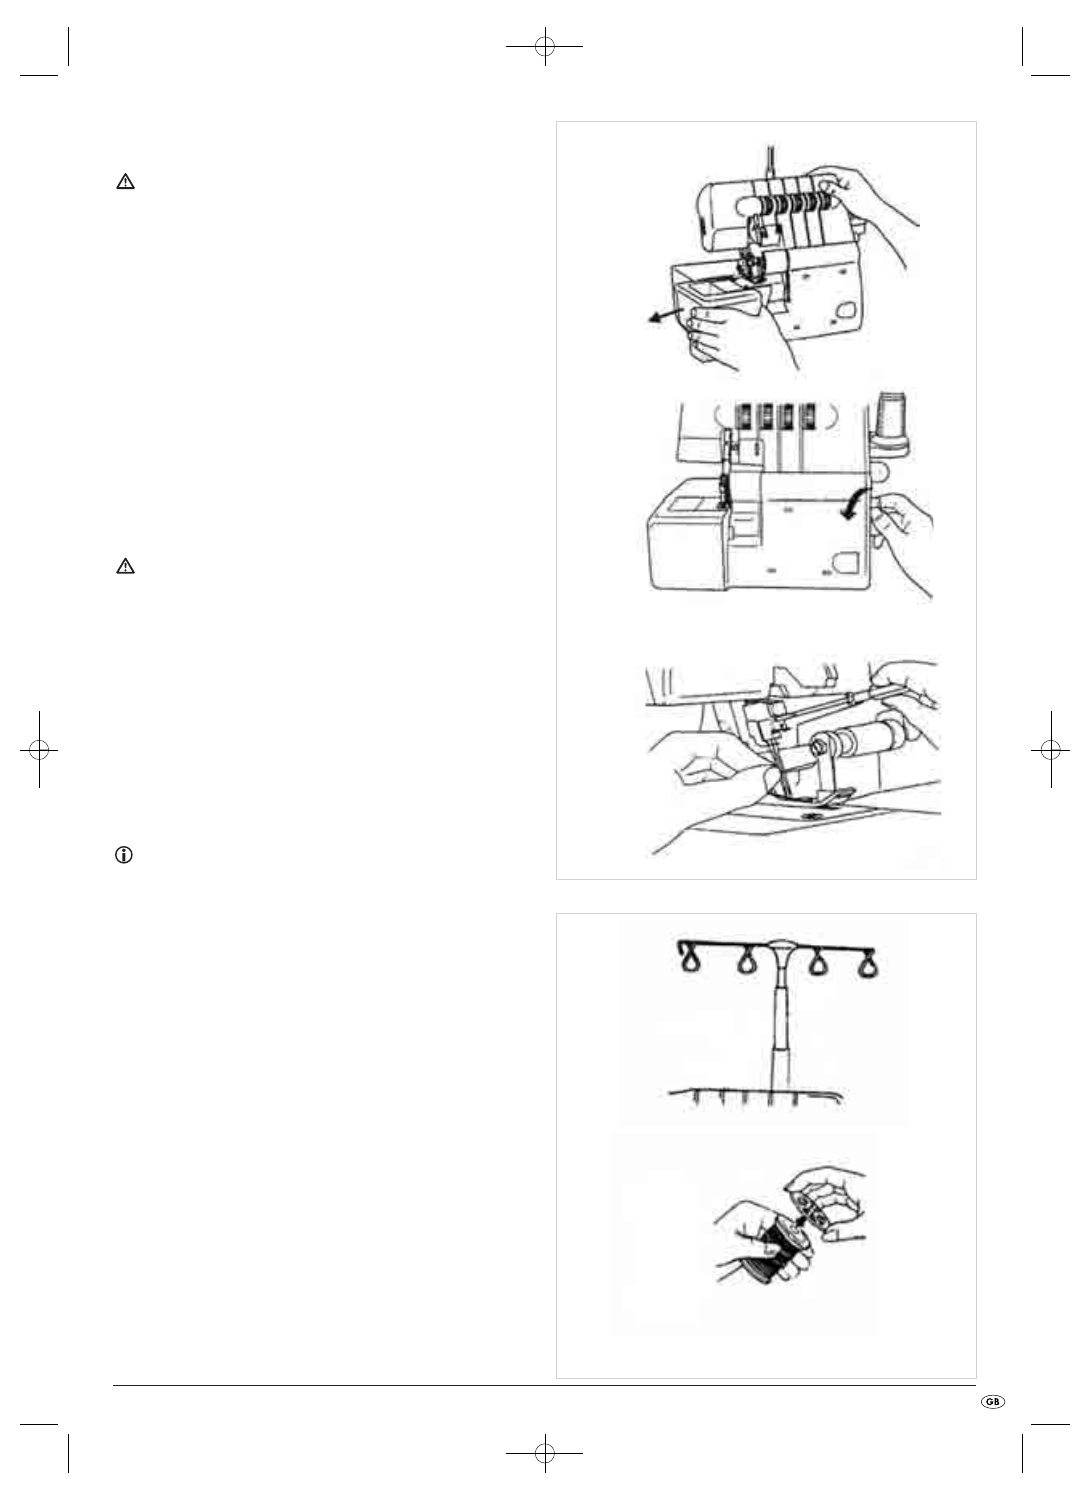
An exchange of the needles is easier if you first remove the free arm cover
(Fig. 9a)!
1. Turn the handwheel 6 towards yourself until the needles are in the
highest position (Fig. 9b)
2. Loosen the needle retaining screws with the small screwdriver until the
needles are free (Fig. 10).
3. Remove the needles.
Inserting needle(s)
Attention!
Before exchanging the needles, remove the power plug. This prevents an
unintended starting of the machine. If you do not, you run a risk of serious
injury!
1. Hold the needle with the flattened side to the rear.
2. Push the needle as far as it will go into the needle holder.
3. Firmly tighten the needle screws with the small screwdriver (Fig. 10).
Operating the handwheel
Note:
Always turn the handwheel 6 only towards yourself (Fig. 9b).
Adjusting the thread tree
• Completely remove the thread tree 1 before threading (Fig. 11).
• Turn the thread tree 1 so that the thread guides stand exactly above
the spool supports 2.
• In the correct position, the two jointed parts of the thread tree 1 snap
audibly into position.
• Place the thread rolls on the thread roll centrings.
If you do not use industrial coils, remove the thread roll centrings. Slide
a spool cap onto each of the thread rolls (Fig. 12). This will hold them in
place when sewing.
Fig.10
Fig. 11
Fig. 12
Fig.9b
Fig.9a
IB_64780_SON 90 A1_LB5 09.03.2011 16:22 Uhr Seite 115