Sewing corners – Silvercrest SON 90 A1 User Manual
Page 142
Sewing corners
Outer corners
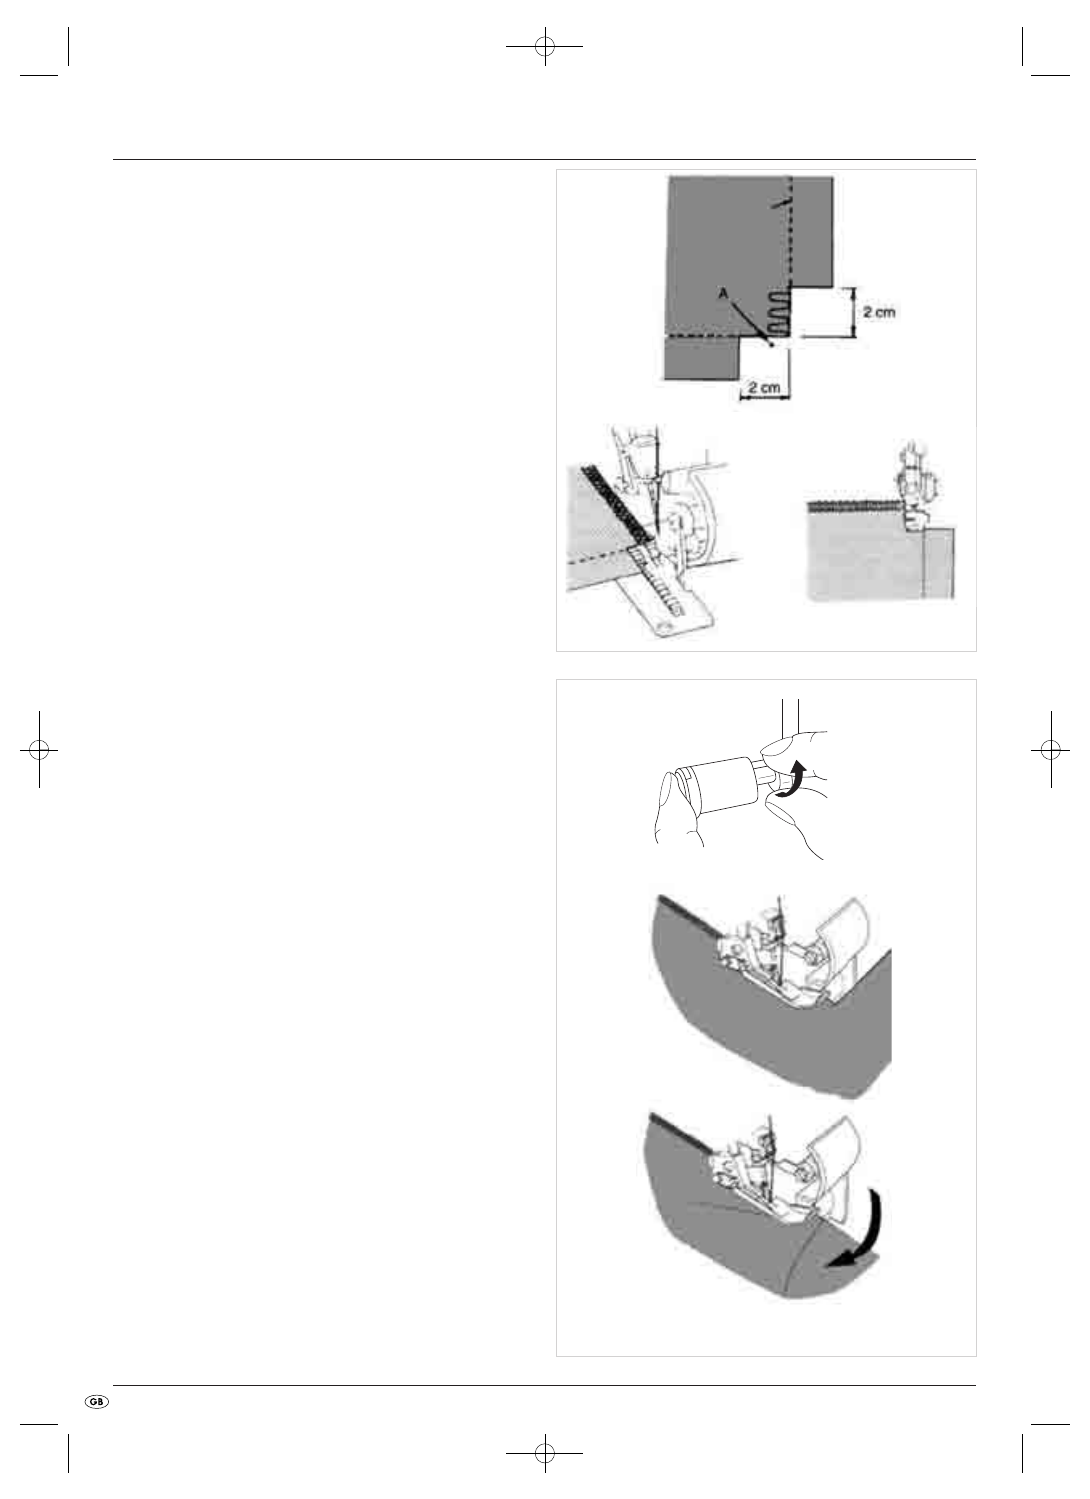
1. Cut away, before and after the corner, about 2 cm to the seam line
(Fig. 97).
2. Sew a stitch further than to the marking "A" on the drawing and then
stop (Fig. 97).
3. Lift the needle and sewing foot a.
4. Pull the fabric to the rear, such that the yarn being held by the finger of
the stitch plate e is released. (For better recognition, on the drawing
opposite the sewing foot a is not shown - Figure 98).
5. Rotate the workpiece and lower the sewing foot a so that the upper
blade i lies in a line with the cutting edge (Fig. 99).
6. Pull the loose threads up and continue to sew.
Inner corners
1. Cut the fabric away from the seam edge.
2. Adjust the upper blade i into the rest position (Fig. 100).
3. Sew on the cutting edge (Fig. 101).
4. Stop sewing just before reaching the corner.
5. Place a fold on the corner, so that the two edges form a line (Fig. 102).
6. Sew slowly over the corner and along the second edge. Ensure that you do
not include the fold!
Cutting line
Fig. 97
Fig. 99
Fig. 98
Fig. 100
Fig. 101
Fig. 102
- 140 -
IB_64780_SON 90 A1_LB5 09.03.2011 16:22 Uhr Seite 140