Silvercrest SON 90 A1 User Manual
Page 121
- 119 -
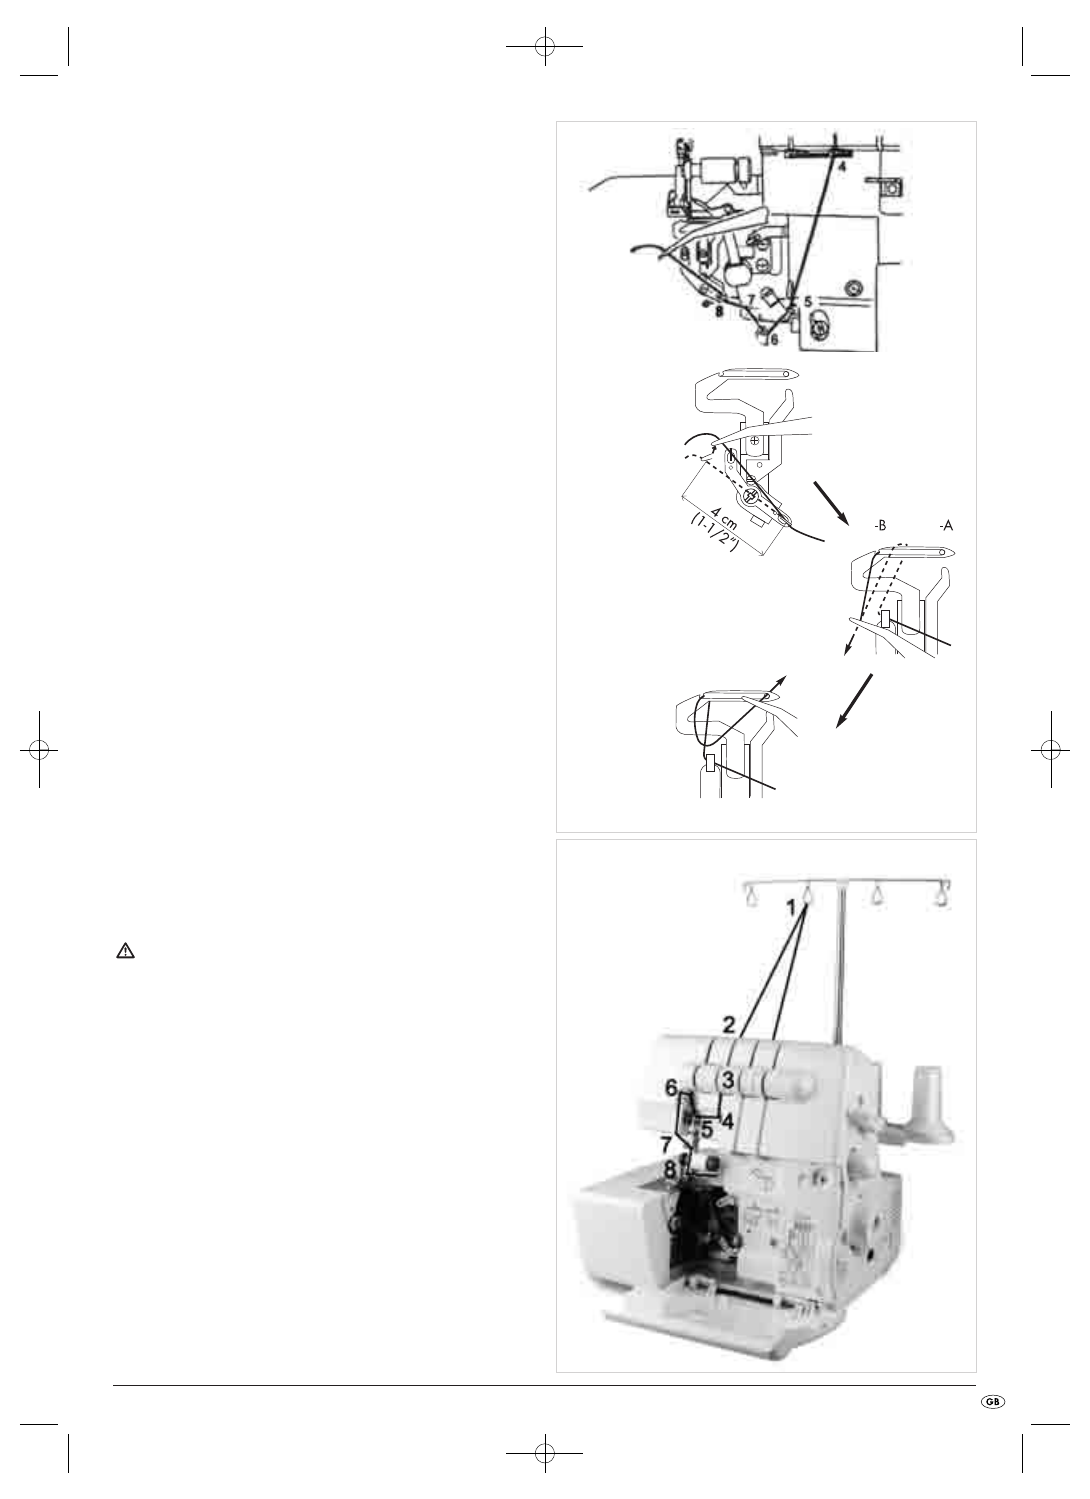
5. Thread the yarn in the looper area as per the yellow markings (4 - 8)
(Fig. 22).
6. Firmly hold the yarn with the tweezers about 4 cm from the thread
guide (Fig. 23).
7. Now guide it lightly, from the left and with the tweezers, under the
thread guide.
8. Pull the yarn upwards into the thread guide (9).
9. Lead the yarn to the rear and over the upper end of the lower looper p
(10A) (Fig. 23).
10. Then, carefully pull the yarn down so that it slides into the recess of
the looper (10B) (Fig. 23). For this step also use the drawing which
is attached to the machine!
11. Guide the thread through the looper eyelet (11). The yarn should run
in the groove of the lower looper p (Fig. 23).
12. Draw around 10 cm of yarn through the looper and place it to the
rear o
ovve
err the upper looper o and the stitch plate e.
Threading yarn for the right needle (green)
Attention!
Before threading, ALWAYS place the power switch 8 at "O" (Off) and
remove the plug from the mains power socket. This prevents an unintended
starting of the machine. If you do not, you run a risk of serious injury!
Figure 24 shows the thread path of the right needle thread. The individual
threading positions are numbered and described in detail in the following.
1. Guide the yarn from back to front through the thread tree 1 (1).
9
8
10
10
11
Fig. 22
Fig. 23
Fig. 24
IB_64780_SON 90 A1_LB5 09.03.2011 16:22 Uhr Seite 119