Threading – Silvercrest SON 90 A1 User Manual
Page 118
Threading
Note:
On delivery, all 4 threads are already threaded. You can begin sewing im-
mediately. Should you wish to change the thread, and all 4 threads are still
threaded, then proceed as described in the chapter "Changing threads
(binding together)“.
Should you need to rethread all threads from scratch, then proceed as
described in this chapter, "Threading“.
General instructions for threading
Attention!
Before threading, ALWAYS place the power switch 8 at "O" (Off) and
remove the plug from the mains power socket. This prevents an unintended
starting of the machine. If you do not, you run a risk of serious injury!
Correct threading is important, so that the stitches are not irregular and that
the yarn does not break.
Behind the front flap 0 there is a diagram with instructions for threading.
Additionally, the thread guides are marked in various colours.
In the accessory box you will find tweezers, the use of which helps make
threading easier.
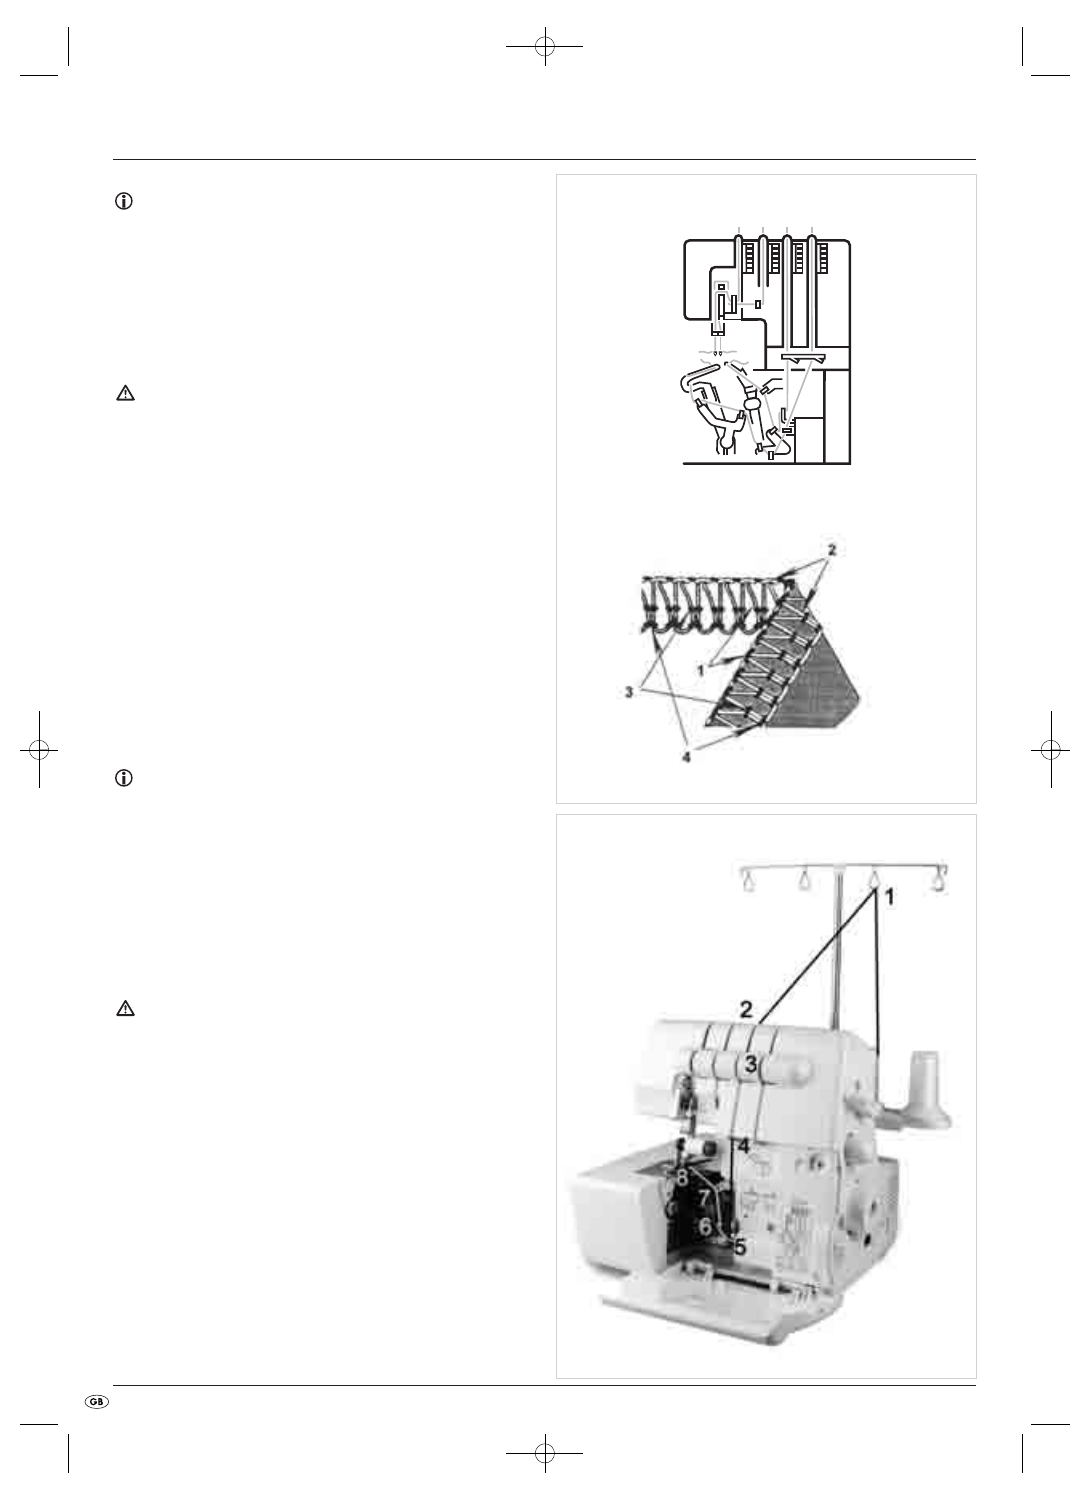
Threading is done in this order (Fig. 13/14):
1. First step:
Upper looper (red)
2. Second step:
Lower looper (yellow)
3. Third step:
Thread for the right needle (green)
4. Fourth step:
Thread for the left needle (blue)
Note:
When all threads are threaded, and the lower looper thread loosens itself,
proceed as follows:
• Unthread the two threads of the needles.
• Then thread the lower looper thread.
• First then rethread the threads of the two needles again.
The needles must always be the last to be threaded!
For simplification, the individual steps are numbered on the drawings.
Threading the upper looper thread (red)
Attention!
Before threading, ALWAYS place the power switch 8 at "O" (Off) and
remove the plug from the mains power socket. This prevents an unintended
starting of the machine. If you do not, you run a risk of serious injury!
Always use the accompanying drawings for assistance.
Figure 15 shows the thread path of the upper looper thread. The individual
threading positions are numbered and described in detail in the following.
1. Open the front flap 0.
2. Guide the yarn from back to front through the thread tree 1 (1).
1
4 3
2
Fig. 13
Fig. 14
Fig. 15
- 116 -
IB_64780_SON 90 A1_LB5 09.03.2011 16:22 Uhr Seite 116