2 inserting and removing the blade assembly, 3 positioning the blender jug – Silvercrest SKMH 1100 A1 User Manual
Page 90
88
Caution! When blending liquids on level
10 or using the pulse button 9, do not
exceed a quantity of 1 litre in blender jug 6,
otherwise liquid may spray out. At speeds
lower than 10, the blender jug may contain
up to 2 l.
Note: Certain operations require a
sufficiency of contents in the blender jug 6
for the appliance to function properly. For
example, when whipping cream always use
at least 200 ml, and when whisking egg
whites use at least two.
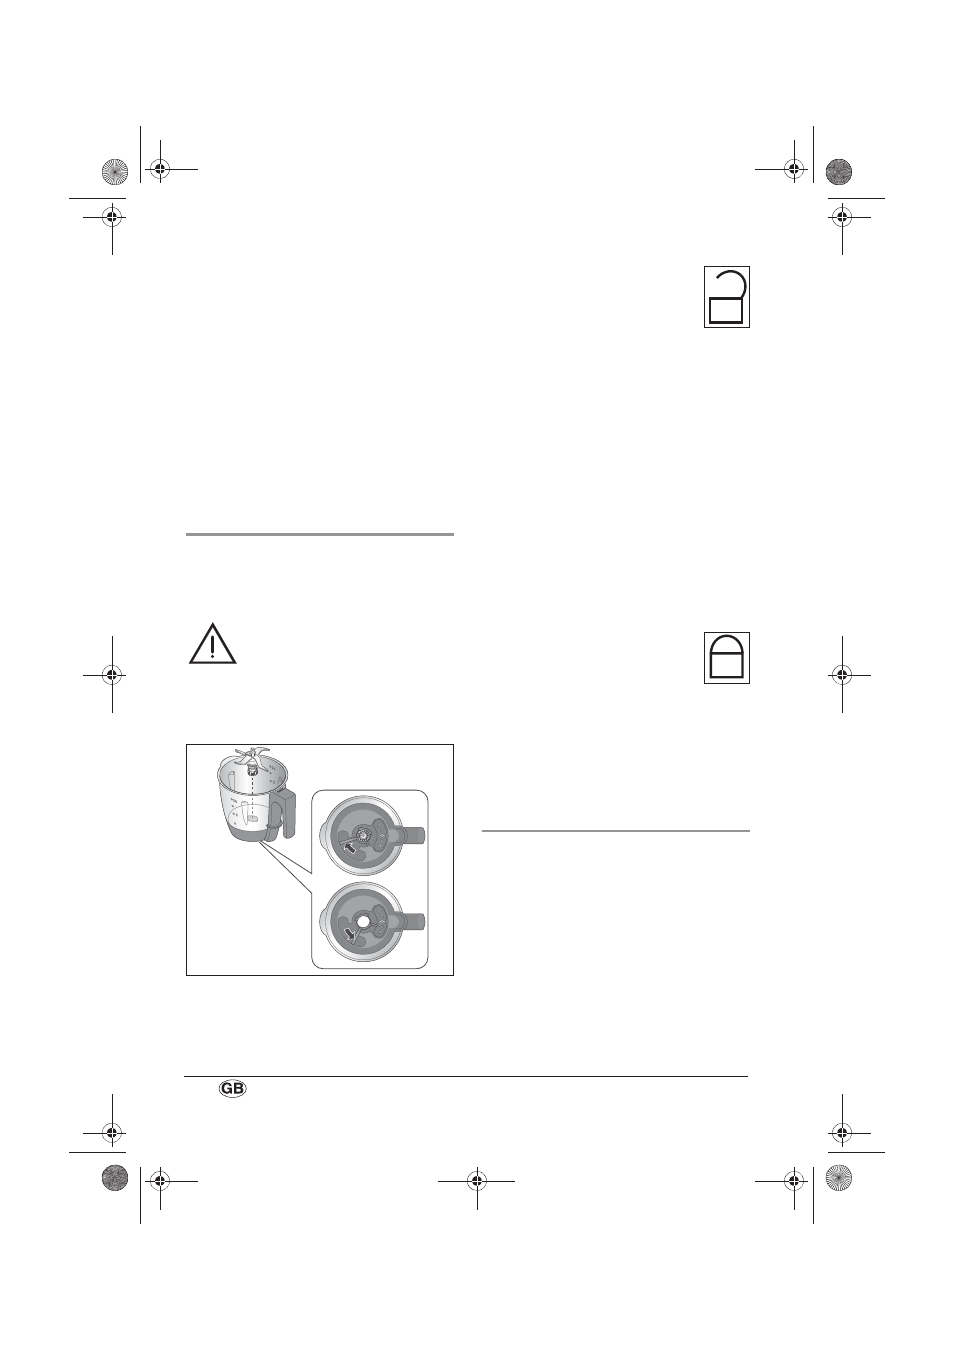
7.2 Inserting and removing the blade
assembly
The blender jug 6 may never be used
without the blade assembly 20 because the
assembly 20 constitutes the seal for the
bottom of the jug 6.
Warning! Remember that the
blades of the assembly 20 are
extremely sharp. Never touch them
with your bare hands to avoid
cutting yourself.
Here is how to remove the blade
assembly 20:
1. Lay the blender jug 6 on its side.
2. Press the unlock lever on the
underside of the blender jug 6
so that it is pointing at the open
padlock symbol.
3. Carefully remove the blade
assembly 20.
Here is how to insert the blade
assembly 20:
4. Lay the blender jug 6 on its side.
5. Insert the blade assembly 20 from the
inside. Note that the two protrusions on
the base of the blade assembly 20 have
to be inserted into the two holes in the
base of the blender jug 6.
Caution!
• Make sure that the rubber seal 19 of the
blade assembly 20 is correctly seated,
otherwise the contents are liable to leak
out.
6. To lock the blade assembly 20,
press the unlock lever on the
underside of the blender jug 6
so that it is pointing at the
closed padlock symbol.
Note: Cut large pieces into smaller ones
with an edge length of about 3 – 4 cm.
Pieces larger than this may get jammed in
the blades.
7.3 Positioning the blender jug
1. Position the blender jug 6 in its
receptacle 14.
2. Press the blender jug 6 down slightly
until it meshes with the drive gear.
Notes:
– If the gears do not line up and you are
unable to press the blender jug 6
down, you may need to wriggle it
slightly to get the gears of the jug 6 to
slide into the receptacle 14.
RP93471 Küchenmaschine mit Heizung LB5 Seite 88 Donnerstag, 14. August 2014 3:36 15