Fig.1 – Medal Sports WM.com1444126 User Manual
Page 6
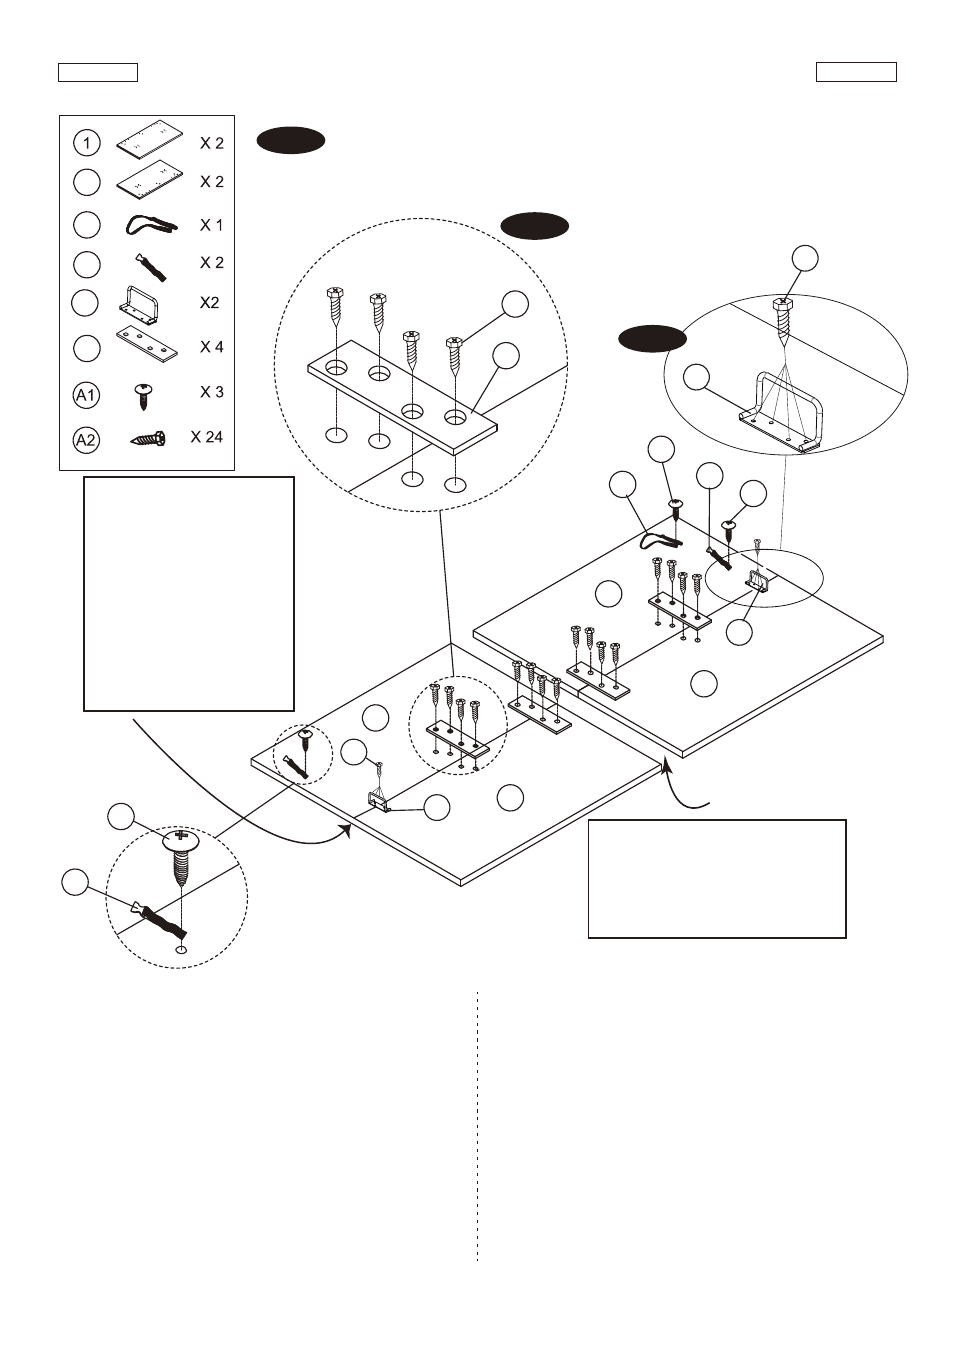
FIG. 1
www.themdsports.com
1444126
5
(Continúe en la siguiente página.)
(Continued on the next page.)
Español
English
FIG.1
3. Place Table Surface - 1 (#1) and Table Surface - 2 (#2)
with the painted surface facing down on a flat surface.
4. Connect Table Surfaces together using two Brackets
(#24) using twelve Screws (#A2).
See FIG. 1 and 1A.
5. Attach the Safety Strap - Long (#19) and Safety
Strap - Short (#20) to the surface using three Screws
(#A1).
See FIG. 1.
6. Attach one Handle (#23) to the surface using four
Screws (#A2).
See FIG.1B.
FIG.1
3. Coloque la Superficie de Mesa - 1 (#1) y la Superficie de
Mesa - 2 (#2) con la superficie pintada cara hacia abajo
sobre una superficie plana.
4. Conecte juntos usando 2 Corchetes (#24) usando 12
Tornillos (#A2).
Vea la FIG. 1 y 1A.
5. Adjunte la Correa de Seguridad-Largo (#19) y la Correa
de Seguridad-Corto (#20) a la superficie usando 3 Tornillos
(#A1).
Vea la FIG. 1.
6. Adjunte 1 Manija (#23) a la superficie usando 4 Tornillos
(A2).
Vea la FIG. 1B.
1
1
2
2
19
20
20
A1
A1
Note:
Align the inside seams of
each sections so that
pre-drilled holes line up
across from each other.
Nota:
Alinee las costuras interiores
de cada secciones de
modo que los agujeros
pre-taladrados alinee a
través el uno del otro.
Note: Center gap tolerance
approximately 10~13mm.
Nota: La tolerancia de la distancia
central está aproximadamente de
10~13mm.
Player
/ Jugador
Player
/ Jugador
Center / Centro
24
A2
A1
A2
23
23
A2
23
FIG. 1B
FIG. 1A
19
20
24