Precision Medical HeliO2 Blenders User Manual
Page 10
Heliox / Oxygen Blender Service Manual
Page 8
LOW FLOW
Figure C
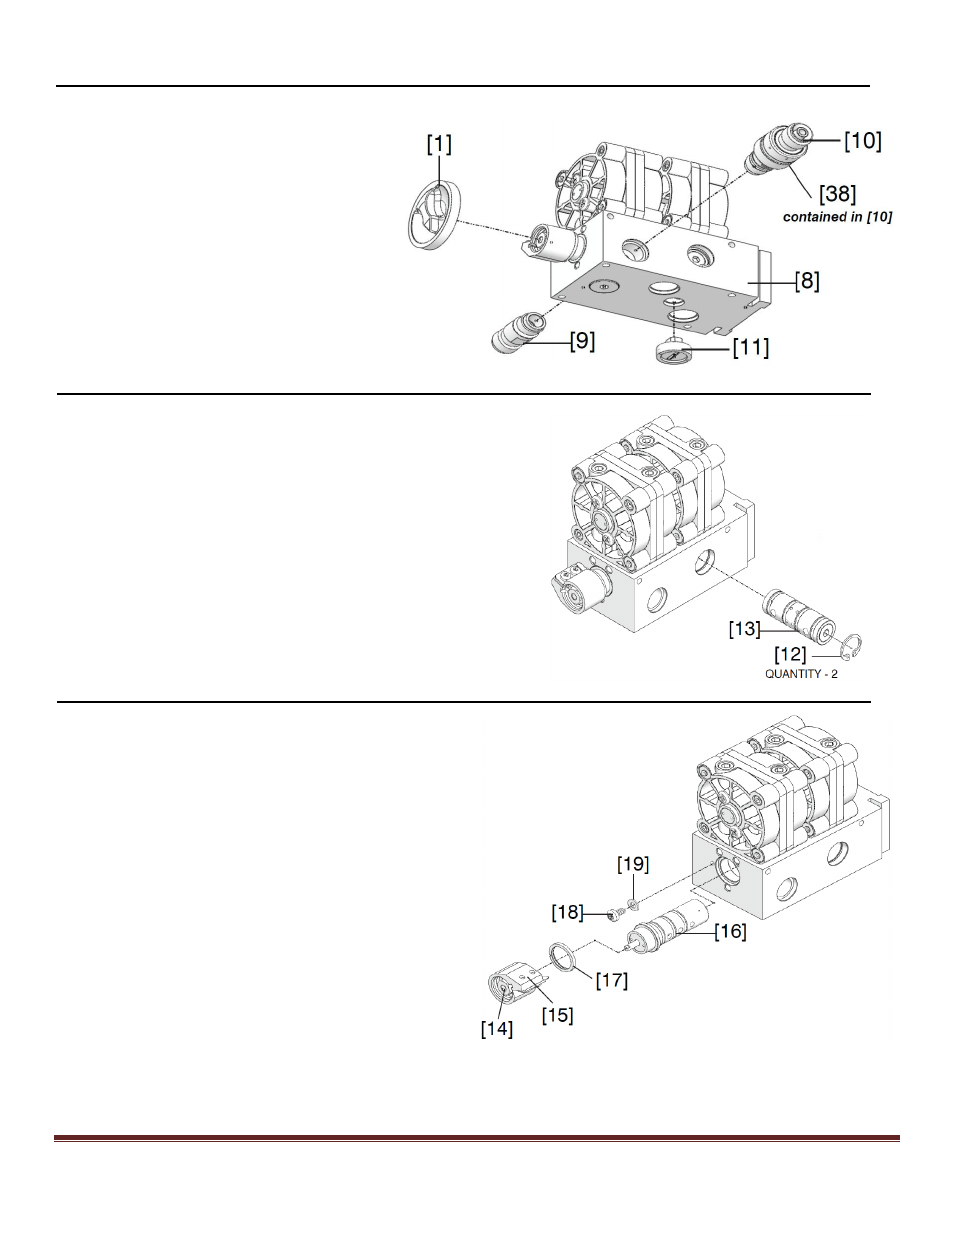
8. Remove dial [1] by pulling dial
away from manifold block [8].
9. Remove the primary [9] and
auxiliary [10] outlets (auxiliary
contains Blue Muffler [38]) by using
a ½ in. open end wrench to
unscrew.
10. Use Retaining Ring Pliers to
unscrew and remove audio alarm
assembly [11] from the bottom of
the manifold block.
Figure D
11. Use small retaining ring pliers to remove retaining
rings [12] from each side of the alarm assembly [13].
Push the alarm assembly through to remove the
assembly from manifold block.
Figure E
12. Using a 11/32 in. nut driver or socket, loosen
the nut [14] (ONLY two turns) holding the
knob guide [15] on the proportioning valve
assembly [16]. Slide knob guide assembly
from proportioning valve assembly shaft.
Slide resistance ring [17] from proportioning
valve assembly.
13. Remove phillips head screw [18] and washer
[19] from side of proportioning valve
assembly.
14. Replace knob guide assembly and tighten the
nut.
15. Pull knob guide assembly to remove
proportioning valve assembly from manifold
block. Again, loosen the nut (ONLY two turns) holding the knob guide to the proportioning valve
assembly, remove knob guide from proportioning valve assembly shaft.