Attery pack, Eplacing the battery packs – Riello UPS Sentinel Dual (High Power) (3.3 - 10 kVA) User Manual
Page 63
63
A
B
C
B
ATTERY PACK
R
EPLACING THE BATTERY PACKS
As mentioned in the introduction, the UPS comes with a dedicated battery pack to allow an easy hot swap
replacement of the batteries with full safety ensured thanks to the protected connection system.
WARNING: for your safety and that of your product, the information set out below should be carefully
followed.
WHEN THE BATTERY PACK IS DISCONNECTED, THE LOADS CONNECTED TO
THE UPS ARE NOT PROTECTED FROM MAINS FAILURE.
THE BATTERY PACK IS VERY HEAVY. BE VERY CAREFUL WHEN REPLACING IT.
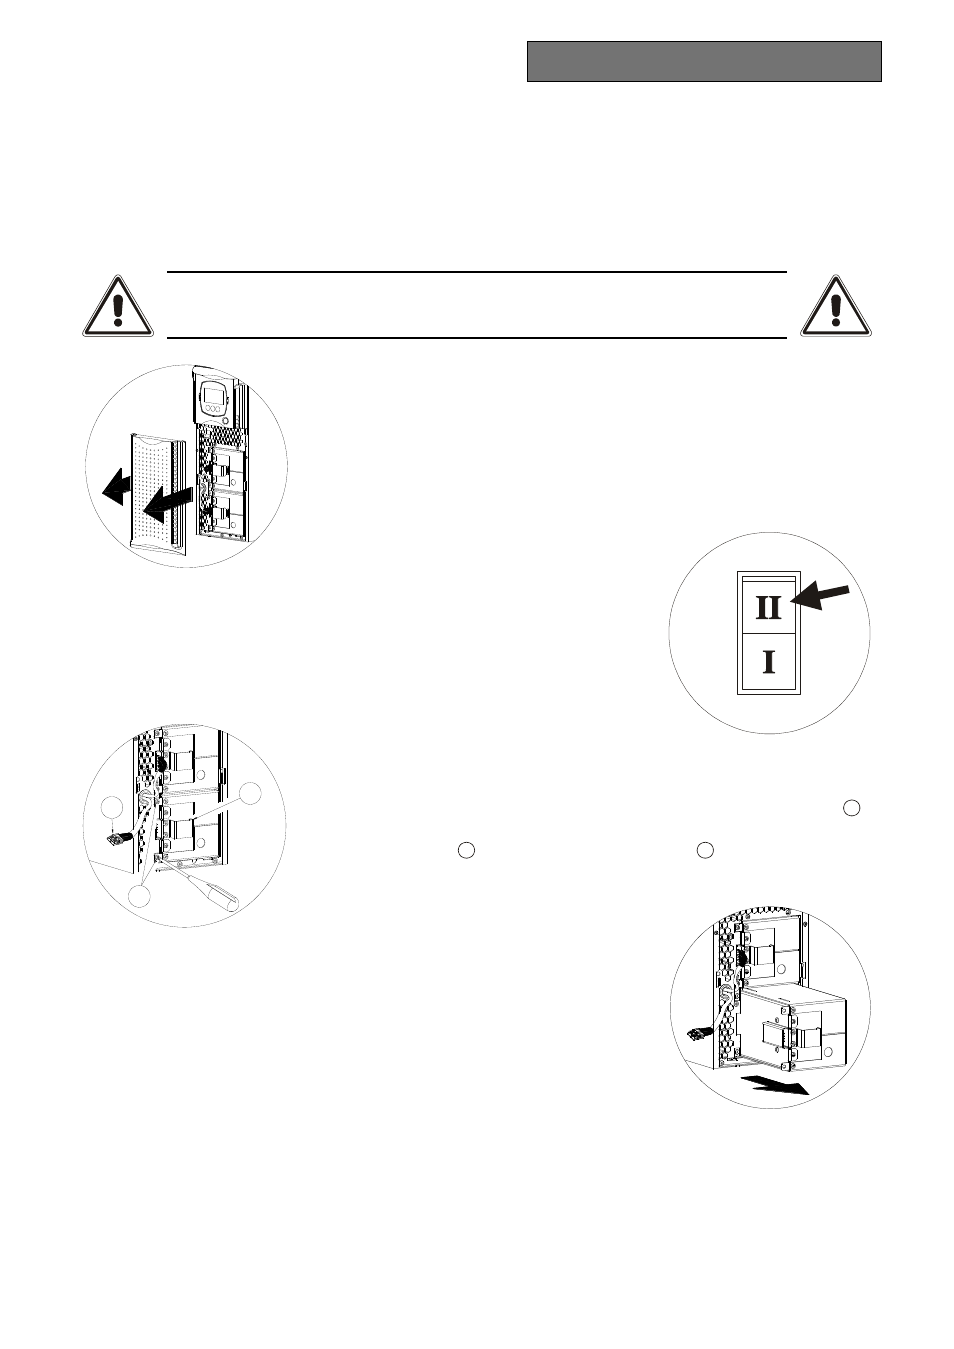
1. The battery packs are located behind the UPS front panel. Hold the
panel centrally from the sides and gently pull it outwards as shown in the
figure at the side. Do not force the panel fixing pins during this operation.
2. Set the manual bypass switch located under the front panel to position
“II” (see figure at side).
NOTE: in this condition the load is powered from bypass and the
display should show the message FAULT: C02.
WARNING: For correct operation of the UPS it is recommended to
replace the battery pack only with the UPS switched on.
3. The battery packs are connected to the UPS via cables with connector.
Referring to the figure shown at the side: take hold of the connector (
A
)
and remove it by gently pulling. Undo the two screws securing the battery
pack to the UPS (
B
) and take hold of the handle (
C
) for removal.
4. Holding the handle, remove the battery pack by pulling it outwards, as
shown in the figure at the side. Be very careful when extracting the
battery pack as it is extremely heavy.
WARNING: the new battery pack must have the same number and type
of batteries as the one it is replacing (see label on the battery pack near
the connector).
5. Insert the new battery pack in the compartment, secure it to the UPS with the screws removed previously
and reconnect the cable with connector. Replace the other battery pack by repeating the operations
described from point 3 onwards. Once the new battery packs have been secured and connected, return the
switch to position “I” and close the front panel. Check that the display has returned to normal.