The rear panel – RIGOL DM3068 User Manual
Page 52
RIGOL
DM3068 Quick Guide
8
The Rear Panel
Fuse
AC 250V T250mA
AC 250V T125mA
~Line(25VA Max)
AC 100-120V 45-440Hz
AC 200-240V 45-66Hz
SEL
115
230
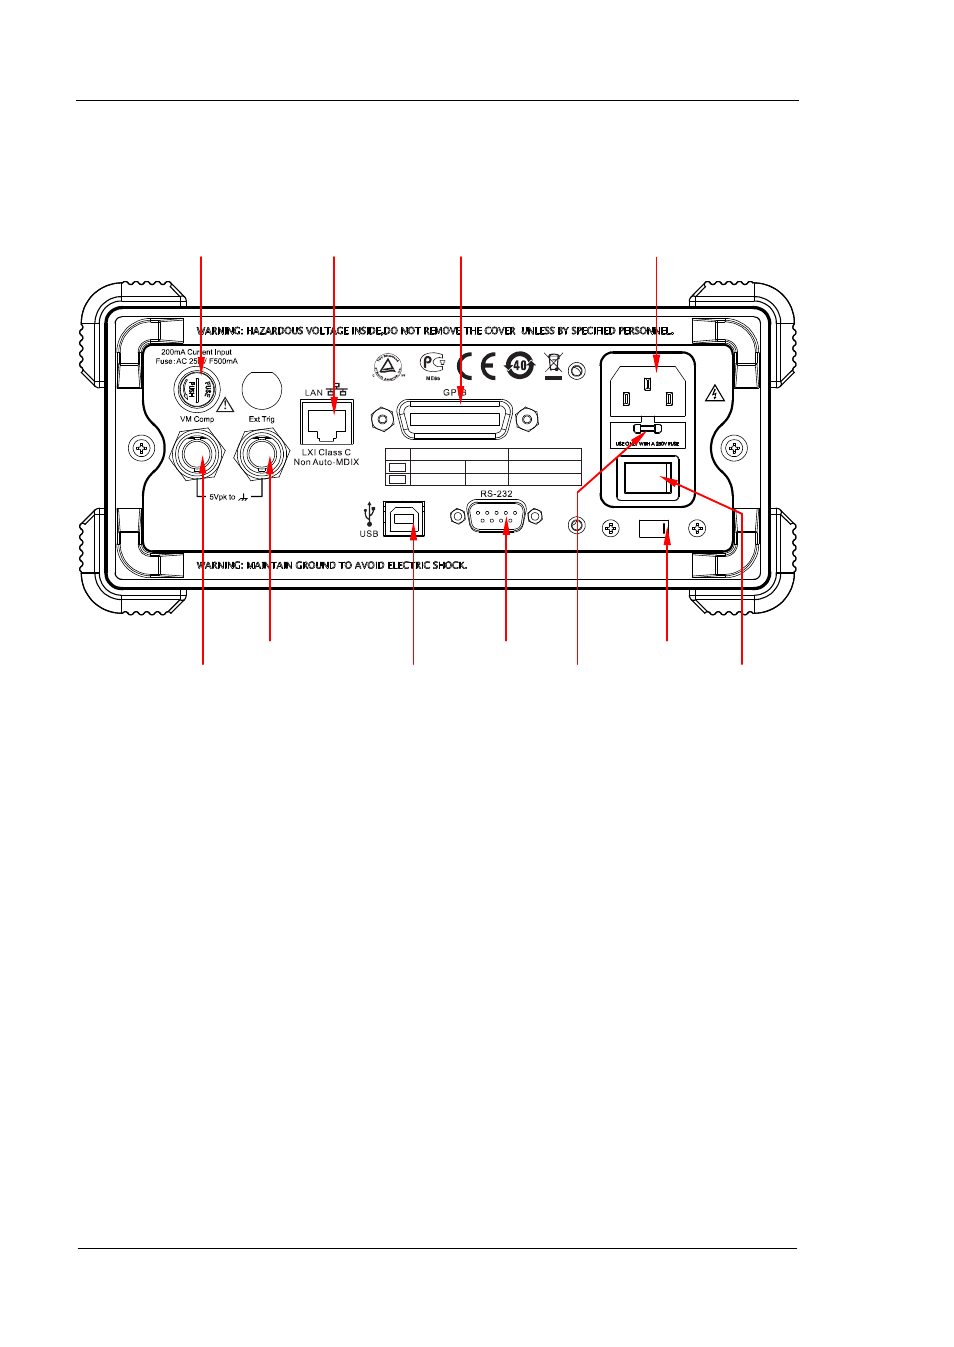
Figure 6 Rear Panel Overview
1. Curr Input Fuse
The multimeter uses two kinds of fuses for protecting high and low currents and
both fuses were already installed before leaving factory. The current into 10 A
cannot exceed 13.5 A, otherwise it will blow out the internal fuse; while the
current into LO Sense/200 mA terminal cannot exceed 650 mA, otherwise the
current fuse from the rear panel may be blown out. To replace the low current
fuse, please:
1) Cut off the power supply.
2) Pull out the fuse seat by turning a straight screwdriver counterclockwise as
shown in the figure.
3) Place a new specified fuse.
4) Reinstall the fuse seat into the slot.
NOTE: The high current fuse stands inside the multimeter and is not
allowed to be replaced by users themselves. If such work must be
done, send your multimeter back to the factory.
1.Curr Input Fuse 2. LAN Port 3.GPIB Port 4.Power Socket
6.Ext Trig Input 8.RS232 Port 10.Voltage Selector
5.VMC Output 7.USB Device Port 9.Power Fuse 11.Power Switch