Sharp PN-60TW3 User Manual
Page 15
15
E
Customizing the icons that appear in the classic menu and floating menu
These settings are shared by the classic menu and floating menu (horizontal and vertical).
The settings of the horizontal display of the floating menu are shared with the vertical display.
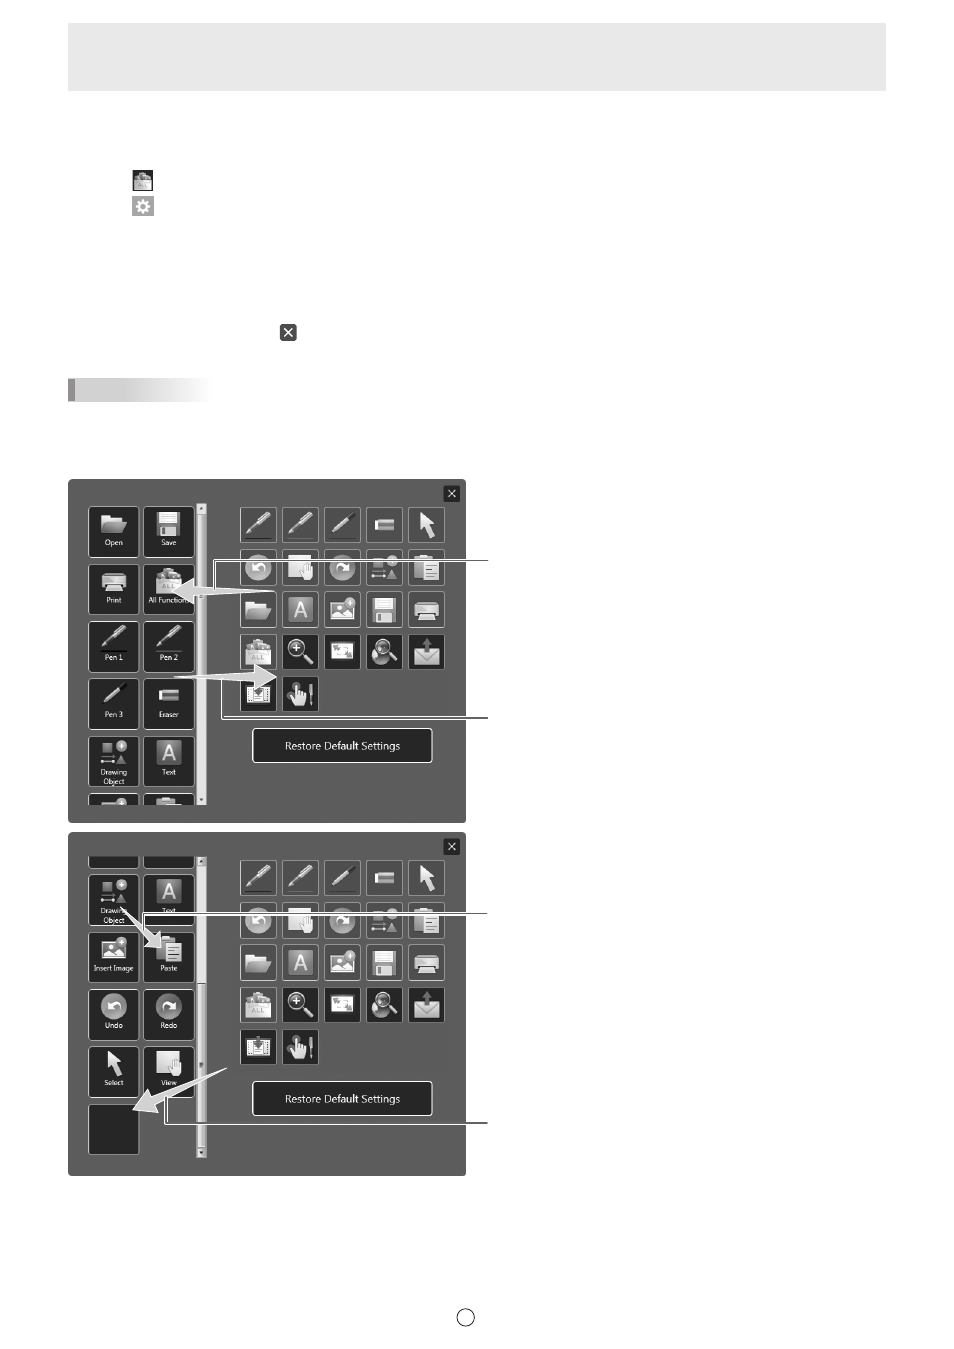
1. Touch
“All Functions” in the menu.
2. Touch
.
3. Drag the desired icon from the icon list at the right to the menu and insert it in the desired position.
• To add an icon to the bottom of the menu, drop the icon in the blank space.
• The same icon cannot be added more than once. Icons that have already been added are grayed out.
• An icon can be dragged between menu positions at the left and inserted.
• To remove an icon from the menu, drag the icon to the icon list.
4. To close the settings, touch or a point outside the settings menu.
TIPS
• At least one or more “Pen” icon should be displayed on the menu.
• Cannot remove “Eraser”, “Select” and “All Functions” icon from the menu.
• To return the menu display to the default state, touch “Restore Default Settings”.
Drag to add an icon
Drag to remove an icon
Drag and insert an icon
To add to the bottom, drag to the empty space