Mounting and positioning the natureview hd cam – Bushnell NatureView HD Essential Trail Camera (Green) User Manual
Page 26
26
MOUNTING AND POSITIONING
THE NatureView HD Cam
Mounting
After you’ve set up the camera’s parameters to your personal preferences
at home or in your truck, you’re ready to take it outside and slide the power
switch to “ON”. When setting up the NatureView HD Cam for scouting
wildlife or other outdoor applications, you must be sure to mount it in place
correctly and securely. We recommend mounting the NatureView HD Cam
on a sturdy tree with a diameter of about 6 in. (15cm). To get the optimal
picture quality, the tree should be about 16-17 ft. (5 meters) away from the
place to be monitored, with the camera placed at a height of 5-6.5 ft. (1.5~2
m). Also, keep in mind that you will get the best results at night when the
subject is within the ideal flash range, no farther than 60’ (19m) and no closer
than 10’ (3m) from the camera.
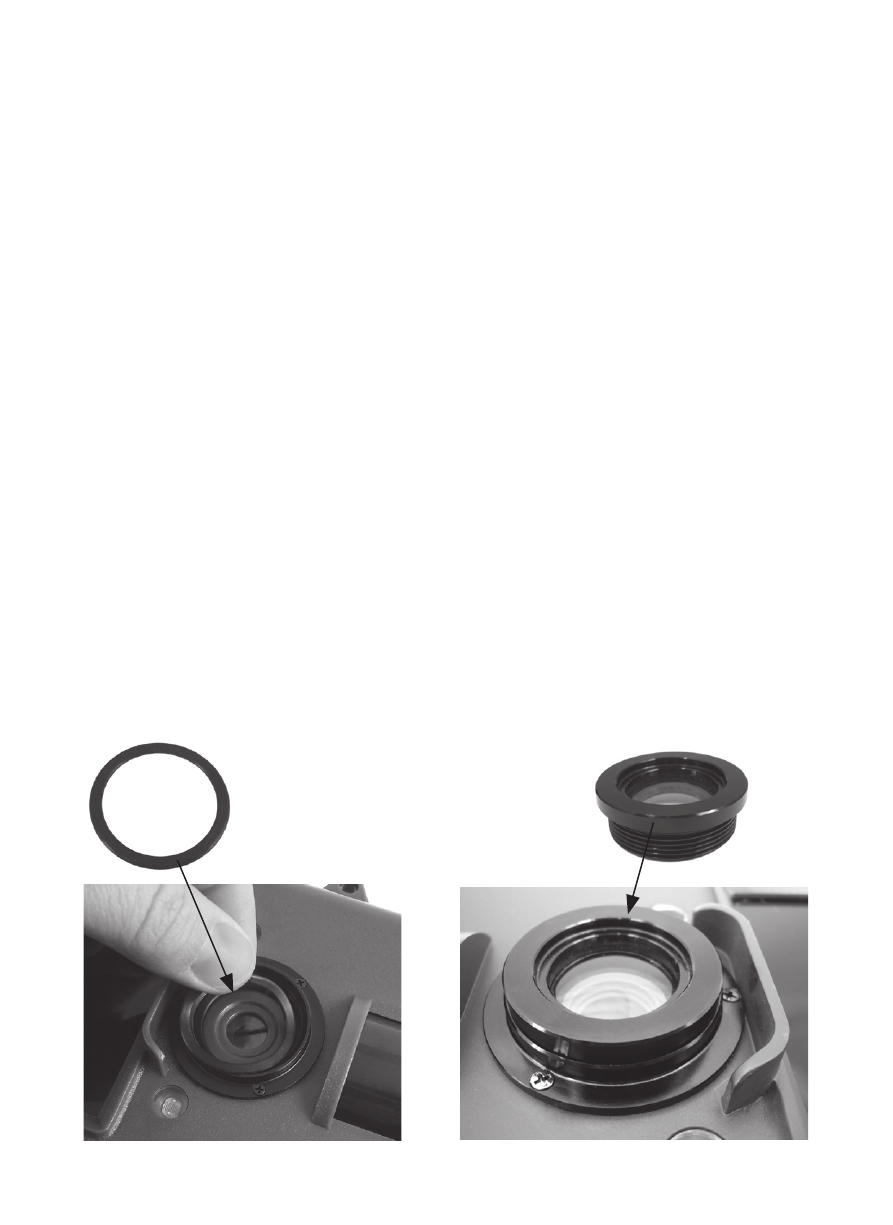
To capture close-up images at much shorter ranges, one of the included
close-up lenses may be attached to the primary lens
(see below)
. To avoid
the potential for moisture condensation inside the primary lens, drop one of
the provided "O-ring" rubber seals inside the lens shade before installing
the close-up lens. Then screw the close-up lens in place over the primary
lens (only one at a time may be installed). The close-up lenses change the
minimum focus distance to either 60cm (23.5") or 46cm (18").
1-Place rubber O-ring at
bottom of lens shade
2-Screw selected close-
up lens into lens shade
1
2